Disassembly – Clevo M860TU User Manual
Page 33
Disassembly
Removing the Hard Disk Drive 2 - 7
2.Disassembly
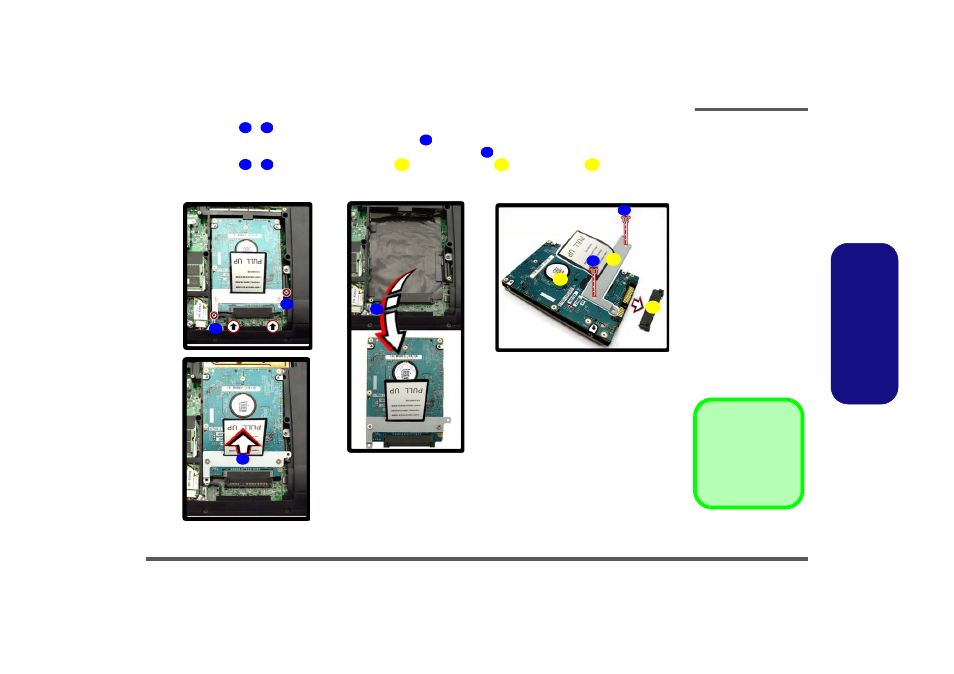
6. Remove screws
-
from the hard disk assembly.
7. Pull the hard disk assembly in the direction of the arrow
.
8. Carefully remove the hard disk assembly in the direction of the arrow
.
9. Remove screws
-
to separate the hard disk
from the bracket
and connector
.
10. Reverse the process to install a new hard disk(s).
11
12
13
14
15
16
17
18
19
13
15
16
14
c.
f.
d.
17
11
12
e.
18
19
Figure 3
HDD Assembly
Removal (cont’d)
c. Remove screws.
d. Pull the HDD module in
the direction of the arrow
e. Remove the HDD mod-
ule.
f. Remove the screws and
separate the bracket and
connector from the HDD.
17. HDD
18. HDD Bracket
19. HDD Connector
• 4 Screws