Processor installation procedure – Clevo M860TU User Manual
Page 38
Disassembly
2 - 12 Removing and Installing a Processor
2.Disassembly
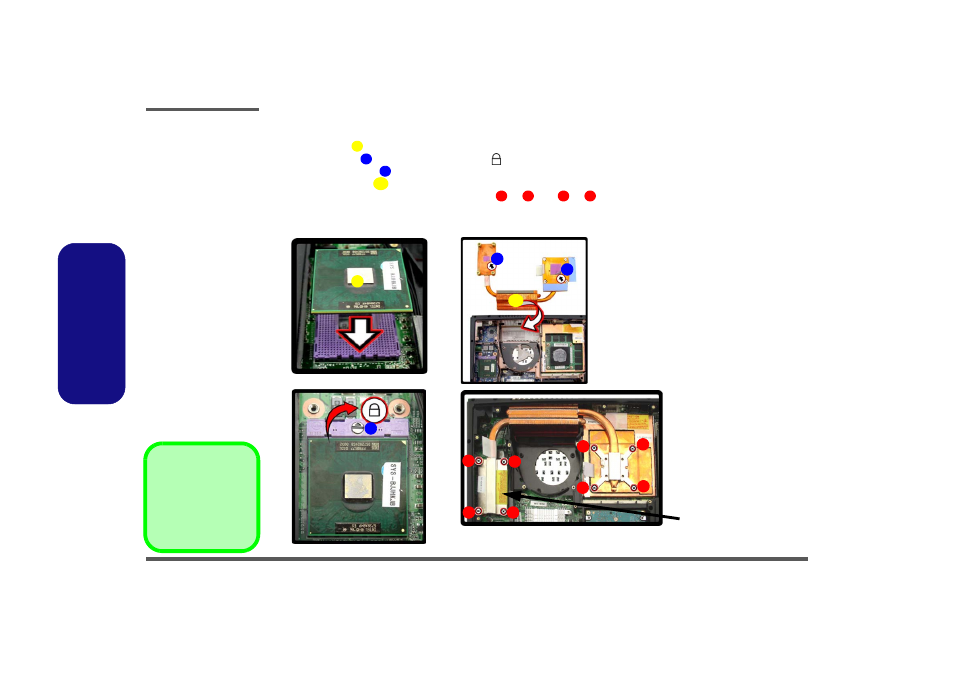
Processor Installation Procedure
1. Insert the CPU
, pay careful attention to the pin alignment, it will fit only one way (DO NOT FORCE IT!), and turn
the release latch
towards the lock symbol
(
Figure 8b
).
2. Remove the sticker
(
Figure 8c
) from the heat sink.
3. Insert the heat sink
as indicated in
Figure 8c
.
4. Tighten the CPU heat sink screws in the order
to
and
to
(the order as indicated on the label and
Fig-
ure 8d
).
5. Replace the component bay cover and tighten the screws (see
).
A
B
C
D
1
4
5
8
c.
b.
d.
B
A
a.
C
D
1
3
2
4
Note:
Tighten the screws in
the order as indicated
on the label.
C
5
6
8
7
Figure 8
Processor
Installation
a. Insert the CPU.
b. Turn the release latch to-
wards the lock symbol.
c. Remove the sticker from
the heat sink and insert
the heat sink.
d. Tighten the screws.
A. CPU
D. Heat Sink
• 8 Screws