4 removing and replacing the control panel, 1 removing the control panel, 2 replacing the control panel – SilentKnight 5499 9A Distributed Power Module User Manual
Page 34
5499 Distributed Power Module Installation Manual
30
151253
6.4
Removing and Replacing the Control Panel
This section provides instruction on how to remove and replace the control panel if it
is determined that the control panel needs to be repaired or replaced.
6.4.1
Removing the Control Panel
Follow these step to properly remove the control panel:
1. Remove the two heat sink screws. The heat sink screws are located on the top of
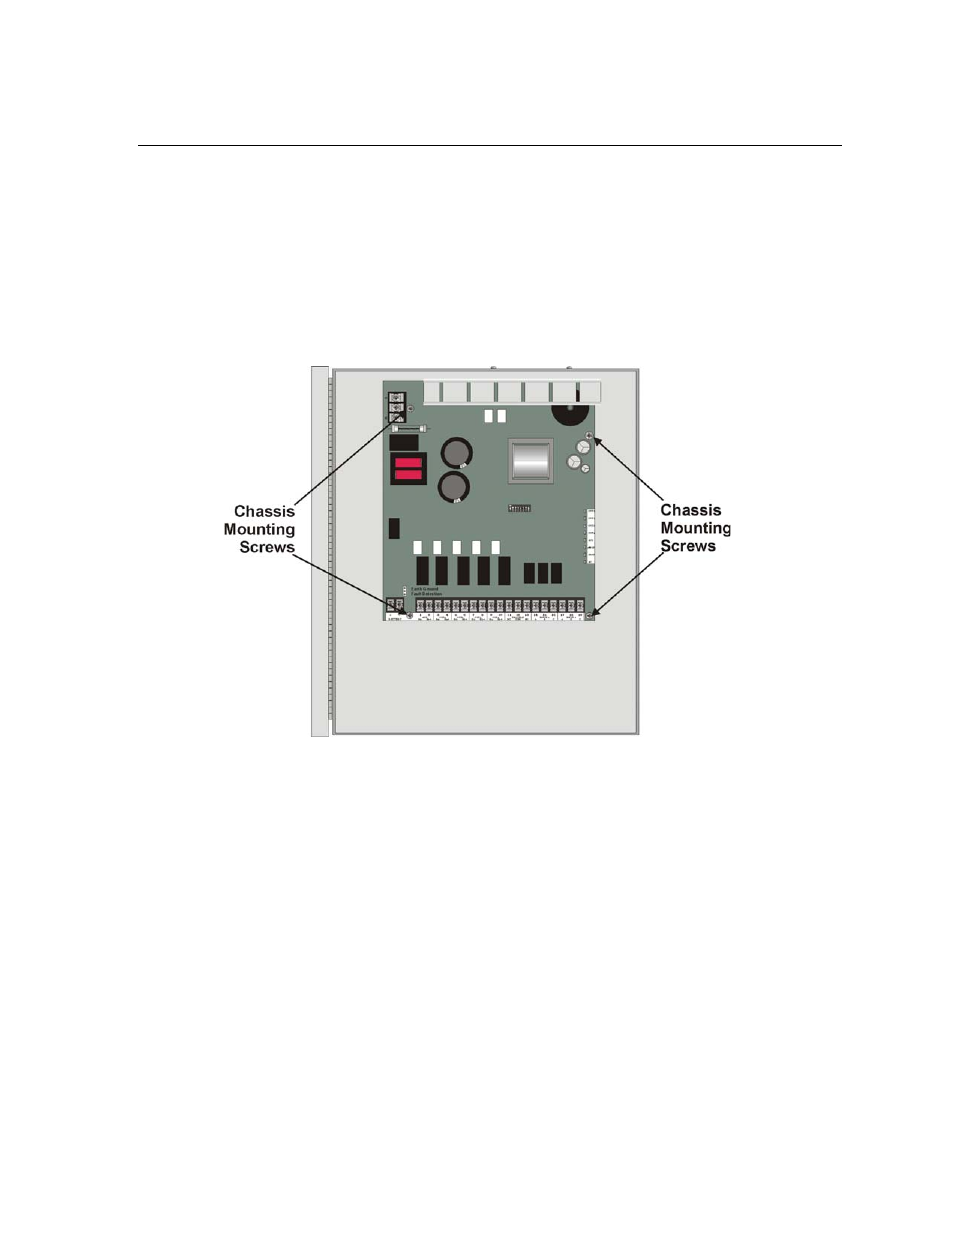
Figure 6-1 Mounting Screw Locations
2. Remove the four chassis mounting screws. See Figure 6-1 for chassis screw loca-
tions.
3. Carefully remove the control panel.
6.4.2
Replacing the Control Panel
Follow these steps to replace the control panel:
Note: Use a grounding strap when working with static sensitive components.
1. Align the control panel with the chassis mounting stand-offs. See Figure 6-1.
2. Insert the four chassis mounting screws (see Figure 6-1). Do not over tighten the
chassis mounting screws.
3. Insert the two heat sink screws (see Figure 6-1). Do not over tighten the heat sink
screws.
Note: The heat sink screws must be installed for proper heat dispersion of the power module’s power