Fan blades 7, Fan components 7, Fan guard 7 – Reznor B Parts Manuals User Manual
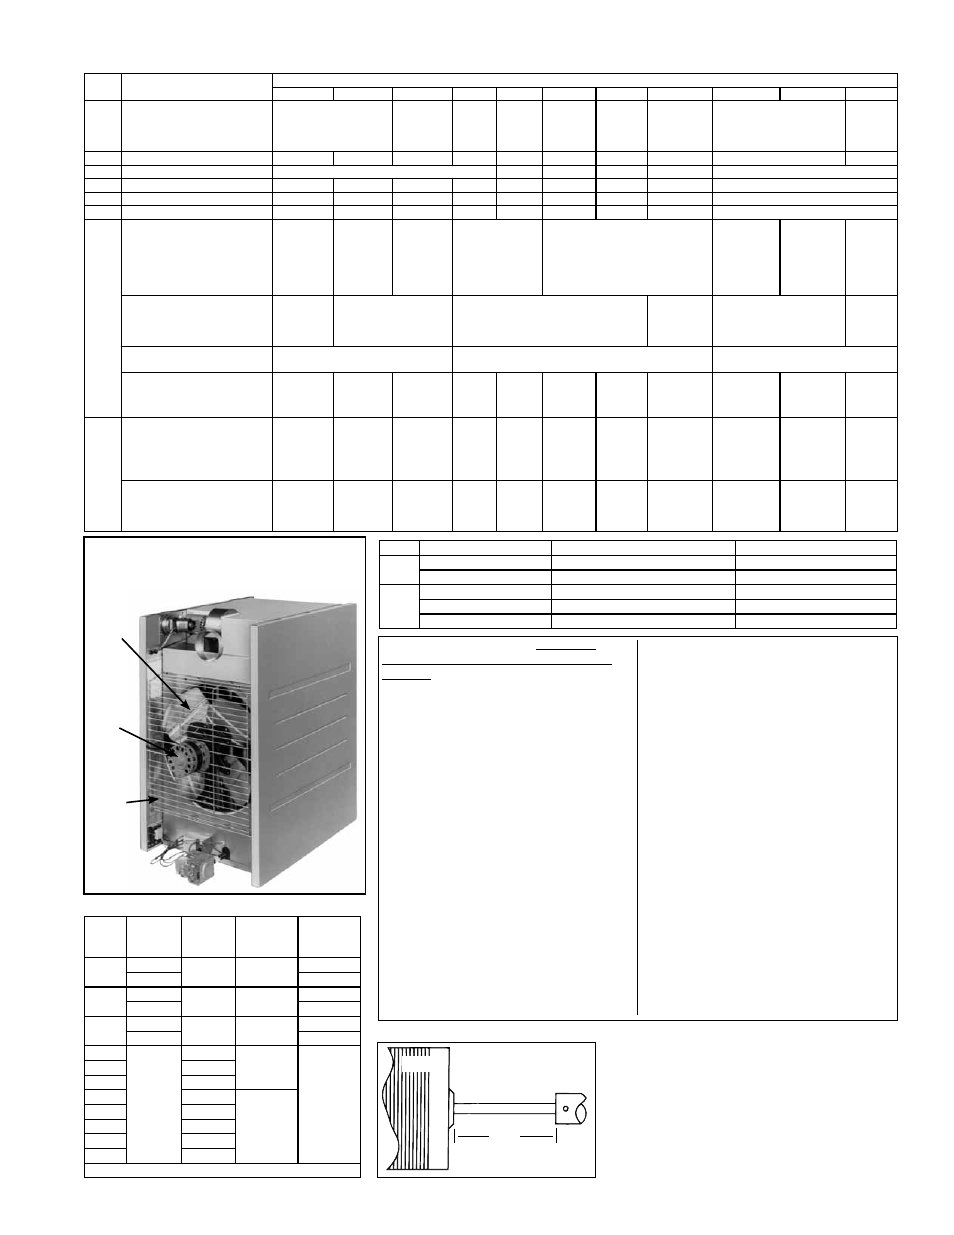
Page 7: Fan motor spacing 7, Fan motor 7, Fan components -- models f and fe, Model fe illustrating one-piece fan guard, Fan motor spacing
Form P-F/B (01-8-15), P/N 272436R5, Page 7
29
28
26A
Motor
Fan Hub
A
Model Date of Manufacture
Standard Fan Guard
Was available as an Option
F
4/88 - 10/90
Lower Half only
Upper Half
After 10/90
One-Piece Full Fan Guard
None
FE
4/88 - 10/89
Lower Half only
Upper Half
10/89 - 10/90
Both Upper and Lower Halves
None
After 10/90
One-Piece Full Fan Guard
None
Model FE illustrating one-piece
Fan Guard
Fan Components -- Models F and FE
Fan Motor Spacing
Code Description
Size
25
50
75
100
125
130
165
200
250
300
400
26A
Full Fan Guard
(See "Fan Guard
Replacement" below.)
110907
110908
110910 132363 110910
136209
(replaces
110911)
110912
176647
(replaces 131404 and
110914)
176648
(replaces
110915 &
131405)
26B Fan Guard Plate (2)
--
--
--
--
133977
--
133978
--
176151
176152
26C Fan Guard Hardware
(4) 96450 screws w/washers
--
(4)
96450
--
(4)
96450 (8) 113275, #10-32 1/2" lg hex head
26D Fan Guard Isolator Assy (4)
--
--
--
--
96451
--
96451
--
96451
26E Washer for Code 26D (4)
--
--
--
--
96452
--
96452
--
96452
27 Motor Adapter Plate
--
--
--
--
96452
--
96452
--
176523
28
Fan Motor, 115/1/60, Open
(
NOTE: Replacement
208/230/1/60 fan motor is no
longer available.)
96286
Universal
JA2C377N
96287
Universal
JA2N199N
96288
Universal
JA2R238N
95548
1/30HP, A. O.
Smith 326P139
95547
1/20HP
95546
1/6HP
A.O. Smith
F42A51A13
147913
1/4HP
A.O. Smith
F48H01A13
(replaces
95545)
156275
1/2HP
Fan Motor,
115/1/60, Enclosed
96286
Universal
JA2C377M
100992
Universal JA2S128N
102380
1/8HP A.O. Smith 322P986
102381
1/6HP
A.O. Smith
F48G56A13
137044
1/4HP, F48AE65A13
(replaces 115866)
--
Fan Motor, 230/1/50 Hertz
(Opt AK11) Model F only
112675
Universal JF2K010N
121277
A.O. Smith 92AC154
172794
Assy including motor P/N 155063
Fan Motor, .018HP, 115/1,
School Option (Opt AL2B) for
Model F50 only
--
174403
--
--
--
--
--
--
--
--
--
29
Fan Blades (For proper shaft
placement, see Fan Motor
Spacing Table below.)
132465
Revcor
01005-18
(replaces
96377)
129853
Revcor
011005-34
(replaces
96378)
96379
Revcor
G1203-30
41004
Lau
FP-
1437
131970
Revcor
T1603-
32
104692
Revcor
T1404-40
(replaces
48692)
96380
Revcor
G1603-
40
96381
Lau F10
H8.7 20-24
96382
Lau F10
H8.7 22-26
96383
Lau F10
H8.7 22-36
96384
Lau F-12
H8.7
24-36
Fan Blades, 5/16" bore, 10"
dia, 5 blades, 34o pitch,
School Option (Opt AL2B) for
Model F50 only
--
129853
--
--
--
--
--
--
--
--
--
Size
Electrical
Supply
Fan
Blade
P/N
Set Screw
Torque
In-Lbs
"A" Hub
to Motor
Spacing
25
60 Hz
132465
80 ±10
1-1/4"
50 Hz*
3-1/4"
50
60 Hz
129853
80 ±10
3/8"
50 Hz*
3-1/4"
75
60 Hz
96379
80 ±10
1/8"
50 Hz*
3-1/4"
100
50*
or
60 Hz
41004
120 ±10
2-1/2"
125
131970
130
104692
165
96380
150 ±10
200
96381
250
96382
300
96383
400
96384
*Only gravity-vented F models are available with 50 Hz.
Fan Guard Replacement - The upper
and lower fan guard halves are no longer
available. If adding an "upper half" or
replacing a fan guard, it is necessary to install
the full fan guard (Code 26A). To make this
replacement, follow these instructions.
1. If the heater is installed, turn off the gas
and disconnect the electric power.
2. Remove the left outer side panel
(left when facing the rear of the unit).
Disconnect the fan motor wires.
3. If present, remove the tension-mounted
upper half fan guard.
4. Remove the four screws for attaching
the fan guard. Remove the lower half fan
guard, the motor, and the fan blade.
5. Assemble the new full fan guard, the
motor and the fan blade. To Assure proper
grounding of the motor, it is important that
the same hardware be used for attaching
the motor to the fan guard as was used
with the original guard.
Check fan blade position on the shaft; see
illustration below and Table left.
Position the assembly on the heater.
Attach the fan guard at the center mounts
using the screws that held the old fan
guard. (It is important that you use these
specially designed screws because they
will cut through the coating on the fan
guard to provide a ground for the fan
motor.)
Rotate the fan blade to check for
adequate clearance. If adjustment is
required, loosen the mounting screws,
re-position the fan guard, and tighten the
screws. Rotate the fan blade and re-check
for adequate clearance. Repeat this
procedure until the assembly is positioned
properly.
6. Drill the required upper and lower
mounting holes. Attach the new fan guard
at all upper and lower mounting points
using field-supplied sheetmetal screws.
7. Reconnect the fan motor wires and
replace the outer side panel.
8. Restore power to the heater and turn on
the gas. Light, following the instructions
on the lighting instruction plate. Check for
proper operation.