Printhead replacement procedure – MF Digital Spectrum 2 Thermal User Manual
Page 38
Spectrum2 Printer Operator’s Guide
Document Revision: 102803
37
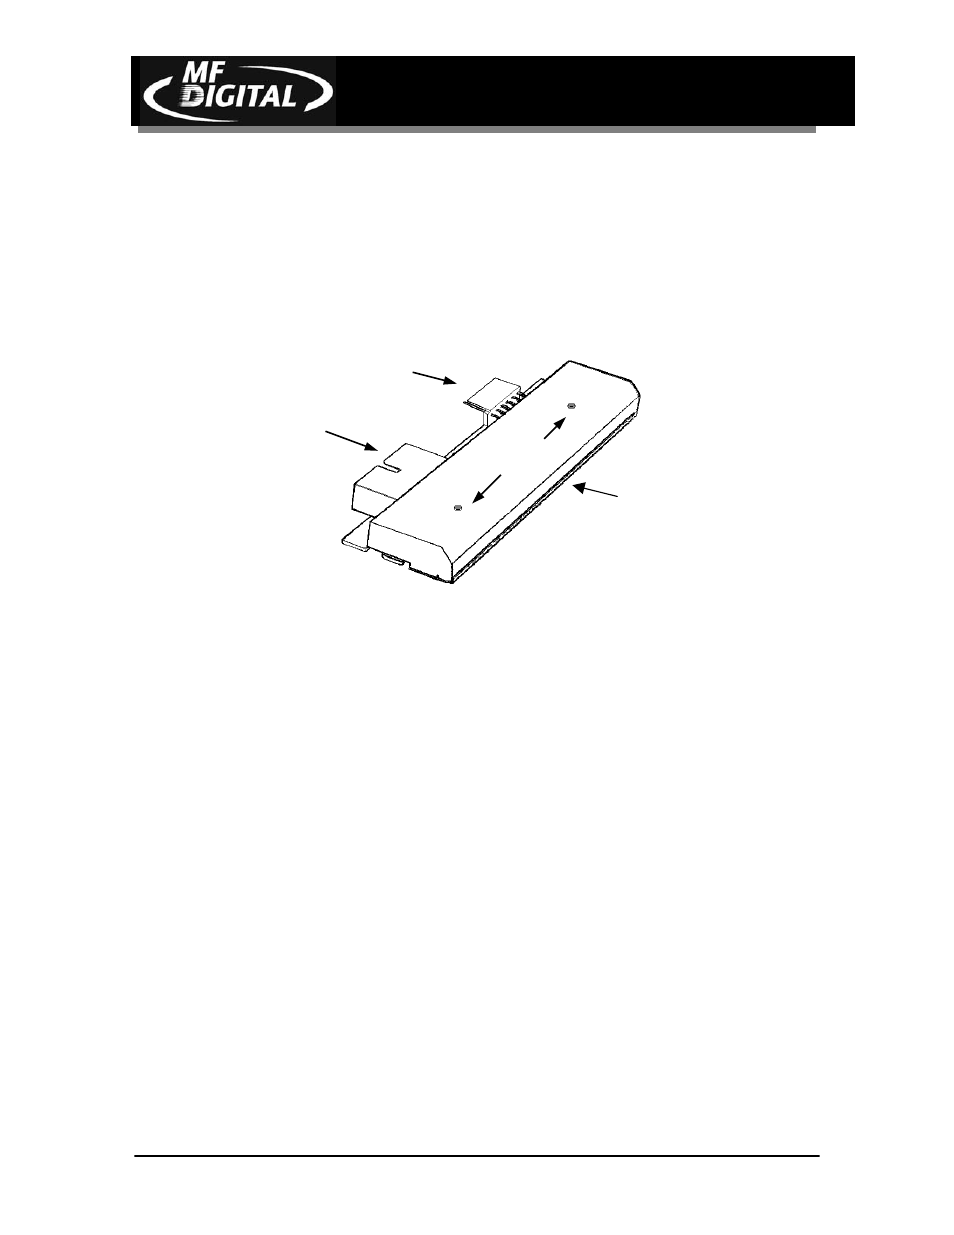
Important: The printhead's power connection has three black ground wires. The ground
wires must be connected to the pins of the power connector closest to the center of the
print head.
Printhead Replacement Procedure
Figure 14: The printhead's printing element is fragile, avoid touching the printing element
To replace printhead, you will need the following tools:
• Phillips-head screwdriver
Important:
Always turn power off and unplug printer prior to removing print head.
Important:
The printhead is fragile. Avoid touching the printing element and always
store the printhead on a soft area such as a clean paper towel
Wait until all printing has finished, and remove any CD still on the Tray.
• Power off and unplug printer
• Remove the top cover, remove ribbon, and set aside.
• Printhead is held by two Philips head screws
• Look down top of chassis to locate Philips head screws
• Use screw driver to loosen screw (note: screws are captive and will not fall out)
• Open Chassis (pull chassis knob out, and lift chassis)
• Printhead will hang from two cable connectors
Printing element
Print Control
Power Connection
Securing Screw
Holes