General information on recording, Recording from a cd, Tape decks – Philips FW620C User Manual
Page 15: П п о, Turn, Time of, Tape side-eiapsed time of current track
Attention! The text in this document has been recognized automatically. To view the original document, you can use the "Original mode".
TAPE DECKS '«■
[General information on recording
Recording is permissible insofar as copyright or other rights of third
parties are not infringed.
At the very beginning and end of the tape, no recording will take
place during the first seven seconds when the leader tape passes
the recorder heads.
■
When a recording is active, most functions are disabled.
RECDRIIfJG RCTB'E will appear on the display when a wrong
button is pressed.
■
In general, the recording level is set automatically.
The recording is not affected by the controls VOLUME, DBB, POP,
ROCK, CLASSIC, JAZZ and OPTIMAL-USER.
1
2
fMNT
• Mtm
П О Р Ч
П П о
и и и
8 Start the recording by pressing CD ►TAPE
-►The display shows CDPy.
With a delay of seven seconds
(leader tape of the tape),
playing of the CD or program
starts automatically.
At the end of the first side,
recording stops somewhere within the running track.
-►When ZD is selected, the tape direction is reversed and
recording continues with the beginning of the incompletely
recorded track.
-►Recording will stop when it's finished according to the chosen
play mode or when the CD player reaches the end of the CD or
the program.
Pressa
(orSTOP!
at an earlier stage.
on the remote control) to stop the recording
v>
"OJ
c
Ш
Protecting tapes against accidental erasure
• Keep the tape side to be
safeguarded in front of you and
break out the left tab.
Now, recording on this side is no
longer possible.
• To record on this tape side again,
cover the hole with a piece of
adhesive tape.
EDIT CD - automatic CD track selection by
specifying the tape length_____________________
To prevent that at the end of the tape the recording is interrupted
somewhere within a track, you can use the EDIT CD feature.
However, it can only be used for CDs with a maximum of 30 tracks.
The unit automatically selects the total number of tracks that will
fit onto each tape side.
The original order of tracks will not be changed.
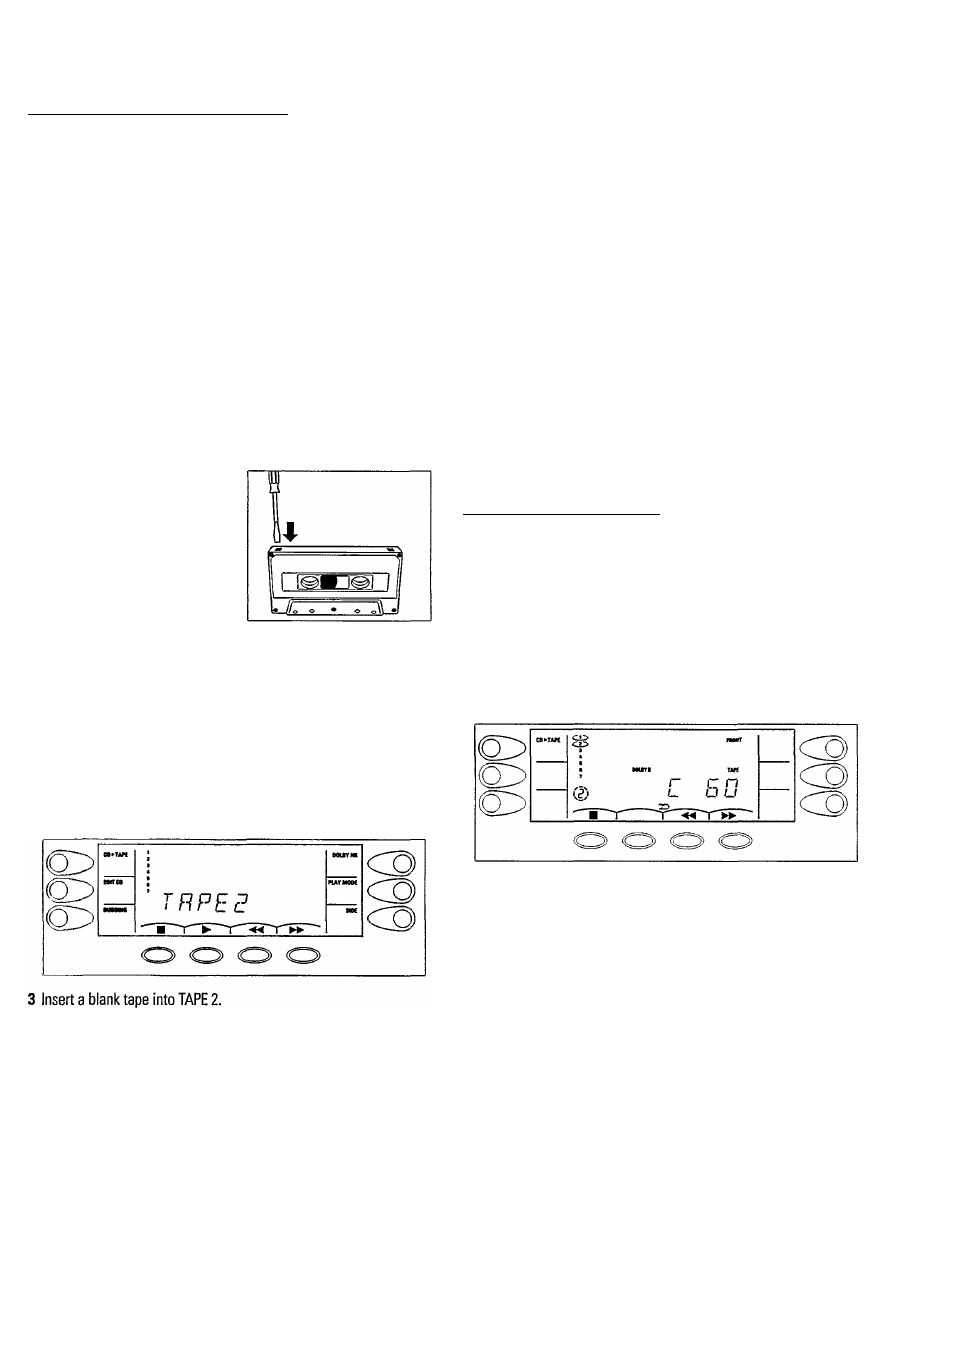
Recording from a CD
1 Insert a CD and, if desired, program track numbers.
2 Press TAPE 2 on the unit or on the remote control.
-► The available display button functions light up:
4 Select the tape side by pressing SIDE; FRONT or BACK.
5 Select the play mode by pressing PLAY MODE until the desired
indicator lights up;Z or ZD.
6 If desired, switch on the Dolby NR system by pressing DOLBY NR.
7 If you want to make a "EDIT CD recording", follow from here the
instructions for EDIT CD.
1 Press EDIT CD.
-► 5CI.GCT TRPE LENGTH and C5u appear on the display.
2 Press-« or^^ until the desired tape length appears on the
display (on the remote control use the buttons M orM.
-►The display shows in turn:
rcn_ron_^r inn_J- On_^rDn_J“UC_*<“Crn_^
3 Start the recording by pressing CD ►TAPE.
-► With a delay of seven seconds (leader tape of the tape),
playing of the CD or program starts automatically.
-►Recording will stop when it's finished according to the chosen
play mode or when the CD player reaches the end of the CD or
the program.
• Press ■ (or STOP!
at an earlier stage.
on the remote control) to stop the recording
• You can change the type of the CD time information, by repeatedly
pressing DISPLAY MODE on the unit:
-► The display shows in
turn:
remaining
time
of
current
track
-
remaining
TIME OF
current
TAPE SIDE-EIAPSED TIME OF CURRENT TRACK-...
15