Build the tail surfaces building instructions – Great Planes RV-4 Park Flyer Kit - GPMA0010 User Manual
Page 9
❏
1. Unroll the plan sheets. Re-roll them inside-out so they
will lie flat. Place the fin/rudder portion of the fuse plan over
your flat building board, then cover it with Great Planes Plan
Protector or wax paper so glue will not adhere to the plan.
Note: The bottom of the fin is difficult to see on the fuselage
plan. A separate drawing of the fin is located on the wing
plan and may be more useful for building the fin.
❏
2. Find the four hardest 1/8" x 1/4" x 24" [3.2 x 6.4 x 610mm]
balsa sticks and set them aside for use as the wing spars.
❏
3. Build the fin and rudder framework from two 1/8" x
1/4" x 24" [3.2 x 6.4 x 610mm] balsa sticks. Hint: Start with
the longest pieces first. If you accidentally cut one piece too
short, use it for a shorter piece somewhere else, thus
minimizing wasted material.
❏
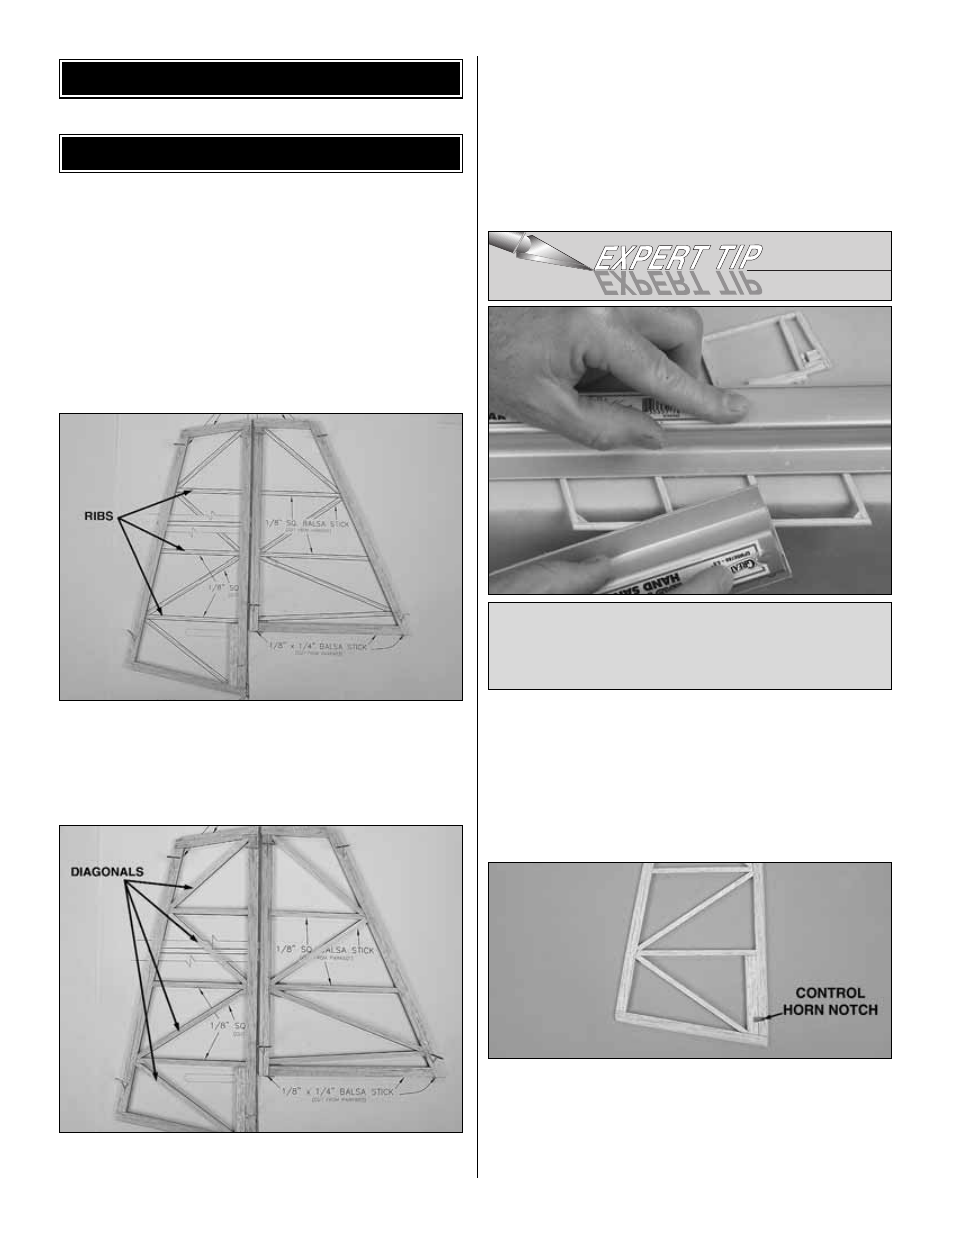
4. Add the fin and rudder ribs and diagonal braces
from two 1/8" x 1/8" x 24" [3.2 x 3.2 x 610mm] balsa sticks.
❏
5. Remove the fin and rudder from the plan. Use a bar
sander with 150-grit sandpaper to carefully sand both sides
of the fin and rudder flat and even. Round the corners as
shown on the plan. Refer to the Expert Tip that follows, then
round the leading edge, top of the fin, trailing edge and top
of the rudder.
❏
6. Sand a bevel on the leading edge of the rudder as
shown in the cross-section on the plan.
❏
7. Use a #11 blade to cut the notch in the rudder where
shown on the plan for the laser-cut 1/16" [1.6mm] plywood
control horn. The control horn will be installed into the
notch on the right side of the rudder, but do not glue it into
place until the pushrods are installed during
“Hook Up the
Controls.” The rudder control horn has an “R” printed on it.
To round the edges of the tail pieces, place one of them
on your workbench so the edge you are rounding extends
just beyond the edge of the bench. Use a bar sander to
hold it down. Use another bar sander to do the sanding.
BUILD THE TAIL SURFACES
BUILDING INSTRUCTIONS
9