Mount the canopy, cowl & wheel pants – Great Planes RV-4 Park Flyer Kit - GPMA0010 User Manual
Page 30
❏
4. Connect the motor to the speed control. Guide the
speed control and wiring through the hole in F1. Mount the
gearbox to F1 with screws supplied with the gearbox.
Note: If you are installing a speed 400 size motor you will
need to enlarge the hole in F1 slightly. This can be easily
done with a rotary tool and a sanding drum.
❏
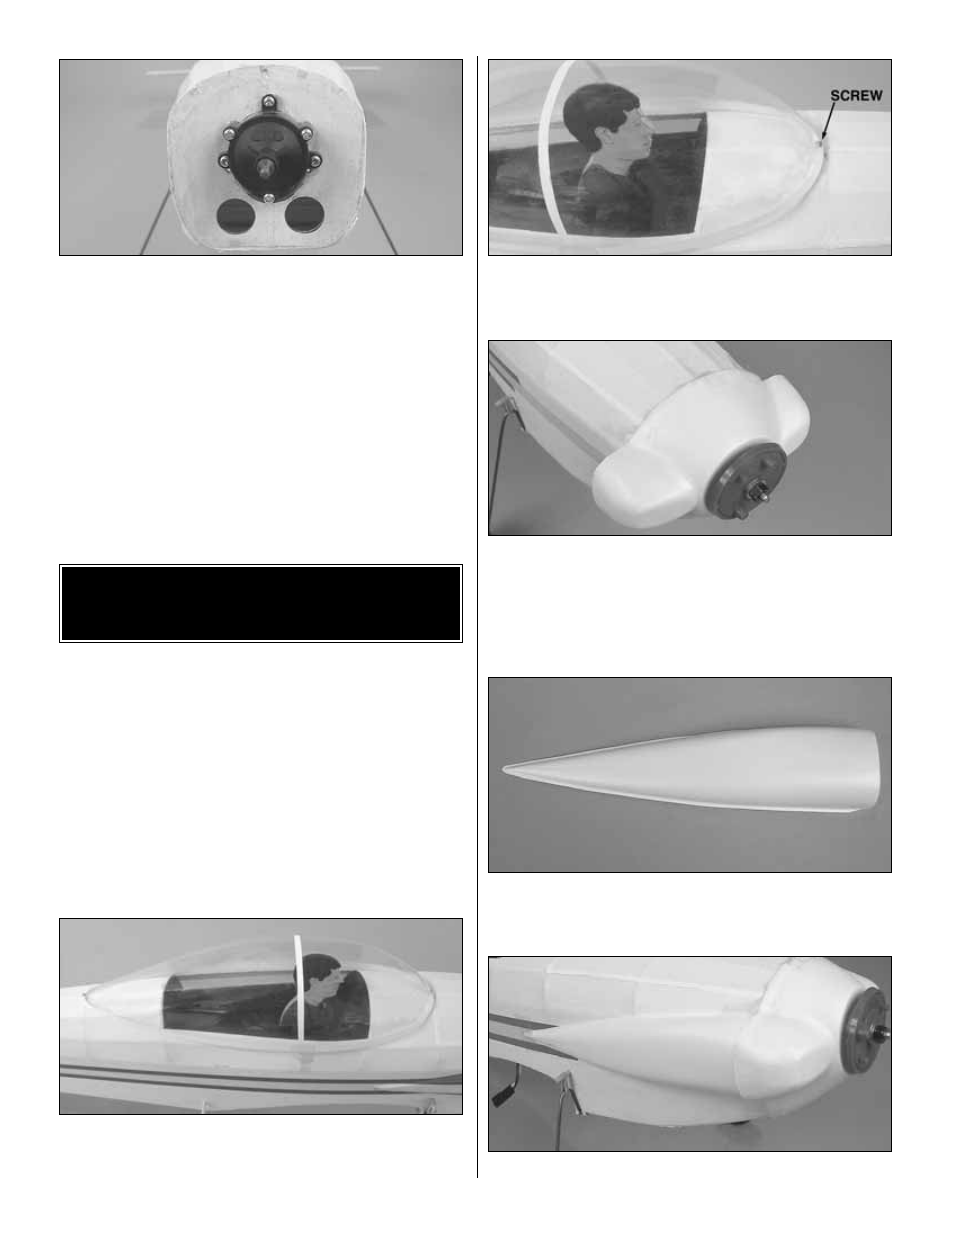
1. Paint the cockpit area to suit your color scheme. We
used black, water-based paint.
2. Trim the pilot outlines from the fuselage plan and glue
them to a flat piece of foam, such as from a foam dinner
plate. Trim the assembly and paint the pilot as desired.
Mount the pilot to the cockpit floor with clear tape.
❏
3. Trim the canopy to fit the cockpit area. We trimmed
ours even with the bottom edge of the canopy as close to
the base as possible, but you may want to leave a small lip
around the base.
❏
4. Mount the canopy to the fuselage. This can be done by
taping the canopy to the fuselage with clear tape or by using
the supplied #2 x 3/8" [9.6mm] screws.
❏
5. On our model, we used a screw at the front and rear
of the canopy and tape on the sides.
❏
6. Cut the cowl from its plastic sheet as close to the base
as possible. Fit the cowl to the front of the fuselage. Mount
the prop adapter and the spinner back plate to the gearbox
output shaft. Position the cowl so it is centered on the
spinner back plate and tape it into place on the fuselage.
❏
7. Cut the cowl cheeks from their plastic sheet, leaving a
small lip at the edges.
❏
8. Fit the cowl cheeks to the model and tape them into place.
MOUNT THE CANOPY, COWL &
WHEEL PANTS
30