Great Planes RV-4 Park Flyer Kit - GPMA0010 User Manual
Page 17
❏
2. Use thin CA to glue the die-cut 1/16" [1.6mm] left and
right fuselage top deck pieces together. Hold the pieces
together tightly while applying CA glue to the joint a couple
of inches at a time, wiping excess CA from the joint before
it hardens. Lightly sand the top deck smooth.
❏
3. Use a straightedge and a hobby knife to trim the front
edge of one of the die-cut 1/16" [1.6mm] balsa fuselage
sides along the cut line. Mark the inside of that fuse side
with an “R,” designating it as the right side. Note: The cut
line is not straight and angles about halfway down the side.
❏
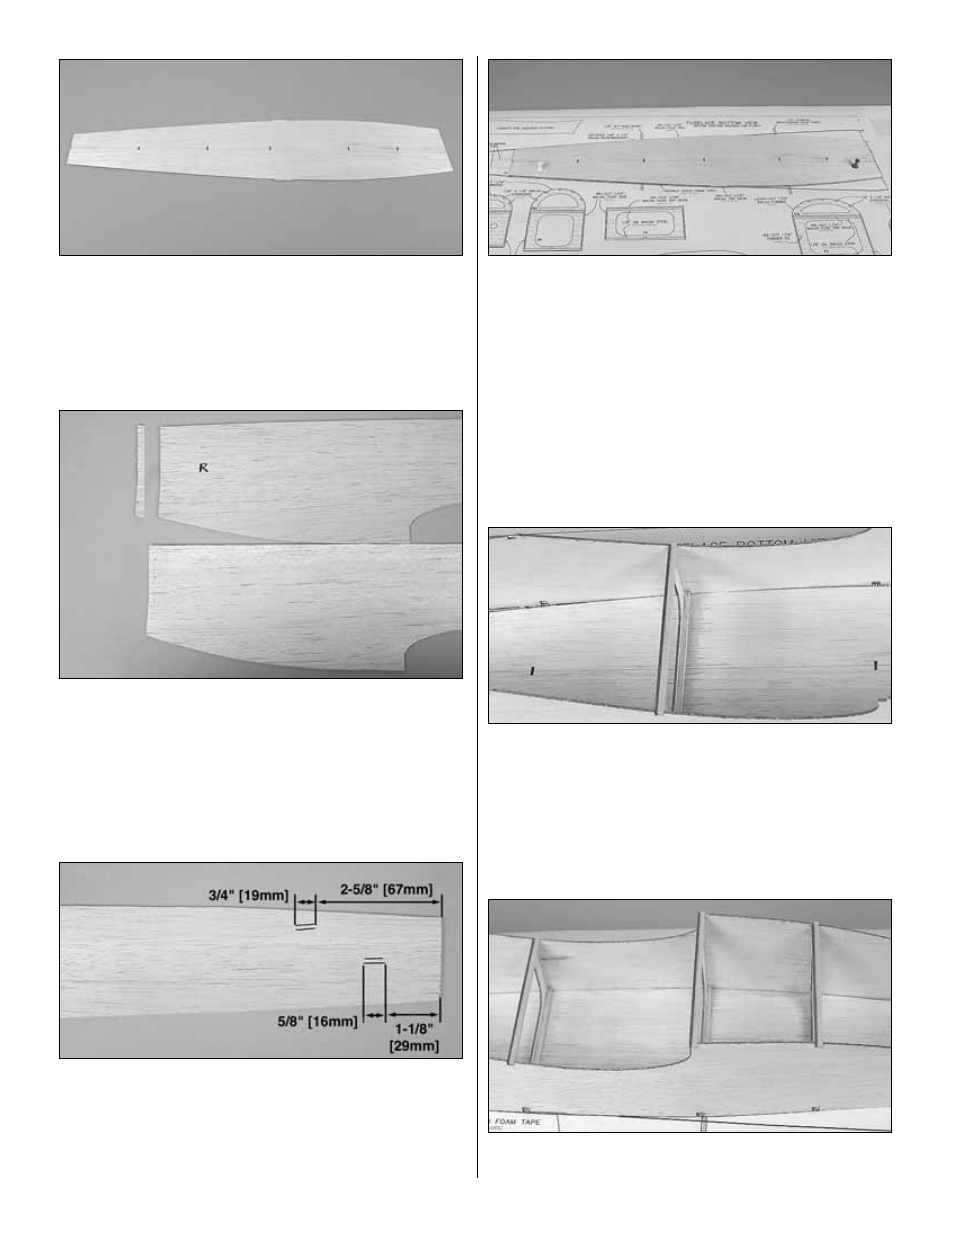
4. There are die-cut markings for the pushrod exit slots
on the rear of the fuselage sides. Cut out the lower rear slot
on the right fuselage side. Cut out the upper forward slot
on the other fuselage side, which now becomes the left
side. Note: The marked slots can be difficult to see. Cut the
slots according to the dimensions shown in the above photo.
❏
5. Cover the bottom view of the fuse plan with Plan
Protector or wax paper. Pin the die-cut 1/16" [1.6mm] balsa
fuselage top deck over the bottom view of the fuselage plan.
Important: The front of the top deck should be aligned with
the rear of F1. The fuselage sides will extend 1/16" [1.6mm]
forward of the top deck.
❏
6. Fit former F4 and the fuse sides to the fuse top. When
satisfied with the fit, glue F4 to the fuse top and sides. Note:
Make certain the right fuse side is on the right, and the left
fuse side is on the left (Remember, you are building the
fuselage upside-down.)
❏
7. Working forward one former at a time, glue formers F3
and F2 to the fuse top and sides.
17