Final assembly – Great Planes RV-4 Park Flyer Kit - GPMA0010 User Manual
Page 27
❏
2. Note the wrinkles in the covering while holding the
wing. Have an assistant heat the covering on the top and the
bottom until the wrinkles disappear. Allow the covering to
fully cool before letting go.
❏
3. Add washout to the left wing panel the same way.
❏
4. Check the wing periodically to be sure the washout
remains. Twist and shrink the covering as necessary to
retain the washout.
❏
1. Mount the wing to the fuse with two #64 rubber bands
(when it’s time to fly the RV-4 Park Flyer, use four #64
rubber bands). Trim the front edge of the aft fuse bottom
sheeting and cut notches in former F5 to accommodate the
aileron torque rods. If you have to cut much of the former,
use a leftover 1/8" x 1/8" [3.2 x 3.2mm] balsa stick to cut and
glue a reinforcing piece behind F5.
❏
2. Use a small pin to poke several holes through the
covering in the top and bottom of the stab where it will be
glued to the fuselage. These holes will absorb the CA that
will be used to glue the fin to the stab and will make for a
stronger glue joint.
❏
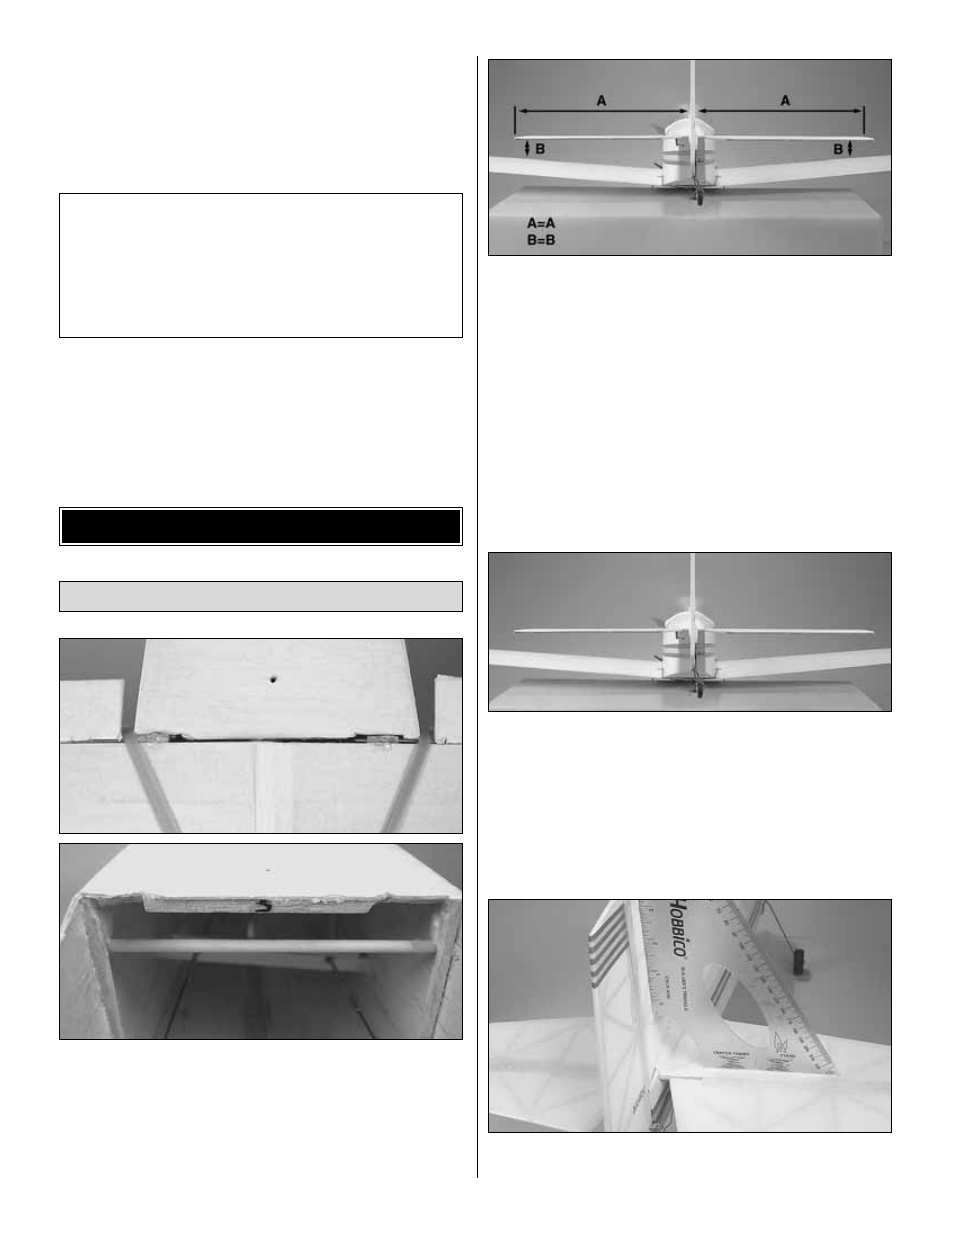
3. Place the stab in the fuse, making sure it is centered
as shown in “A” = “A” in the photo above. Hint: If the
covering on the stab is transparent, align the sticks on both
sides of the center stick with the fuse.
❏
4. View the model from the rear and see if the stab is level
with the wing as shown in “B” = “B.” If the stab is not level
with the wing, carefully sand the “high side” of the fuse until
you can get the stab to align.
❏
5. Use a string or tape measure to align the stab. Put a
pin in the center of the top of former F1. Tie a loop in one
end of the string and place it over the pin. Put some tape
over the string with a mark on it. Swing the string from side
to side and adjust the stab as required until the stab is
aligned properly.
❏
6. When satisfied with the alignment, glue the stab in
place with thin CA.
❏
7. Insert the vertical fin in the fuselage. Use a builders
square to get the fin perpendicular to the stab. Make sure
Join the Tail Surfaces
FINAL ASSEMBLY
Note: For a small, lightweight model such as the RV-4
Park Flyer, it is not critical to get exactly 1/8” [3.3mm] of
washout. However, it is important that
some washout be
present in both wing tips. Do your best to achieve the
washout recommended, but don’t spend hours trying to
do so. A slight variance in both wing tips is acceptable, as
long as neither of the wing tips have any “wash-in.”
27