Great Planes RV-4 Park Flyer Kit - GPMA0010 User Manual
Page 18
❏
8. Working aft one former at a time, glue formers F5, F6
and F7 to the fuse top and sides. Glue the fuse sides to the
fuse top.
❏
9. Glue former F8 into position between the fuselage sides.
❏
10. Glue the laser-cut 1/16" [1.6mm] ply landing gear mount
to the fuselage where shown on the side view of the plan.
❏
11. Use a sheet of 1/32" x 3" x 15" [0.8 x 76 x 380mm]
balsa to sheet the bottom rear of the fuselage. Start at
former F5 and cut and glue only the first two pieces. The
remainder of the sheeting will be installed after the servos
are installed.
❏
12. Remove the fuselage from the plan. Reinforce any
glue joints that look weak. Lightly sand the fuselage smooth.
❏
13. Cut two 1" [25.4mm] pieces from a leftover 1/8" x 1/4"
[3.2 x 6.4mm] balsa stick. Glue a piece to each side of the
fuselage on top of the ply landing gear mount.
❏
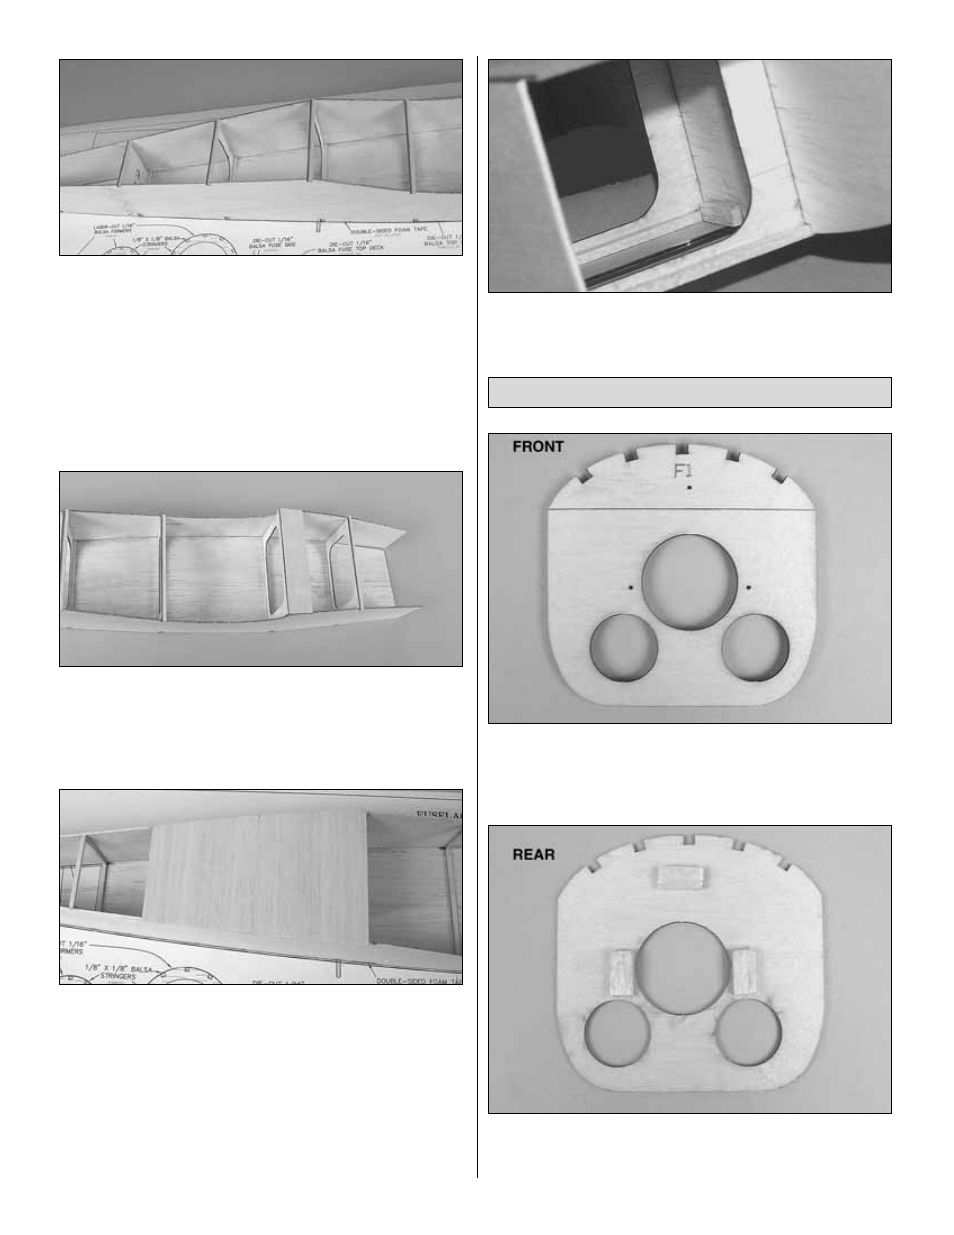
1. Locate the laser-cut 1/16" [1.6mm] ply former F1.
Draw a line across the top of the former on the front, as
shown in the photo. Note that the hole for the gearbox is
offset to the right as seen in the above photo.
❏
2. Cut three 1/2" [13mm] pieces from a leftover 1/8" x 1/4"
[3.2 x 6.4mm] balsa stick. Glue a piece over each of the screw
holes on the rear of F1. Position them as shown in the photo.
Finish the Fuselage
18