Preflight – Great Planes RV-4 Park Flyer Kit - GPMA0010 User Manual
Page 34
❏
3. Operate the servos by moving the control sticks. Check
that the servos respond in the correct direction as shown in
the diagram. If necessary, use the servo reversing function
in your transmitter to get the controls to respond correctly.
❏
4. Now that the servos and the servo arms are centered,
center the rudder and elevator by adjusting the position of
the forward wire pushrod ends inside the pushrod tubes.
Permanently glue the pushrod ends in the pushrod tubes
with thin CA. Carefully bend the aileron torque rods or the
pushrods until both ailerons are centered.
❏
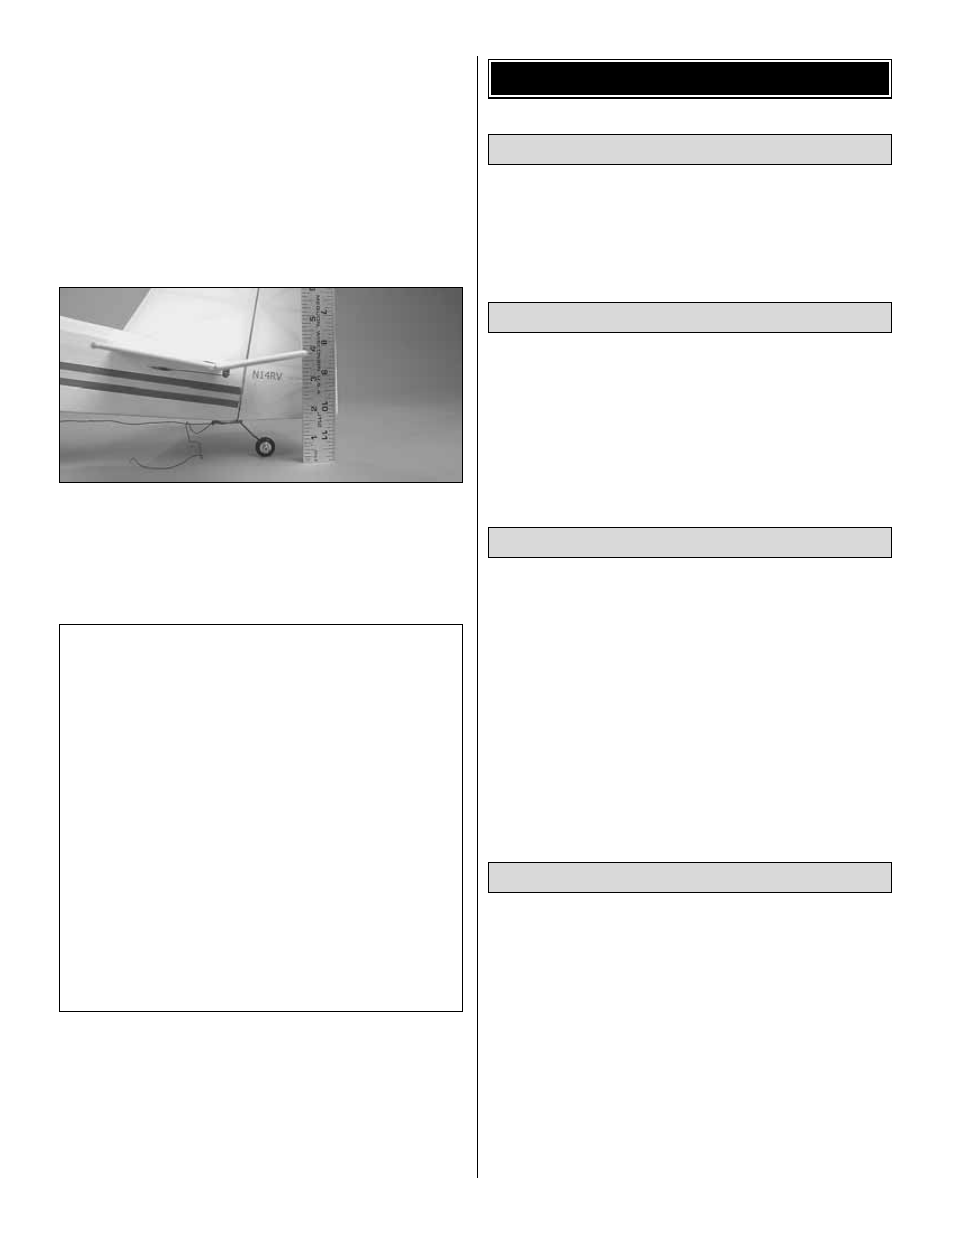
5. Operate the controls with the transmitter and use a
ruler to measure the throws. If necessary, reposition the
pushrods on the servo arms (farther out for more throw,
closer in for less throw), or use the ATV function on the
transmitter to set the control throws according to the chart
that follows.
❏
6. Disconnect the receiver battery and switch off
the transmitter.
Follow the instructions that came with your radio to charge
the batteries the evening before you plan to fly. You should
always charge the transmitter batteries before flying and at
other times as recommended by the radio manufacturer.
No matter if you fly at an AMA sanctioned R/C club site or if you
fly somewhere on your own, you should always have your
name, address, telephone number and AMA number on or
inside your model. It is required at all AMA R/C club flying sites
and AMA sanctioned flying events. Fill out the identification tag
on page 37 and place it on or inside your model.
Before you fly you should perform one last overall inspection
to make sure the model is truly ready to fly and that you
haven’t overlooked anything. If you are not thoroughly
familiar with the operation of R/C models, ask an
experienced modeler to perform the inspection. Check to
see that you have the radio installed correctly and that all
the controls are connected properly. The motor must also be
checked by confirming that the prop is rotating in the correct
direction and the motor sounds like it is reaching full power.
Make certain all control surfaces (elevators, rudder,
ailerons) are secure, the pushrods are connected, the
controls respond in the correct direction, radio components
are securely mounted, and the C.G. is correct.
Ground check the operational range of your radio before the
first flight of the day. With the transmitter antenna collapsed
and the receiver and transmitter on, you should be able to
walk at least 100 feet away from the model and still have
control. Have an assistant stand by your model and, while
you work the controls, tell you what the control surfaces are
doing. Repeat this test with the motor running at various
speeds with an assistant holding the model, using hand
signals to show you what is happening. If the control
surfaces do not respond correctly, do not fly! Find and
correct the problem first. Look for loose servo connections
or broken wires, corroded wires on old servo connectors,
poor solder joints in your battery pack or a defective cell, or
a damaged receiver crystal from a previous crash.
Range Check
Ground Inspection
Identify Your Model
Charge the Transmitter Batteries
PREFLIGHT
These are the recommended control surface throws:
High Rate
Low Rate
ELEVATOR:
5/8" [16mm] up
7/16" [11mm] up
5/8" [16mm] down
7/16" [11mm] down
RUDDER:
1-1/2" [38mm] right
1" [25.4mm] right
1-1/2" [38mm] left
1" [25.4mm] left
AILERONS:
7/16" [11mm] up
5/16" [8mm] up
5/16" [8mm] down
1/4" [6.4mm] down
IMPORTANT: The RV-4 Park Flyer has been extensively
tested. These are the control throws at which it flies best.
If, after you become comfortable with the way the RV-4
Park Flyer flies, you would like to adjust the throws to suit
your taste, that is fine. However, remember that too much
throw can make the plane more difficult to control and
force it into a stall or a snap roll, so remember, “more is
not always better.”
34