Great Planes RV-4 Park Flyer Kit - GPMA0010 User Manual
Page 21
❏
14. Sand the sticks flat so that the bottom sheeting can
be glued in place.
❏
15. Using the 1/16" x 3" [1.6 x 76mm] balsa sheet, sheet
the bottom front of the fuselage. Start by gluing a sheet
beginning at the ply landing gear mount.
❏
16. Sand the contour of the fuselage front to blend into
former F1. Fill any gaps with lightweight balsa filler.
❏
17. Place the fuselage upside-down over the bottom view
of the plan. Mark the location of formers F2A, F3A, F4A,
F5A, F6A and F7A on the left and right fuselage sides.
Transfer the marks to the top deck of the fuselage. Note on
the side view that formers F4A and F5A are not located over
F4 and F5.
❏
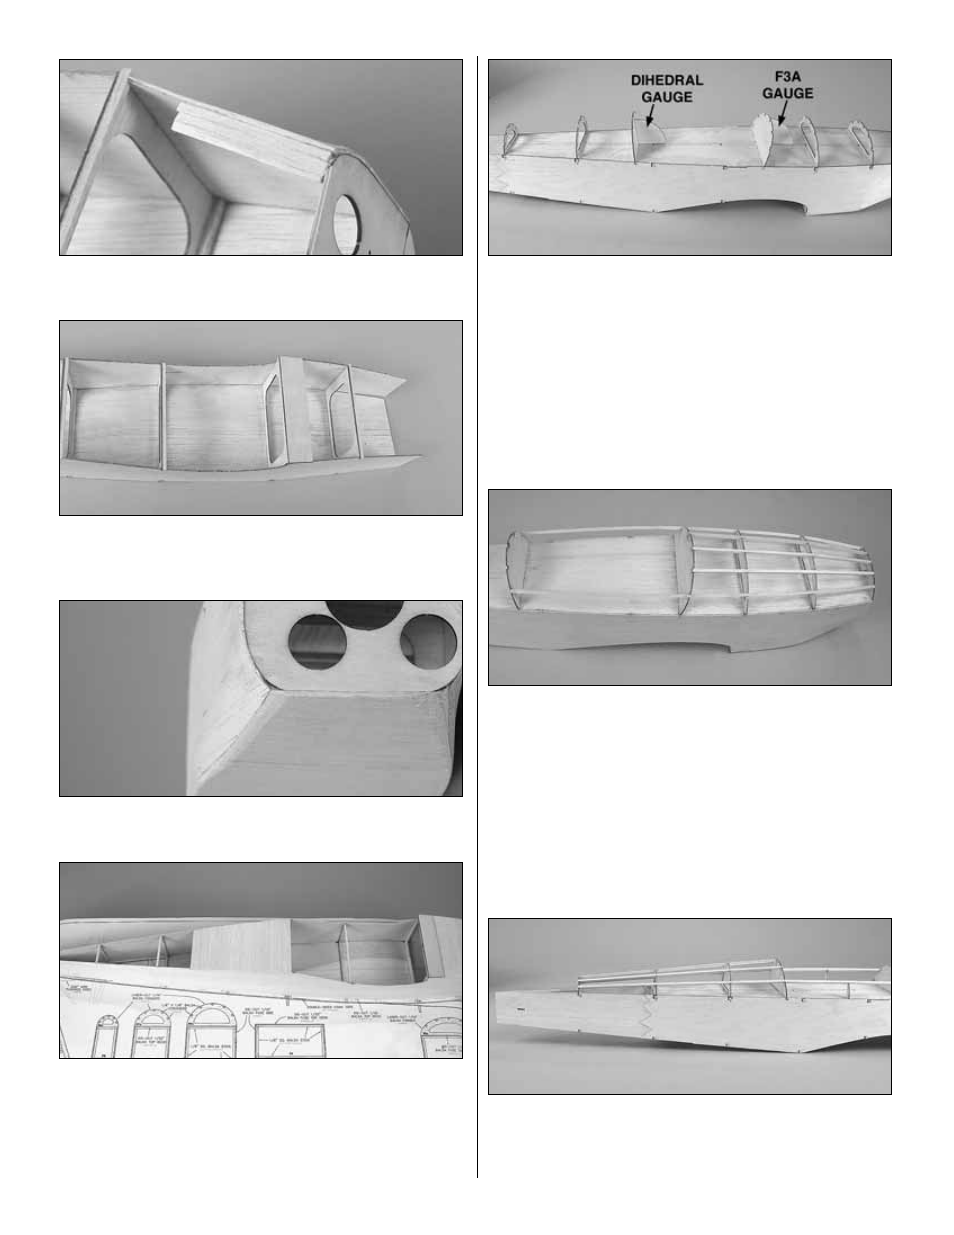
18. Glue the die-cut 1/16" [1.6mm] balsa formers F2A
thru F8A to the fuselage top deck. Formers F2A, F3A, F6A,
F7A and F8A are glued perpendicular to the top deck. Use
the die-cut 1/16" [1.6mm] balsa F3A gauge to establish the
correct angle of F4A. Use the die-cut 1/16" [1.6mm]
dihedral gauge to set the angle of F5A.
❏
19. Using three 1/8" x 1/8" x 24" [3.2 x 3.2 x 610mm]
balsa sticks, cut, fit and glue the stringers to the forward part
of the fuselage. Start with the bottom stringer, which goes
from F1 to F5A. Use the remainder of this stick to do the
stringer above it. Use the third stick to do the top center
stringer, saving the remainder of the stick for the top stringer
on the aft part of the fuselage.
❏
20. Using five 1/8" x 1/8" x 24" [3.2 x 3.2 x 610mm] balsa
sticks, cut, fit and glue the stringers to the aft part of the
fuselage. Start with the two bottom stringers on each side,
which go from F5 to the rear of F8.
21