Great Planes RV-4 Park Flyer Kit - GPMA0010 User Manual
Page 15
❏ ❏
C. Locate one of the 1/16" x 12" [1.6 x 305mm]
aluminum tubes. Cut two 9/16" [14mm] aileron torque rod
bearings from the tube. De-burr the holes in the tube with a
#11 knife blade. Install one of these pieces on the wire.
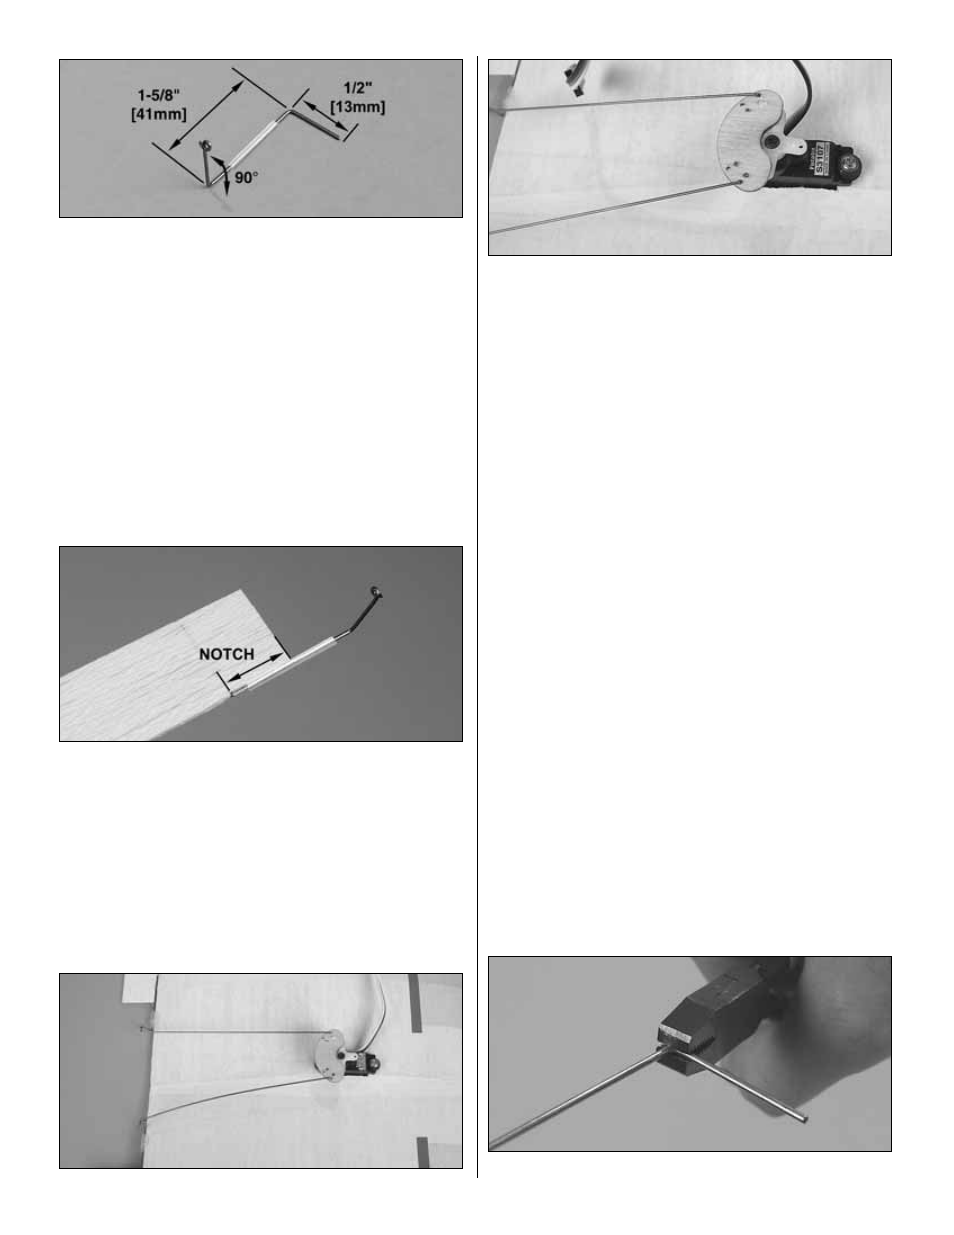
Make the final bend, then cut the wire to the length shown
on the plan. Be certain the horizontal portion of the torque
rod, that goes into the aileron, is perpendicular to the
vertical portion of the rod.
Remember: When you make the left torque rod, the bends are
in different directions and the length will be 1-1/8 [28.5mm].
❏ ❏
2. Cut one of the 1/16" x 7/8" x 17" [1.6 x 22 x 430mm]
balsa ailerons to the length shown on the wing plan. Drill a
#68 (or 1/32") [0.8mm] hole into the leading edge of the
aileron where shown on the plan for the aileron torque rod.
❏ ❏
3. Cut a notch in the leading edge of the aileron
between the hole you drilled and the end to accommodate
the torque rod. Glue the torque rod to the aileron with
medium CA.
❏
4. Return to step 1 and make the left aileron torque rod
and aileron the same way.
Refer to these photos for the following five steps. Note:
You may want to delay the following steps until after the
model is covered.
❏
5. Temporarily tape both ailerons to the wing.
❏
6. Glue the laser-cut 1/16" [1.6mm] ply servo horn to the
plastic servo horn included with your servo. With this servo
horn, the ailerons will travel up more than down, reducing
adverse yaw, which is the tendency for the nose of the
model to turn away from the direction of banked turns.
❏
7. Cut the top sheeting for the aileron servo, so that the
servo can be mounted to the left side of the center rib, aft of
the wing joiner and spar.
❏
8. Clean the aileron servo case with a tissue dampened
with alcohol or other suitable solvent. Mount the aileron
servo to the side of the center rib with double-sided foam
mounting tape (GPMQ4440, not included).
Note: For a more secure bond to the wing rib, first coat the
rib with a thin layer of medium CA where the tape will be
applied. Sand the hardened CA to remove any irregularities.
❏
9. Use the remainder of the .030" [.76mm] wire you used
for the torque rods to make the aileron pushrods. Note that
the pushrods are connected to the torque rods with a
“Z-bend” on both ends. If you do not have Z-bend pliers, or
do not know how to make a Z-bend with regular pliers, follow
the procedure below. (For clarity, larger wire than was
supplied with this kit was used in the photos.)
❏
A. Make the first 90° bend near one end of the wire.
❏
B. Hold the wire in the pliers as shown.
15