Build the wing – Great Planes RV-4 Park Flyer Kit - GPMA0010 User Manual
Page 10
❏
8. Build the stab and elevators from five 1/8" x 1/4" x 24"
[3.2 x 6.4 x 610mm] and two 1/8" x 1/8" x 24" [3.2 x 3.2 x
610mm] balsa sticks. Be sure to notch the leading edge of
both elevators where the basswood joiner stick goes. Do not
join the elevators with the 1/8" x 1/8" x 3" [3.2 x 3.2 x 76mm]
basswood stick until instructed to do so.
❏
9. The same as you did the fin and rudder, remove the
stab and elevators from the plans, sand the stab and
elevators flat and even, then round the corners where
shown on the plan. Round the tips of the stab and elevators.
Round the leading edge of the stab and the trailing edge of
the elevators. Bevel the leading edge of both elevators as
shown in the cross-section on the plan.
❏
10. Use a #11 blade to cut the notch in the left elevator
where shown on the plan for the laser-cut 1/16" [1.6mm]
plywood control horn. The control horn will be installed into
the notch on the bottom of the left elevator, but do not glue
it into place until the pushrods are installed during
“Hook
Up the Controls.”
❏
11. Use a bar sander with 150-grit sandpaper to bevel the
1/8" x 1/8" x 3" [3.2 x 3.2 x 76mm] basswood elevator
joiner to match the leading edge of the elevators.
❏
12. Pin both elevators to the plan upside-down. Check the
fit of the elevator joiner and trim if necessary. Use medium CA
to securely glue the elevator joiner to the left elevator only.
Start by building the left wing panel first so your progress
matches the photos.
❏ ❏
1. Cover the left wing panel plan with Great Planes
Plan Protector or wax paper.
❏ ❏
2. Find the four hardest 1/8" x 1/4" x 24" [3.2 x 6.4 x
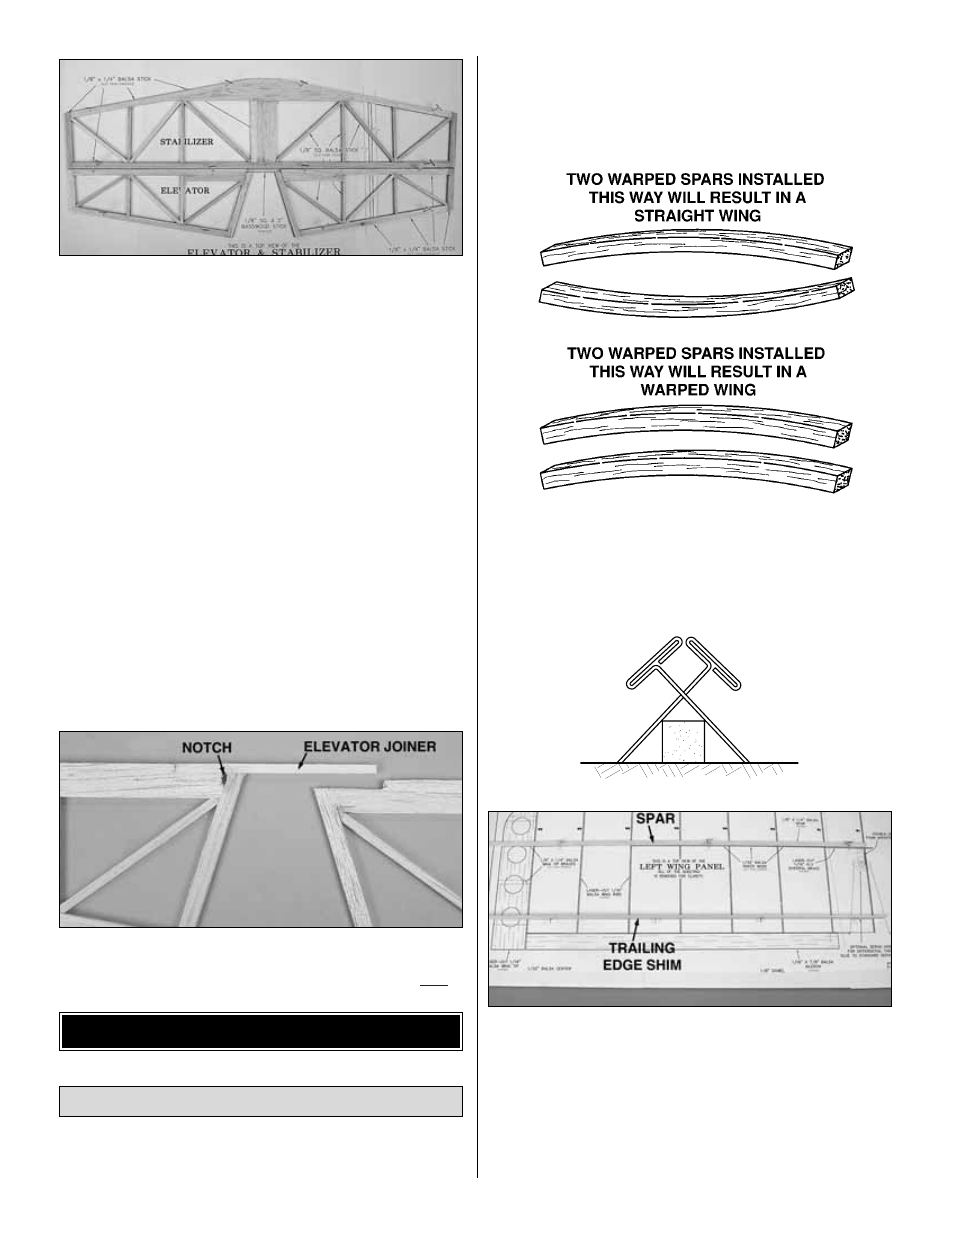
610mm] balsa sticks you set aside earlier. Match the balsa
main spars so any warps will counteract each other.
❏ ❏
3. Pin one of the main spars in position over the plan,
aligning one end of the main spar with the outside edge of
the root rib W-1.
❏ ❏
4. Pin the 1/8" x 3/8" x 24" [3.2 x 9.6 x 610mm] balsa
trailing edge shim in position over the plan, aligning the aft
edge of the stick on the dashed line. The shim should be
standing up with the 1/8" [3.2mm] edge on the table.
Build the Wing Panels
BUILD THE WING
10