Great Planes RV-4 Park Flyer Kit - GPMA0010 User Manual
Page 23
❏
30. Being careful not to glue the stab or fin, glue the stab
fillets to the fuse using the fin and stab spacers. Note: The
stab and fin will be installed after the model is covered.
❏
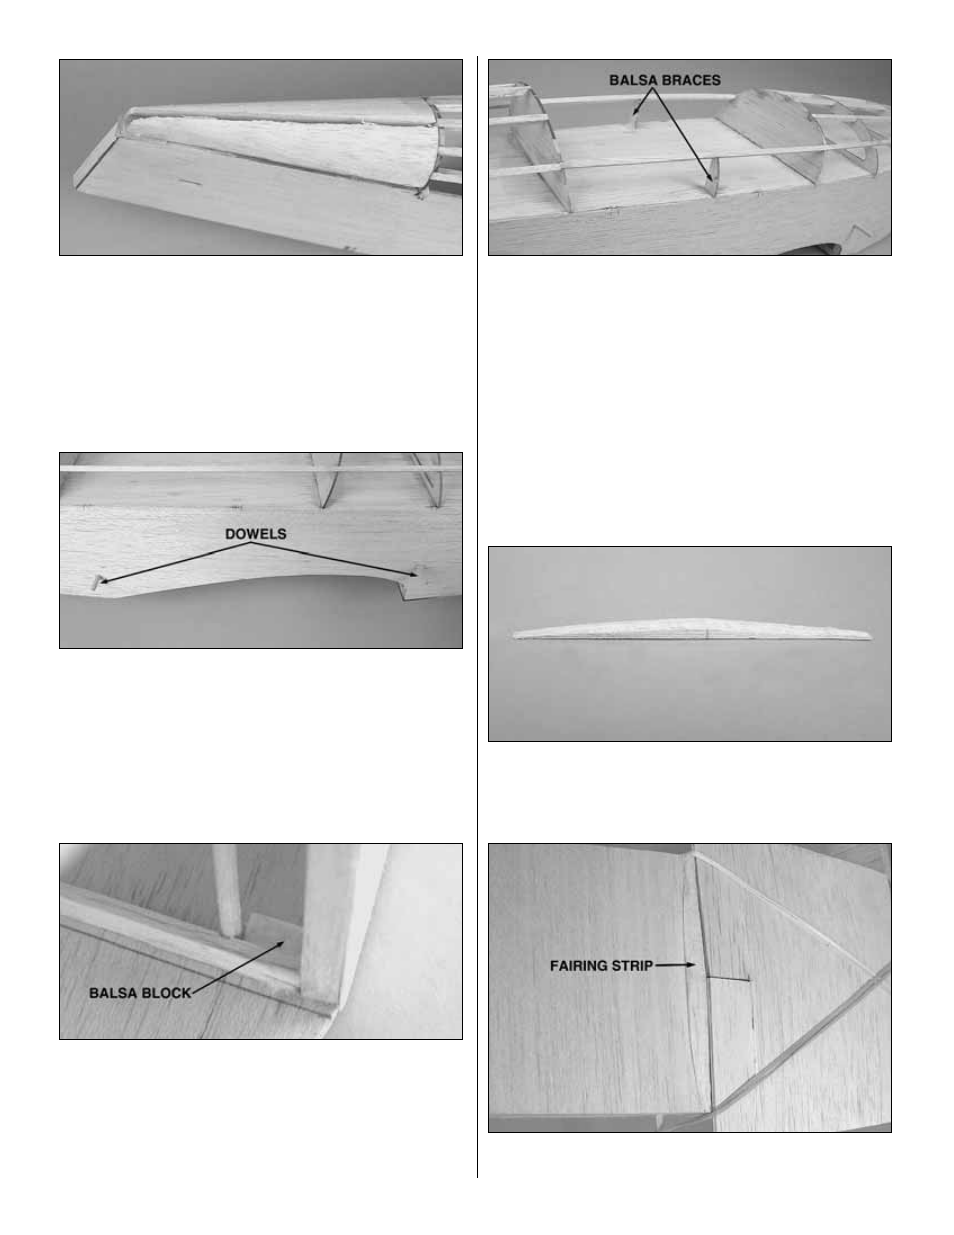
31. From a 1/8" [3.2mm] dowel, cut a 4-3/4" [120mm] rear
wing hold-down dowel and a 5-3/4" [146mm] front wing
hold-down dowel. Round the ends for a neat appearance.
❏
32. Drill 1/8" [3.2mm] holes in the sides of the fuselage
for each dowel where shown on the plan and insert each
dowel into the fuselage.
Caution: If the rear dowel is too low, it will interfere with the
aileron pushrods. If the front dowel is too low, it will not
provide proper shock absorption for the landing gear.
❏
33. Cut four 5/8" [16mm] long blocks from a leftover 1/8" x
1/4" [3.2 x 6.4mm] balsa stick. Glue a block to the inside of the
fuselage side under each dowel end to reinforce the area.
Note: Remove the dowel first so you don’t glue the dowel
in place.
❏
34. Glue the small laser-cut 1/16" [1.6mm] balsa braces
to the fuselage top deck midway between formers F4A and
F5A. These braces are used only to provide additional
support for the canopy and do not need to be even with the
fuselage sides or the stringer.
If you would like to blend the leading and trailing edge of the
wing with the bottom of the fuselage, continue with step 36.
Otherwise, go to
“Install the Pushrods” on page 24.
Adding these fairings will only add a slight amount of weight
to the model.
❏
35. Cut a 3-3/4" [95mm] fairing strip from a leftover 1/8"
x 1/4" [3.2 x 6.4mm] balsa stick. Sand a taper on the ends
of the stick as shown in the above photo.
❏
36. Glue the fairing strip to the bottom of the fuselage
behind the trailing edge of the wing.
23