Great Planes CAP 232 1.60 ARF - GPMA1410 User Manual
Page 27
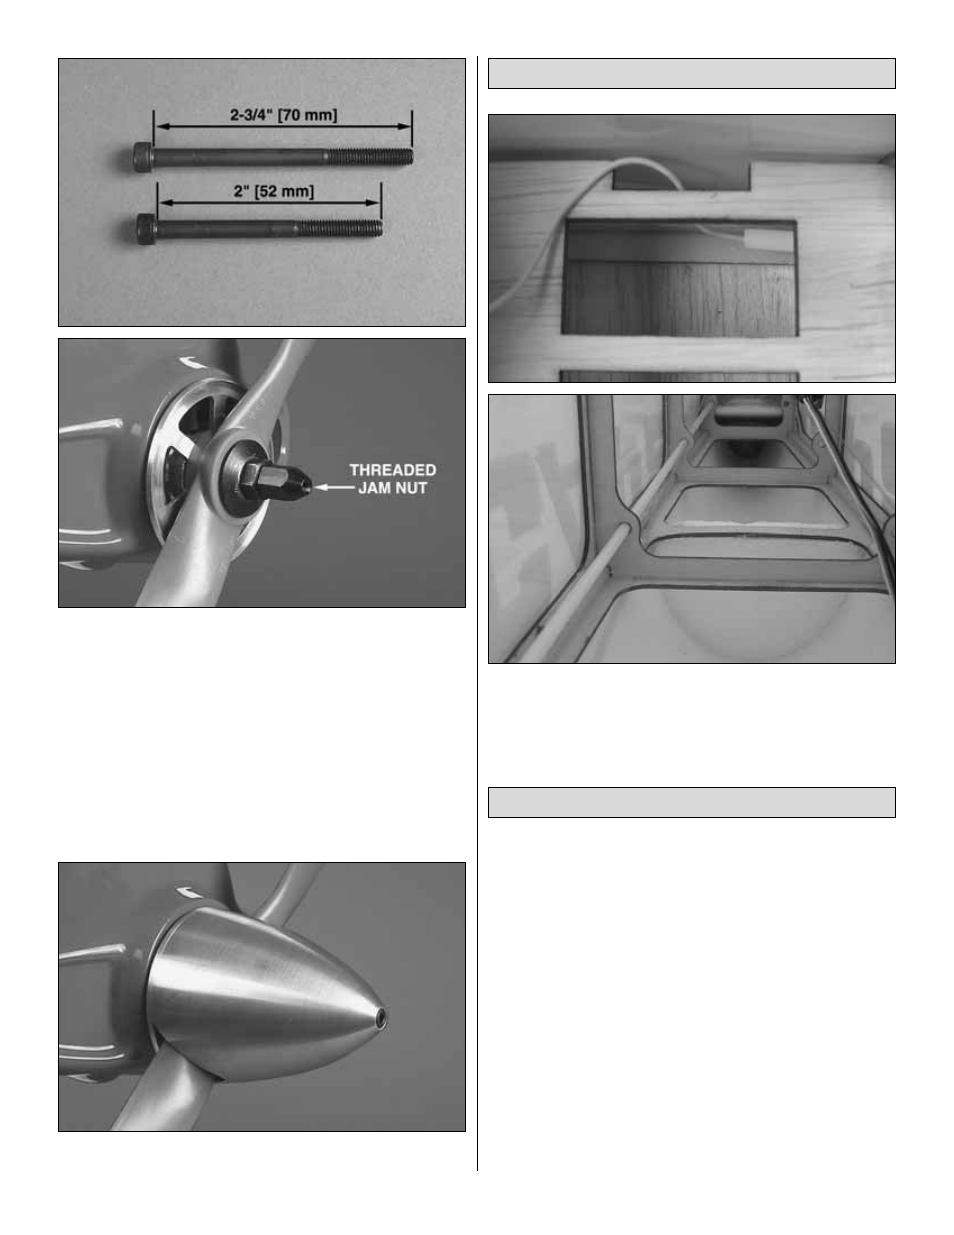
❏
2. For a glow engine installation, you will need to use the
spinner jam nut that is included with the spinner. It is
tightened against the prop nut and washer as shown. It is
pre-tapped to accept the spinner bolts. Two lengths of
spinner bolts are included with the spinner. Depending on
your prop selection and engine selection, you will need to
choose which bolt is the best length for your needs. It may
also be necessary to trim the length of the bolt to fit your
installation. If so, prior to cutting the bolt to length, thread the
provided 5 mm nut onto the bolt. After trimming to the desired
length, back the nut off of the bolt to clean the threads.
❏
3. Mount the spinner cone to the back plate using one of
the supplied spinner bolts
❏
There is a pre-installed antenna tube in the fuselage of
your CAP 232. Gently thread the antenna completely into this
tube prior to flight.
1. Use scissors or a sharp hobby knife to cut the decals from
the sheet.
2. Be certain the model is clean and free from oily
fingerprints and dust. Prepare a dishpan or small bucket with
a mixture of liquid dish soap and warm water–about one
teaspoon of soap per gallon of water. Submerse the decal in
the soap and water and peel off the paper backing. Note:
Even though the decals have a “sticky-back” and are not the
water transfer type, submersing them in soap & water allows
accurate positioning and reduces air bubbles underneath.
3. Position decal on the model where desired. Holding the
decal down, use a paper towel to wipe most of the water away.
4. Use a piece of soft balsa or something similar to
squeegee remaining water from under the decal. Apply the
rest of the decals the same way.
Apply the Decals
Route the Antenna
27