Install the cowl – Great Planes CAP 232 1.60 ARF - GPMA1410 User Manual
Page 25
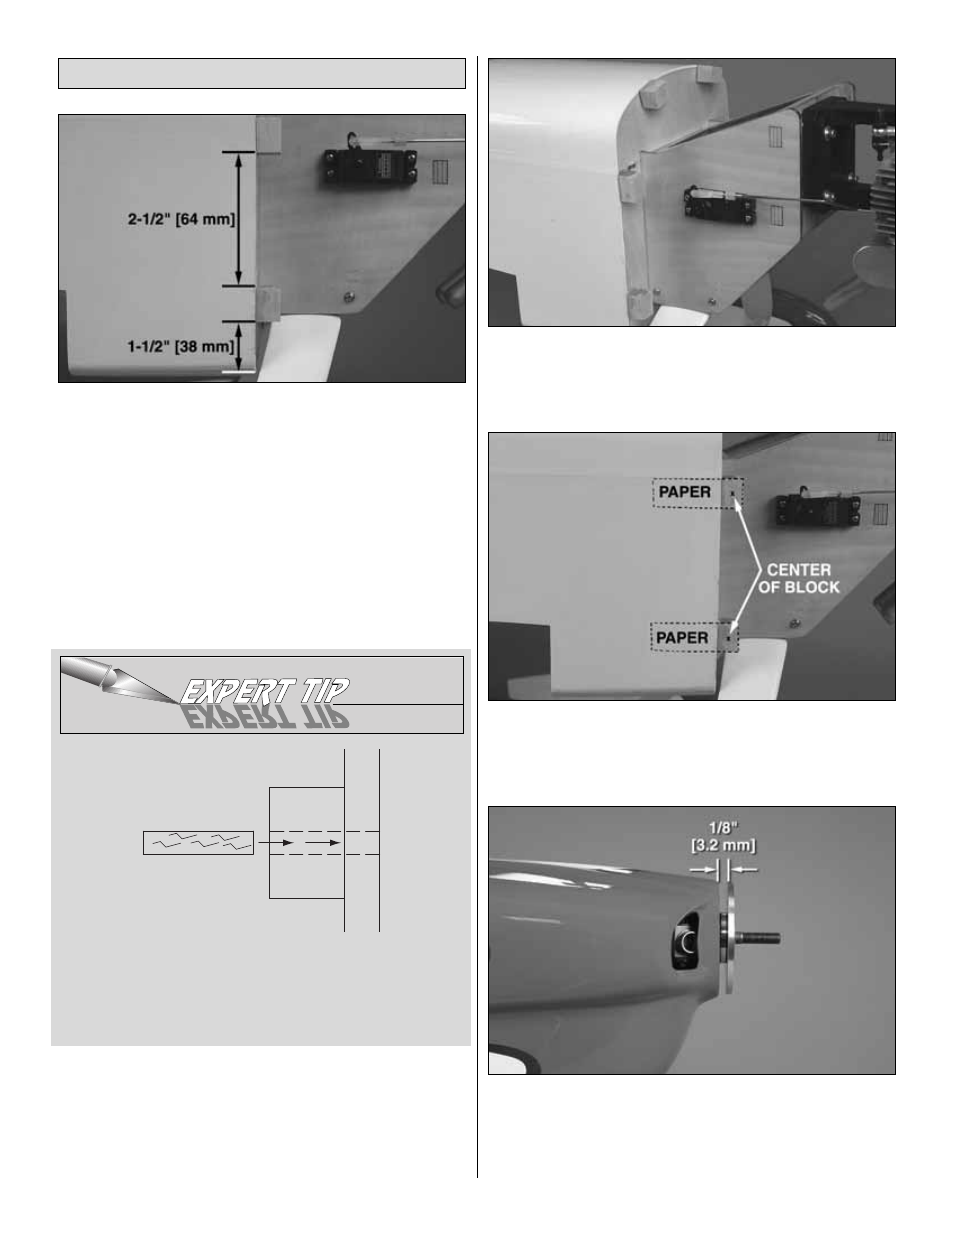
❏
1. Using 30 minute epoxy, glue a hardwood cowl mounting
block flush with the side of the fuselage. Position the first block
1-1/2" [38 mm] from the bottom of the fuselage as shown.
Remove the epoxy in the area where the block will mount with
some medium grit sandpaper (220 grit works good for this) so
that the epoxy will adhere better. Position the next block 2-1/2"
[64 mm] from the top of the first block as shown and epoxy in
place. Be sure to remove the epoxy in the areas on the firewall
for all blocks prior to epoxying in place.
For added strength, after the cowl mounting blocks are all
securely epoxied in place, drill 1/8" [3.2 mm] holes through the
center of each block into the firewall. Insert an appropriate
length of 1/8" [3.2 mm] wooden dowel (not included) into this
hole and into the firewall. Glue this in place using thin CA. This
modification is especially useful for high vibration engines.
❏
2. Glue two more hardwood blocks on the other side of
the fuse at the same locations.
❏
3. The two remaining hardwood blocks are glued on the
top of the fuse as shown. Evenly space them apart. The
exact location is not important.
❏
4. Mark the center of each hardwood block. From this
mark, run a 2" [51 mm] piece of paper straight back onto the
fuselage to use as templates.
❏
5. Slide the cowl over the engine and onto the fuselage. Use
a Dremel tool with a cutting bit to trim the cowl if necessary so
you can get it to fit over the engine. Mount the spinner back
plate to the engine. Position the cowl so that there is a 1/8"
[3.2 mm] gap between the cowl and the spinner back plate.
WOOD DOWEL
COWL
BLOCK
FIREW
ALL
Install the Cowl
25