Great Planes CAP 232 1.60 ARF - GPMA1410 User Manual
Page 10
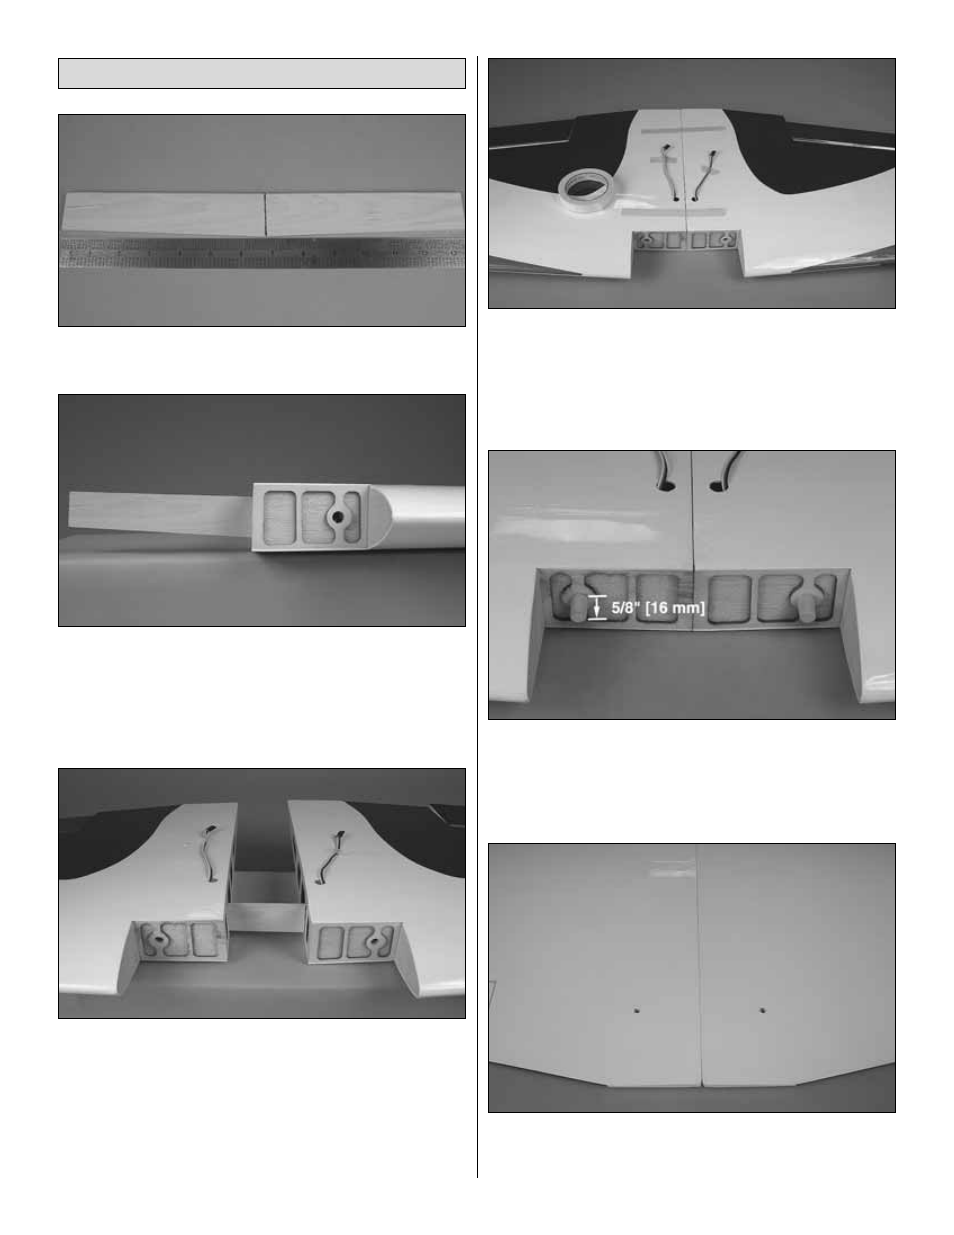
❏
1. Locate the wing joiner. Measure and mark the centerline
of the joiner.
❏
2. Test fit the wing joiner in one half of the wing. Sand as
needed to allow the joiner to fit snug in the wing. Then slide
the other wing half onto the joiner. There should be no gap
between the wing halves when joined. Note the direction of
the joiner. The “V” of the joiner should be towards the bottom
of the wing.
❏
3. When satisfied with the fit, separate the wing panels
and remove the joiner. Mix a large batch of epoxy, enough to
cover one half of the wing joiner and the inside of one wing
joiner pocket. Half of one epoxy mixing cup, or 1/2 oz of
epoxy should work fine. Coat half of the wing joiner and one
wing joiner pocket with epoxy and insert the joiner. Clean up
any epoxy that oozes out using a paper towel and denatured
alcohol. Allow the epoxy to fully harden before proceeding.
❏
4. Mix another large batch of 30-minute epoxy, 1 oz should
do. Coat the other half of the wing joiner, wing joiner pocket
and the two wing roots with 30-minute epoxy. Join the two
wing halves and hold them together with masking tape until
the epoxy has completely hardened. Clean up any excess
epoxy with alcohol and a paper towel.
❏
5. Locate the two 3/8" [10 mm] x 2" [51 mm] wooden
wing dowels. Round the edges of the dowels. Test fit the
dowels into the holes in the forward center section of the
wing as shown. Approximately 5/8" [16 mm] of the dowel
should be sticking out of the wing. Glue in place using epoxy.
❏
6. Locate the wing bolt holes in the aft center section of
the wing. Remove the covering from these holes on the top
and bottom of the wing using a sharp hobby knife.
Join the Wing
10