Great Planes 27% Extra 330S ARF - GPMA1413 User Manual
Page 31
31
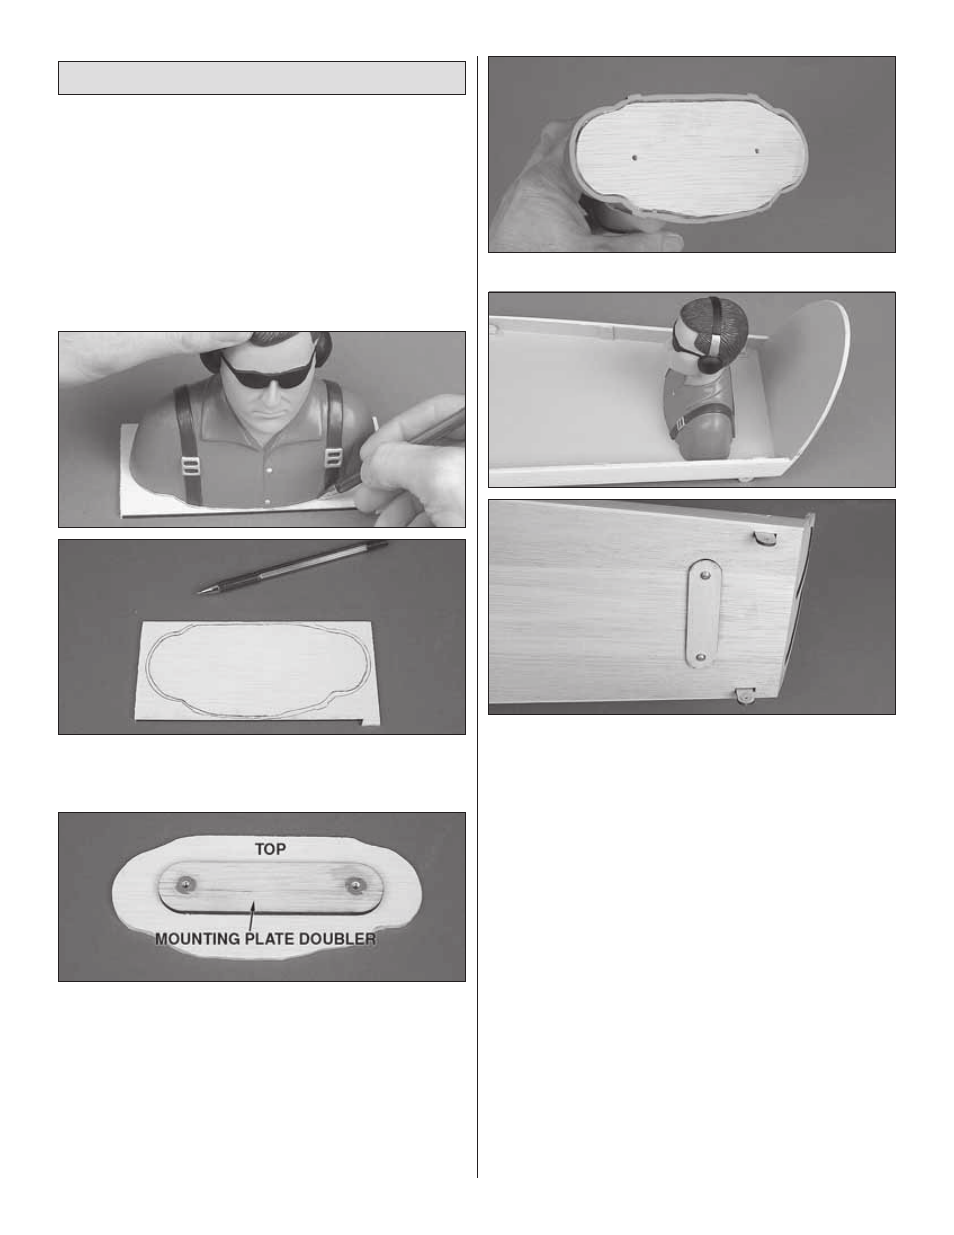
Mount the Pilot
❏
1. Remove the six screws that hold on the canopy. Add a
drop of thin CA to each screw hole that the screws came from.
❏
2. Test fi t the pilot (not included) in the cockpit with the canopy
to make sure he fi ts. If necessary, trim the base of the pilot to fi t.
This can be done with plastic-cutting scissors, a hobby knife or
a belt sander if one is available to you.
❏
3. Make a pilot mounting plate from the 1/8" x 3-1/8" x 6"
[3 x 80 x 150mm] plywood sheet (included).
❏
4. Glue one of the plywood mounting plate doublers
to the top (inside) of the pilot mounting plate. Press 4-40
blind nuts into the doubler. Add a few drops of CA around the
edges of the blind nuts so they won’t fall out.
❏
5. Place the mounting plate on the cockpit fl oor in the
location where the pilot will be mounted. Transfer the holes
in the mounting plate to the cockpit fl oor. Drill 1/8" [3.2mm]
holes through the cockpit fl oor at the marks.
❏
6. Securely glue the mounting plate in the pilot with CA.
❏
7. Mount the pilot to the cockpit fl oor with two 4-40 x 5/8"
[16mm] Phillips screws, #4 lock washers, #4 fl at washers
and another mounting plate doubler. Glue the doubler to the
bottom of the cockpit fl oor. Now the pilot will be secure, but
easily removable.
❏
8. While you’re working on the inside of the cockpit, cut
the instrument panel decal from the decal sheet and stick
it into position on the instrument panel in the cockpit.
❏
9. Mount the canopy to the canopy hatch with the screws
you removed before.