Great Planes 27% Extra 330S ARF - GPMA1413 User Manual
Page 20
20
❏
2. Assemble the stopper, tubes and metal plates. Solder
another fuel line barb onto the ends of the short tubes. Bend
the brass vent/overfl ow tube upward so it will be at the top
of the tank.
❏
3. Connect the fuel tubing to the short tubes and the
clunks–cut the lines so that the clunks cannot contact the
back of the tank–otherwise they could get stuck. Note that
one of the lines will be used for fueling and defueling and the
other line will be the pickup line that goes to the carburetor.
The bent tube will be the vent/overfl ow line that will be
connected to a line that exits the bottom of the fuselage.
Important: Secure both ends of both fuel tubes with small
nylon ties. This is an important measure that must be taken
to be sure the lines remain attached inside the tank.
VENT/PRESSURE
(OR OVERFLOW)
One line is for fueling/defueling and
the other is for fuel pickup to the
carburetor (it doesn’t matter which).
❏
4. Write “TOP” on the back of the tank so you will know
which way to install it after inserting the stopper assembly.
Insert the stopper so the vent tube will be at the top of the
tank. Then tighten the screw to squish the stopper and seal
the tank. Shake the tank to make sure the clunks can move
around and the fuel lines are not too long. If necessary,
remove the stopper and shorten the lines.
Mount the Fuel Tank
❏
1. Glue the plywood fuel tank tray former inside the
fuselage as shown.
❏
2. Use a hobby knife or sandpaper to bevel the front
edges of the plywood fuel tank tray (the front is the end with
the longer tab). The side with the beveled edges will now be
the bottom. (There is another photo showing the bevel in
step 1, on page 26.)
❏
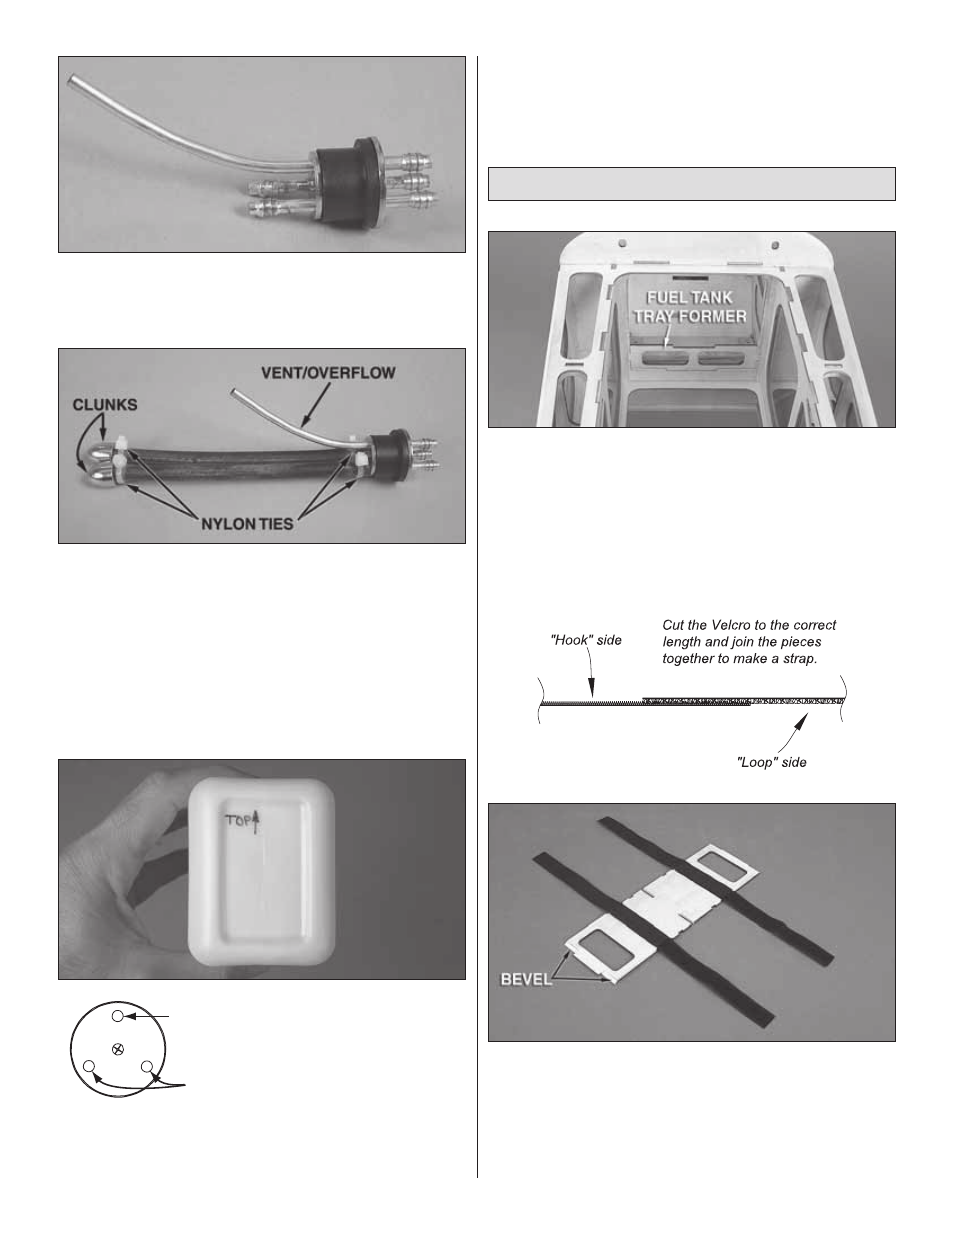
3. Cut two of the 12" [300mm] strips of the rougher “hook”
side of the included Velcro material into two 8" [200mm] strips.
Cut two more of the softer “loop” strips to the same length.
Make two fuel tank straps by overlapping 2-1/2" [60mm] of
the ends of the straps. Use medium CA to glue the straps to
the bottom of the fuel tank tray in alignment with the cutouts
in the sides.