Great Planes 27% Extra 330S ARF - GPMA1413 User Manual
Page 23
23
❏
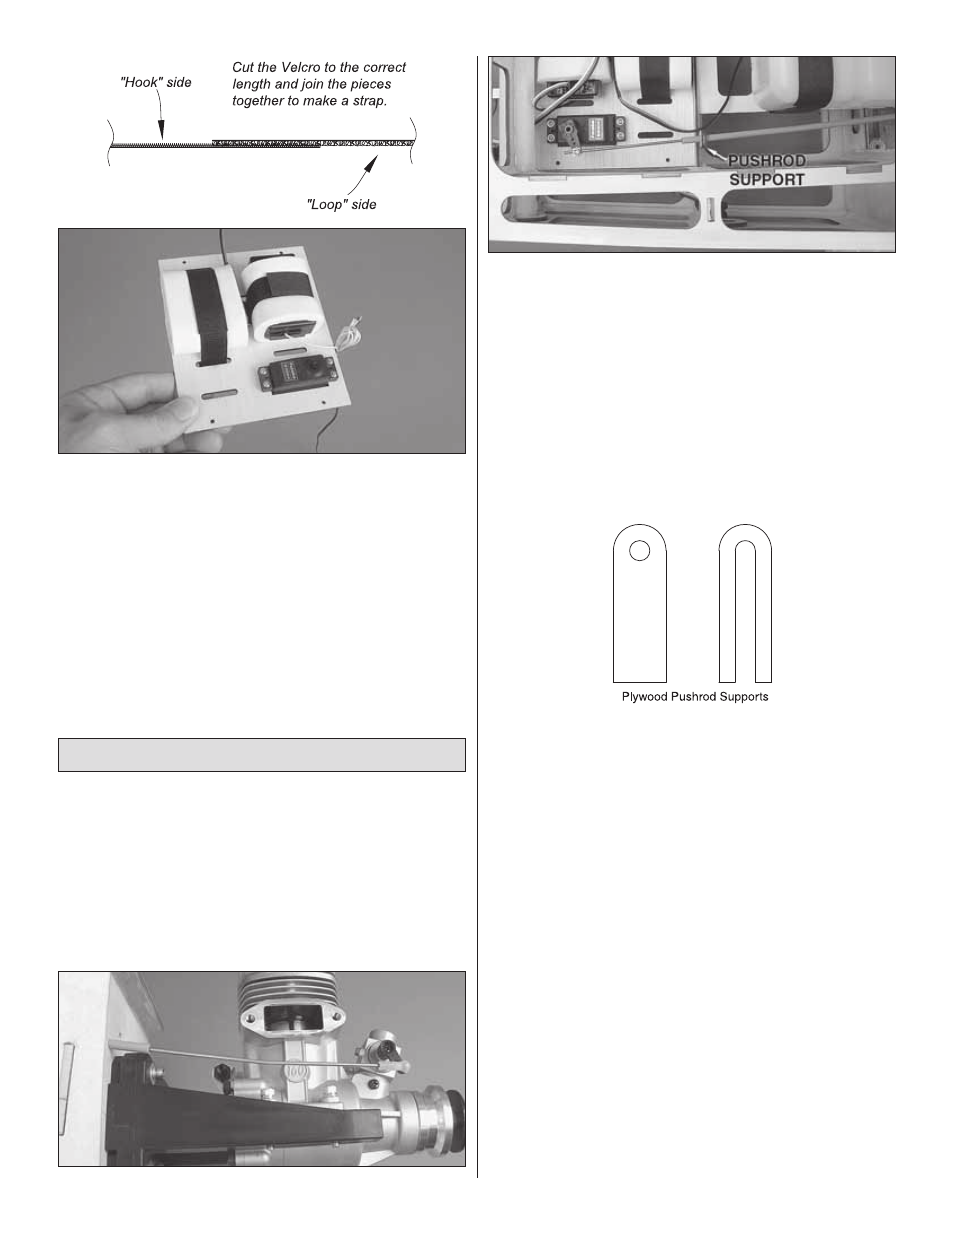
5. Make mounting straps from the included Velcro strips
by cutting them to the correct length for the receiver and
battery. Mount the receiver and battery to the tray with 1/4"
[6mm] R/C foam rubber. If you want you could use CA to
glue the Velcro to the bottom of the tray. This will make re-
fastening the straps around the battery and receiver easier if
you ever remove and re-install them later.
❏
6. Mount the radio tray to the rails in the fuselage with four
#2 x 1/2" [13mm] screws and #2 washers–again, don’t forget
to harden the screw holes with thin CA.
❏
7. Hook up the throttle as instructed below for the type of
engine you are using.
Glow Engine Throttle Hookup
❏
1. Temporarily mount the muffl er to the engine so you will know
where to locate the throttle pushrod so it won’t interfere with the
muffl er. If you haven’t yet done so, mark the fi rewall where the
throttle pushrod will go through and drill a 3/16" [4.8mm] hole
at that mark (this will probably require temporary removal of the
engine). Also be certain to drill the hole where the pushrod will
not interfere with the fuel tank behind the fi rewall and do not drill
into the fuel tank.
❏
2. Hook up the throttle using the hardware listed below.
Glow engine throttle pushrod hardware:
❏
2-56 x 36" [910mm] wire pushrod
❏
3/16" x 36" [4.8 x 910mm] gray pushrod guide tube
On the servo end:
❏
brass screw-lock pushrod connector
❏
nylon retainer
❏
4-40 x 1/8" [3.2mm] SHCS
On the engine end:
❏
nylon ball link
❏
0-80 ball link ball
❏
0-80 nut
Note that, for the O.S. 1.60 FX shown, the pushrod goes
through the fi rewall at a slight angle toward the servo, so you
may need to use a hobby knife to angle the hole accordingly.
Use one of the plywood pushrod supports to secure the aft
end of the pushrod near the throttle servo. Cut the gray pushrod
guide tube to the correct length, then use coarse sandpaper to
roughen both ends where it goes through the fi rewall and the
pushrod support. Glue the tube and the support into position
with medium CA. Cut the pushrod wire to the correct length
and make a slight bend near the end as necessary to align
with the ball link ball on the carburetor arm.