Great Planes 27% Extra 330S ARF - GPMA1413 User Manual
Page 13
13
❏
7. Now that the stab is centered, temporarily mount the
wing to the fuselage with the wing tube and the wing bolts.
Suggestion: Access to the wing bolts will be much easier
with a Great Planes 4-in-1 Installation Tool (GPMR8035).
This will be especially helpful when you get to the fl ying fi eld
and need to get the wing bolts tight.
❏
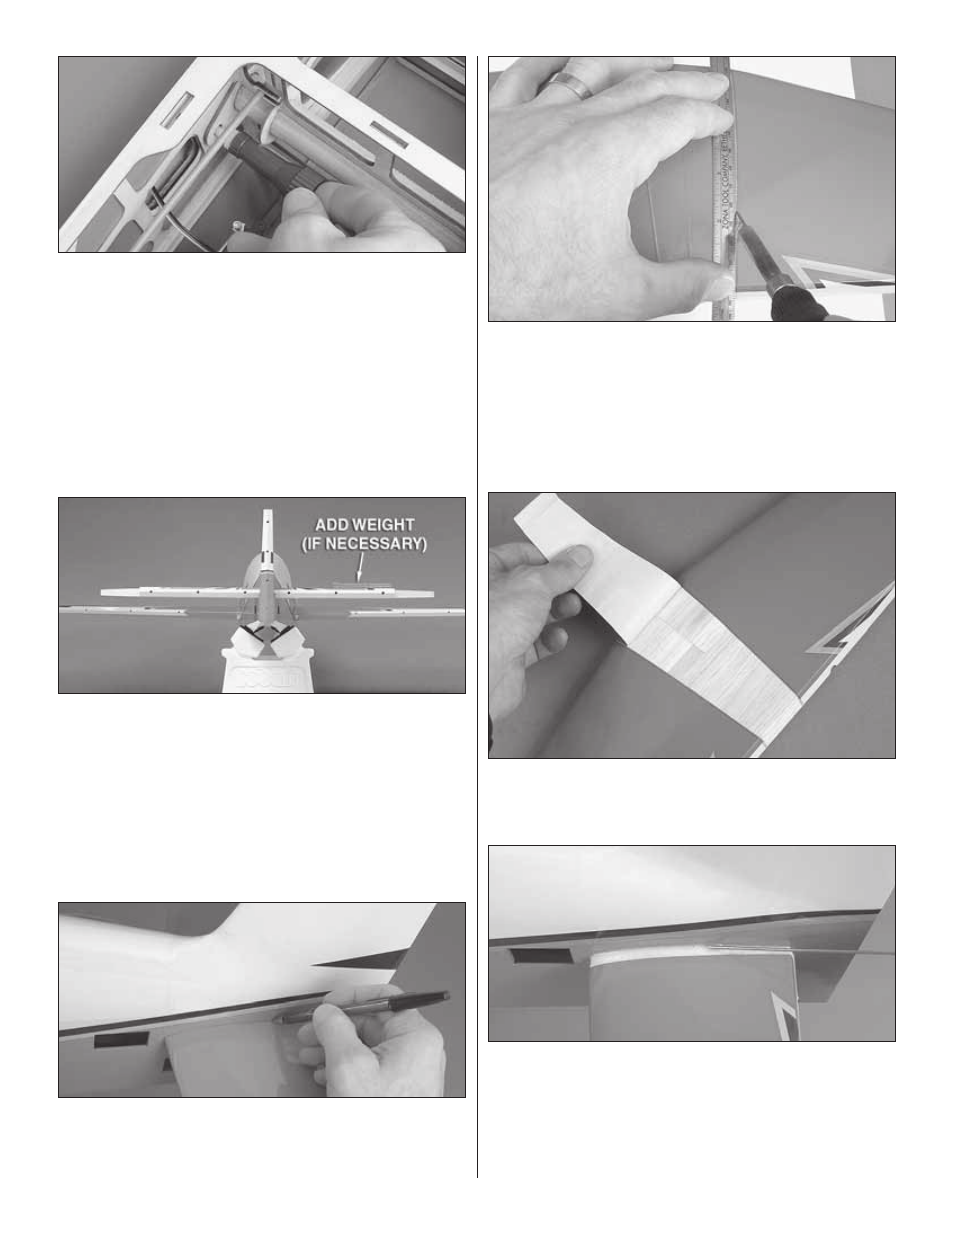
8. Standing about 6' [2m] behind the model, view the
alignment of the stab and wing. If the stab is not parallel with
the wing, it will take just a few ounces of weight to “dial it in.”
Place incrementally increasing amounts of weight on the high
side of the stab until you can get it to align with the wing.
❏
9. Now that you know how much (if any) weight it will take
to get the stab to align with the wing, take off the weight, set
it aside, and use a ballpoint pen to carefully mark the sides
of the fuselage all the way around both sides of the stab.
❏
10. Take the T-pins out of the stab and take the stab out
of the fuselage. Use a soldering iron with a small tip to melt
through the covering 1/32" to 1/16" [.5 to 1.5mm] inside the
lines you marked all the way around–use a fl exible, metal
straightedge to guide the soldering iron. If you don’t have a
soldering iron, a sharp hobby knife could also be used to cut
the covering, but great care must be used not to cut into the
balsa underneath. Otherwise, the stab will be weakened.
❏
11. Peel the covering from the middle of the stab.
Now that all the preliminary work has been done, the stab
can fi nally be glued into position.
❏
12. Apply liberal beads of epoxy all the way around the top
and bottom of the stab just inside the edges of the covering
you cut where the stab will join the fuselage. Slide the stab
into position. Slide it another 1/4" [6mm] out the other side
as shown. Apply more epoxy all the way around the exposed
balsa, then slide the stab back into place. Wipe away excess
epoxy, use the T-pins and the pin and string to re center the