Great Planes 27% Extra 330S ARF - GPMA1413 User Manual
Page 10
10
there is just enough space in the gap to see light through.
Wipe off any excess epoxy that squeezes out and move the
aileron up and down several times to center and align the
hinges. Hold the aileron to the wing with masking tape until
the epoxy hardens.
❏
4. Hinge the other aileron to the other wing with a new
batch of 30-minute epoxy.
❏
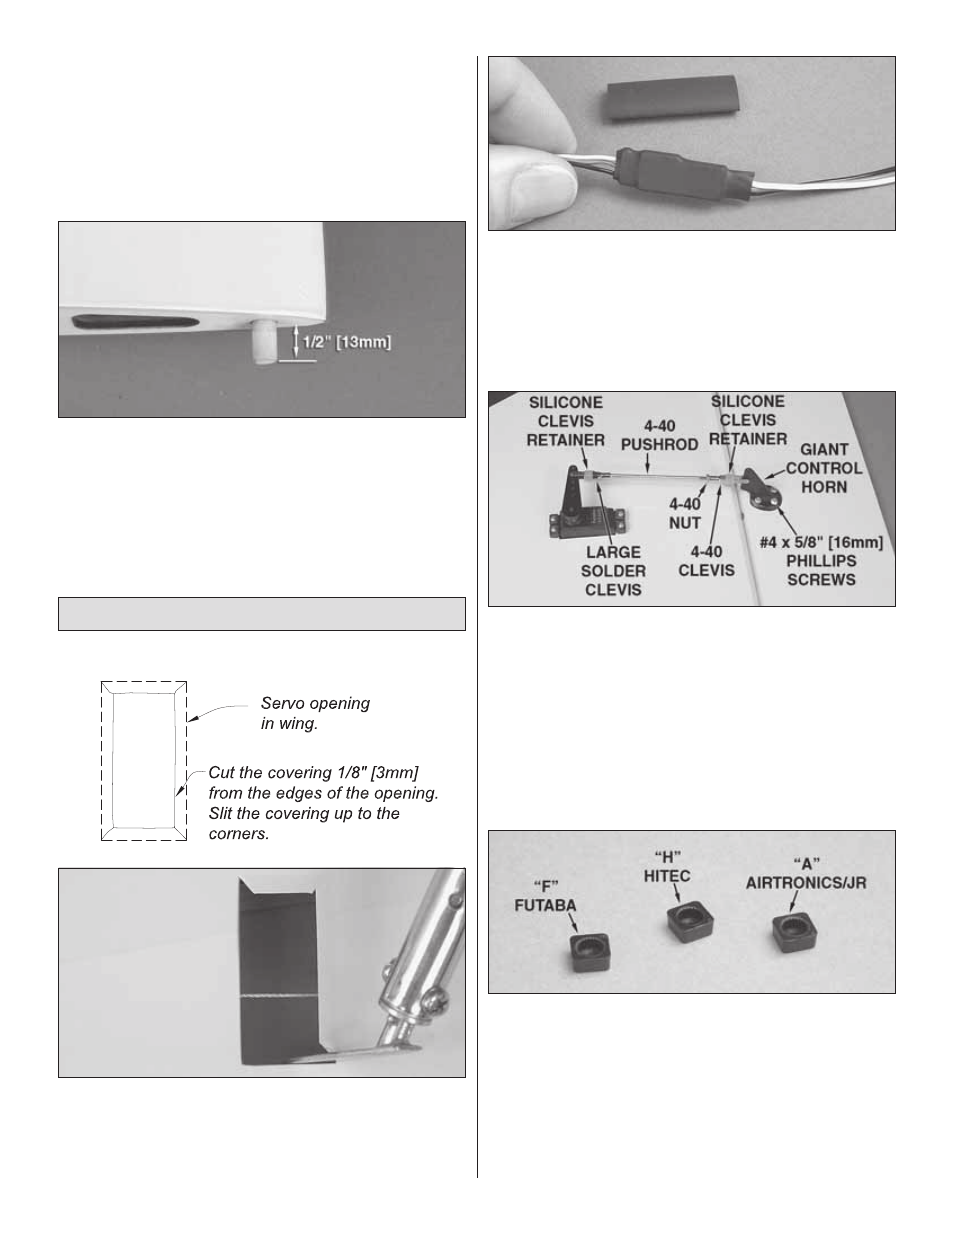
5. While you have some epoxy mixed, glue two 5/16" x 1-1/4"
[8 x 33mm] hardwood incidence dowels into the root end of
each wing so that 1/2" [13mm] of each dowel protrudes.
❏
6. After the epoxy on all the hinges has hardened, remove
the masking tape. Move the ailerons up and down to “break”
any epoxy from the hinge pins and get them moving freely.
Hook Up the Ailerons
❏
1. Cut the covering from the servo openings in the
bottom of the wings. Hint: First cut the covering 1/8" [3mm]
inside the edges of the opening. Then slit the covering up to
the corners and use a trim iron to seal the covering down
inside the opening.
❏
2. Connect a 12" [305mm] servo extension wire to each
aileron servo (for Futaba servos, Hobbico servo extensions
(HCAM2100) were used). Secure each connection with
pieces of 3" [75mm] heat-shrink tubing cut in half. Use a heat
gun to shrink the tubing.
Refer to this photo while mounting the aileron servos
and hooking up the ailerons.
❏
3. Use the string in the wing or a wire with a hook bent
on the end to pull one of the servo wires through the servo
opening and down through the ribs out the end of one of the
wings. Place the servo in the opening. Fit the other servo in
the other wing the same way.
❏
4. Drill 1/16" [1.6mm] holes in the wings for the servo mounting
screws. Temporarily mount the servos with the screws that came
with them. Remove the screws and take the servos out of the
openings. Harden the screw holes with a few drops of thin CA.
Allow the CA to harden, then mount the servos again.
❏
5. Great Planes large-scale 1.5" [38mm] single-sided
servo arms with adapters (GPMM1105) are shown in this
manual. Select the plastic servo arm adapters for the servos
you will be using – “F” is for Futaba, “H” is for Hitec and “A” is
for Airtronics and JR.
❏
6. If your aileron servos come with 3mm screws for
mounting the servo wheels, enlarge the hole in two metal
servo arms and plastic adapters included with this kit with a
#32 (.116" [3mm]) drill.