Great Planes 27% Extra 330S ARF - GPMA1413 User Manual
Page 29
29
❏
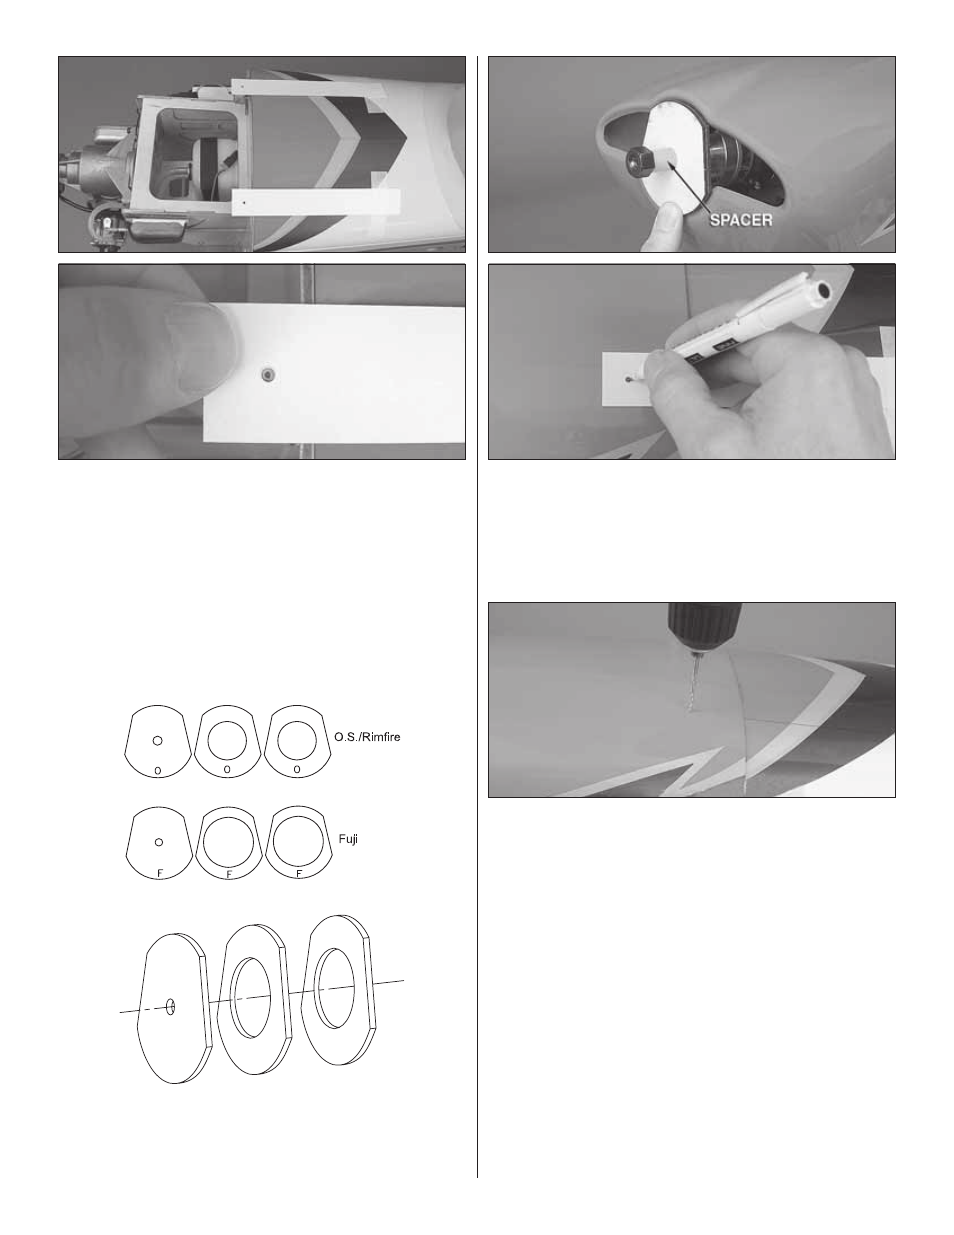
4. Make two templates as shown from manila folder
material or other medium card stock. Place the canopy
hatch on the fuselage, then tape the templates to the canopy
hatch so the holes in the templates align with the marks on
the cowl mounting blocks.
❏
5. Glue together the three pieces of the plywood cowl
centering jig as shown in the diagram for the engine you
are using – Fuji-Imvac (labeled “F”) or O.S. 1.60/ElectriFly
(labeled “O”).
❏
6. Fit the cowl onto the fuselage over the engine. Use
the prop nut or the engine bolt to mount the cowl centering
jig to the engine/motor–if necessary, use a cardboard tube
or something similar as a spacer if the prop nut or bolt won’t
go in far enough. Hold the cowl forward up against the jig,
then use a fi ne-point felt-tip pen to mark the holes in the
templates onto the cowl.
❏
7. Remove the templates. Still holding the cowl forward
against the centering jig, drill 3/32" [2.4mm] holes at the
marks you made through the cowl and the mounting blocks.
❏
8. Remove the cowl. Enlarge the holes in the cowl only
with a 1/8" [3.2mm] drill. Retape the templates to the fuselage
over the next set of cowl mounting blocks. Reposition the
cowl and cowl centering jig on the fuselage. Use #4 x 1/2"
[13mm] screws and #4 nylon washers to loosely mount the
cowl through two top holes.
❏
9. Exchange the 1/8" [3.2mm] drill bit in your drill with the 3/32"
[2.4mm] bit. Repeat the process by holding the cowl to the jig,
marking and drilling the next two holes, removing the cowl and
enlarging the holes in the cowl only with the 1/8" [3.2mm] bit.
❏
10. Repeat once more for the fi nal two cowl mounting
screws–don’t forget to exchange the 1/8" [3.2mm] drill
with the 3/32" [2.4mm] drill before drilling the holes in the
mounting blocks!