Great Planes Extra 300S 40 Kit - GPMA0235 User Manual
Page 8
8
❏
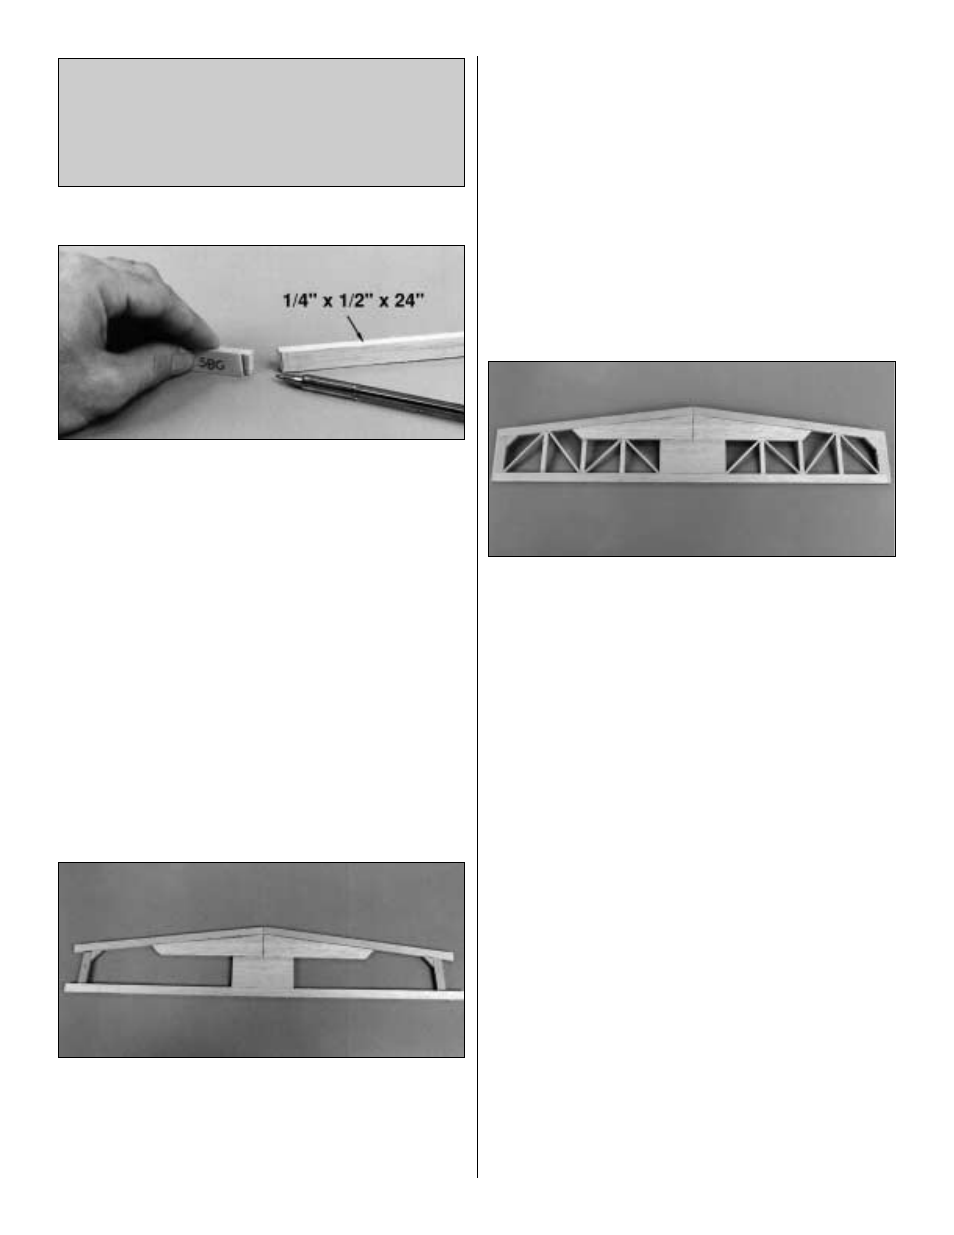
2. Cut a 1/4" x 1/2" x 24" balsa stick (do not use the
30" long stick–it's for the fuse turtle deck) into two 12" long
pieces to make the stab leading edg es. Use the
die-cut 1/8" plywood stab bevel gauge (SBG) to mark,
then cut one end of both sticks. Don't cut the tips of the
LE's yet. Cut and “square them up” with the end of the stab
after you remove it from the plan at step 7. Glue the stab
LE's to the LE doubler with medium CA and pin them in
position over the plan.
❏
3. Glue a 1/4" x 1/2" x 24" balsa stick to the stab center
and pin it in position over the plan for the stab trailing edge.
Use the plans or a straightedge as a guide to make sure the
stab trailing edge is straight as you pin it in position.
Hint: If possible, choose one of the softer pieces of wood for
the stab trailing edge. This will make cutting the hinge slots
easier than if you were to use a harder piece of wood.
❏
4. Cut the ends of the stab from another 1/4" x 1/2" x 24"
balsa stick using the stab bevel gauge to cut them at the
correct angle. Glue the ends of the stab to the leading and
trailing edges and pin them in position. Make the gussets
from the 1/4" x 1/2" stick and glue them in position (you can
use the stab bevel gauge to make the gussets too).
❏
5. Make the 1/4" tail ribs from a 1/4" x 1/4" x 24" balsa
stick, then glue them in position. You can use the stab bevel
gauge for two of the ribs and the 2" wide piece you cut off
the stab center as a gauge to cut the remaining four 1/4"
ribs to exact length.
Hint: Use a sharp single edge razor blade to cut the tail ribs.
❏
6. Make the 1/8" tail ribs from a 1/8" x 1/4" x 24" balsa
stick, then glue them in position. We recommend cutting
these tail ribs with a single edge razor blade too.
Sorry, no
gauges for these. You'll just have to rely on pure skill!
❏
7. Remove the stab from your building board. Inspect all
the glue joints and add CA to any joints that don't look
strong. Cut the ends of the leading and trailing edges so
they extend past the end of the stab by about 1/16". Use
your bar sander to finish the job by sanding the ends of the
LE's and TE so they are flush with the end of the stab. Cut
the 1/8" x 1/4" tips, then glue them to the end of the stab.
❏
8. Use your bar sander or a large sanding block and
220-grit sandpaper to sand the entire top and bottom
surface of the stab until it is flat and even. Be careful while
sanding so you do not over-thin any one particular area of
the stab or gouge the stab ribs by snagging the sandpaper
on them.
There, that was kind of fun wasn't it? Let's continue to build
the elevators, fin and rudder.
❏
9. Follow the recommended building sequence that follows
to build the elevators, fin and rudder from the same sizes of
balsa sticks you used for the stab. Use the die-cut 1/8"
plywood elevator bevel gauge (EBG) where appropriate. The
elevator root ends are made from the leftover piece you cut
from the 1/4" x 2" x 6" balsa sheet at step 1.
Hint: Cut one of the elevator root ends from the plan and
use it as a template to make the balsa part. The rudder
balance tab, rudder bottom and fin base are made from
the 1/4" x 2" x 10" balsa sheet.
Note: Refrain from using excessive accelerator. Even hours
after it's sprayed on, residual accelerator can prematurely
and unexpectedly cure the CA you use later on nearby glue
joints. Unless you must handle or remove the part from your
building board right away, we recommend using no
accelerator at all.