Great Planes Extra 300S 40 Kit - GPMA0235 User Manual
Page 22
❏
13. Temporarily remove the firewall, then install the forward
fuselage top. Make sure the “R” and “L” on the fuselage top are
aligned with right and left fuse sides. Reinstall the firewall.
❏
14. Use medium CA to glue the two die-cut 1/8" birch ply
landing gear plates, then without using any glue fit the
landing gear plate to landing gear formers A (LGF-A) and
B (LGF-B). Fit the assembly into the fuselage as shown on
the plan and the following photo.
❏
15. No gluing yet. Fit the tank floor to the firewall and
LGF-A so the angle at the front of the tank floor matches
the right thrust angle of the firewall.
❏
16. Test fit former F-1D to the bottom of the fuselage in
the location shown on the plan. Note: On the left side of the
fuselage F-1D fits behind the firewall but on the right side of
the fuselage F-1D fits below the firewall. Bevel the forward
edge of F-1D where it contacts the firewall for the best fit.
Slip the forward fuselage bottom under the rubber bands
and position it on the bottom of the fuselage with the punch
marks facing outward.
❏
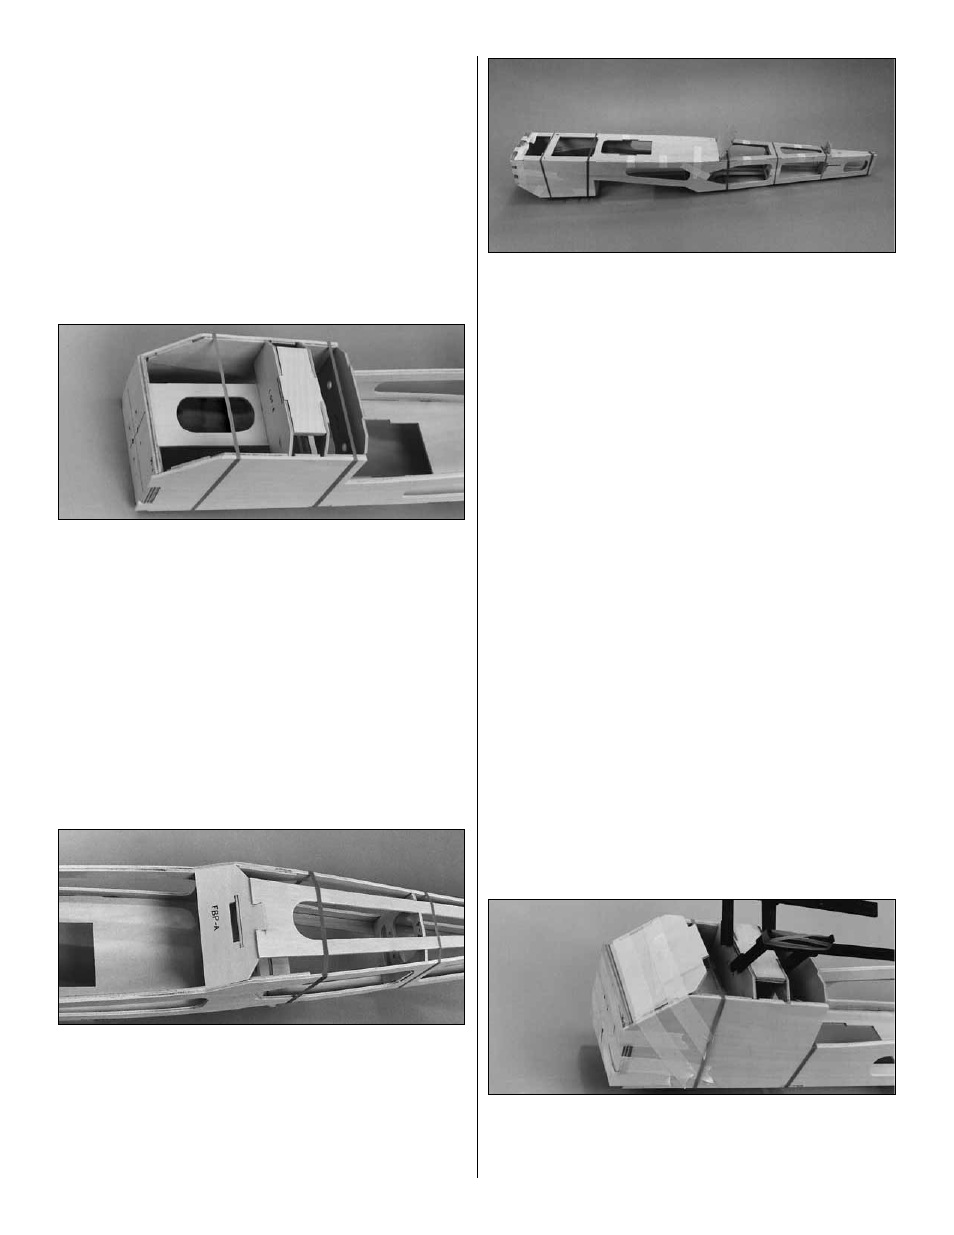
17. Temporarily fit the fuselage bolt plate A (FBP-A) to
the aft fuse bottom and F-3.
We're almost ready to start gluing. There's just a few more
things to do.
❏
18. Use masking tape to securely hold all the fuselage
pieces together. Tape the fuselage sides to the tops and
bottoms and the formers to the sides. Not all of the fuselage
pieces will be glued together at this stage but are held in
position to assure alignment. Only glue the parts you are
instructed to do so in the next step.
❏
19. Use thin CA to begin tack gluing the following pieces
checking alignment as you go. Glue former F-2B to the
fuselage sides but not the forward fuselage bottom. Glue
the forward fuselage top to the fuselage sides between
F-2B and F-3. Glue F-3 to the fuselage sides but not to
FBP-A. Glue the aft fuselage top to the sides, then glue F-4
and F-5 to the sides, top and bottom. Glue the aft fuselage
bottom to the sides at the rear of the fuselage–the bottom
fits between the fuselage sides not underneath them. Glue
the stab base in position with 30-minute epoxy. Do not
apply any glue to FBP-A, LGF-A or B, the forward
fuselage bottom, F-1D, or the firewall.
❏
20. Remove the masking tape and all the rubber bands.
Remove the firewall, F-1D, the forward fuse bottom, the
landing gear plates and LGF-A and B. Keep the stab base
taped to the fuse sides until the 30-minute epoxy cures.
❏
21. Use 30-minute epoxy to glue the firewall and F-1D in
position. Use masking tape, rubber bands or clamps to hold
them until the epoxy cures. Cut two 2-5/8" pieces from the
1/4"x1/4"x10" balsa stick to reinforce the corners behind the
firewall.
❏
22. Use 30-minute epoxy to glue the landing gear plates
to LGF-A and B and LGF-A and B to the fuselage sides.
Without using any glue, temporarily install the tank floor to
set the position of LGF-A.
22