Great Planes Extra 300S 40 Kit - GPMA0235 User Manual
Page 36
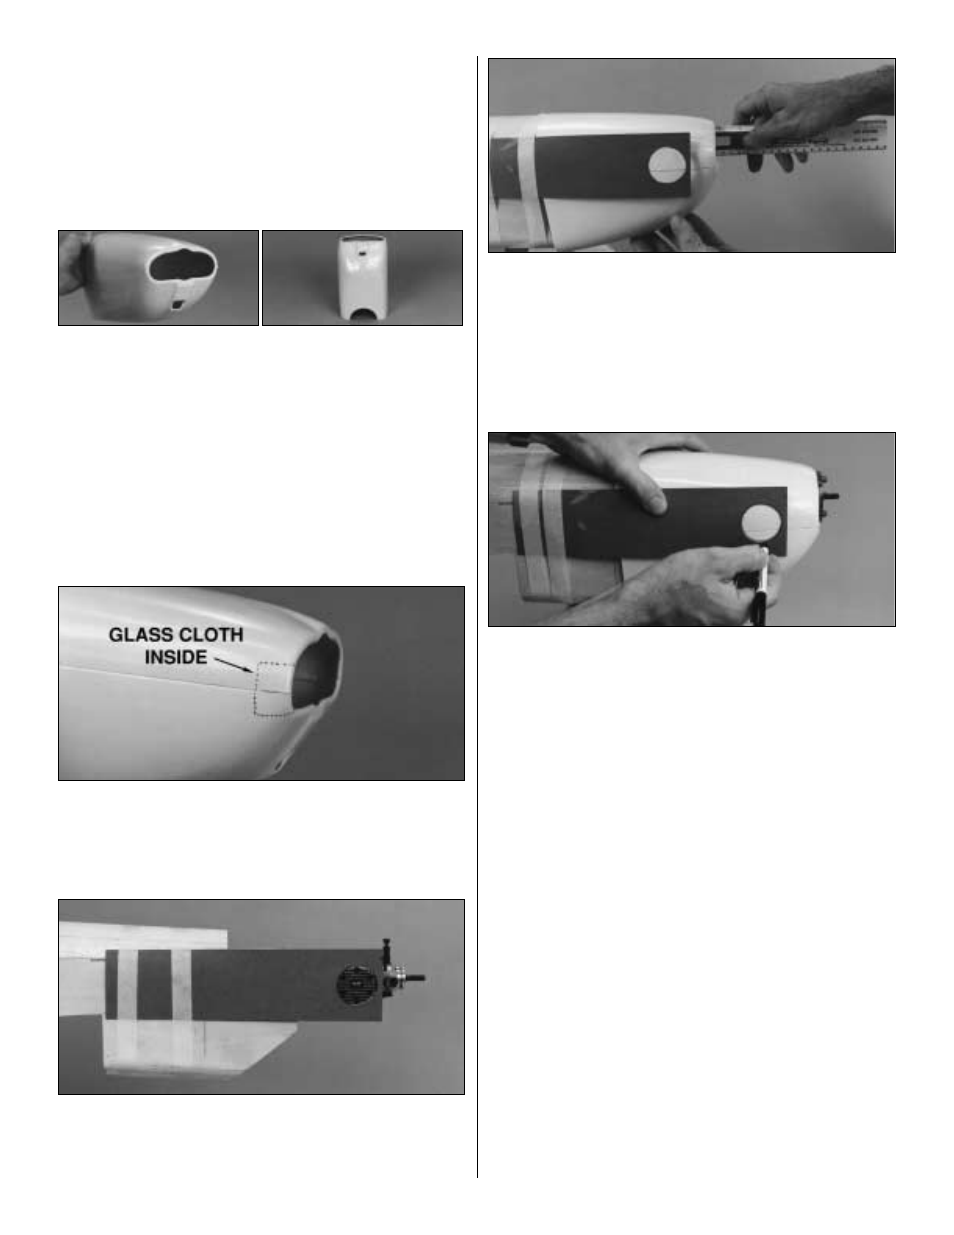
❏
2. Tape the two pieces together, then wick a small
amount of thin CA along the seams of the overlapping
joints. After the CA has cured remove the tape and make
sure you have thoroughly glued the two pieces together by
inspecting the glue joints and adding thin CA if necessary.
❏
3. Use a sharp hobby knife or a MultiPro with a sanding
drum to accurately cut the engine openings at the front of
the cowl and the air exit at the rear of the cowl.
❏
4. Use coarse sandpaper to thoroughly scuff the inside
of the front of the cowl on both sides where there is no
overlapping glue joint.
❏
5. Use 30-minute epoxy to glue a 1" strip of glass cloth
across the glue joint inside the front of the cowl on both sides.
❏
6. Use a piece of thin cardboard or plastic to make a
template for the cutout in the cowl for the head of the
engine. Tape the template to the fuselage side accurately
indicating the position of the head.
❏
7. Place the backplate of your spinner on the engine and
measure the distance between the firewall and the
backplate (it should be 4-3/4"). Remove the engine from the
fuselage, then position the cowl on the fuselage so the
forward edge is 1/8" aft of the measurement you just made.
Use a ballpoint pen to lightly mark the location of the rear of
the cowl on the fuselage top.
❏
8. Align the cowl with the mark you made on the
fuselage, then use a felt-tip pen to transfer the hole in the
template onto the cowl.
Note: The circle you mark on the cowl may be slightly aft of
the actual position of the head of the engine due to the
upward sweep of the template when the the cowl is in position
.
Hint: For the most accuracy, mount the engine to the
fuselage and remove only the cylinder head. Position the
cowl, then install the spinner backplate on the engine. Align
the cowl with the spinner backplate (instead of the
reference line you marked on the fuselage top),
then
transfer the hole in the template onto the cowl.
❏
9. Remove the cowl and template, then remount the
engine (or the cylinder head). Cut out the hole in the cowl,
then test fit it to the fuselage (you may have to temporarily
remove the needle valve so it does not interfere with the
cowl.) Adjust the position and size of the hole as needed.
The location of the hole determines the clearance between
the front of the cowl and the back plate of the spinner.
Hint: Cut the hole in the cowl undersize at first so you can
make adjustments to its position without having to oversize it.
❏
10. Once you have made the hole in the cowl to clear
the engine, place the cowl on the fuselage and fit the back
plate of your spinner on the engine.
36