Great Planes Extra 300S 40 Kit - GPMA0235 User Manual
Page 30
❏
3. Accurately cut the turtle deck sheeting pattern from
the fuselage plan. Use the pattern to make two turtle deck
sheets from the 3/32" x 3" x 24" balsa sheet you set aside
during wing construction.
❏
4. Test fit, then use medium CA to glue the bottom of the
left side turtle deck only to the aft fuselage top, the bottom
stringer and the stab.
❏
5. Use a paint brush or paper towel to apply the water and
alcohol solution to the outside of the turtle deck sheet. Little
by little carefully test bend the sheet around the formers and
stringers. If the sheet will not bend enough apply more water
and alcohol and carefully keep test bending.
❏
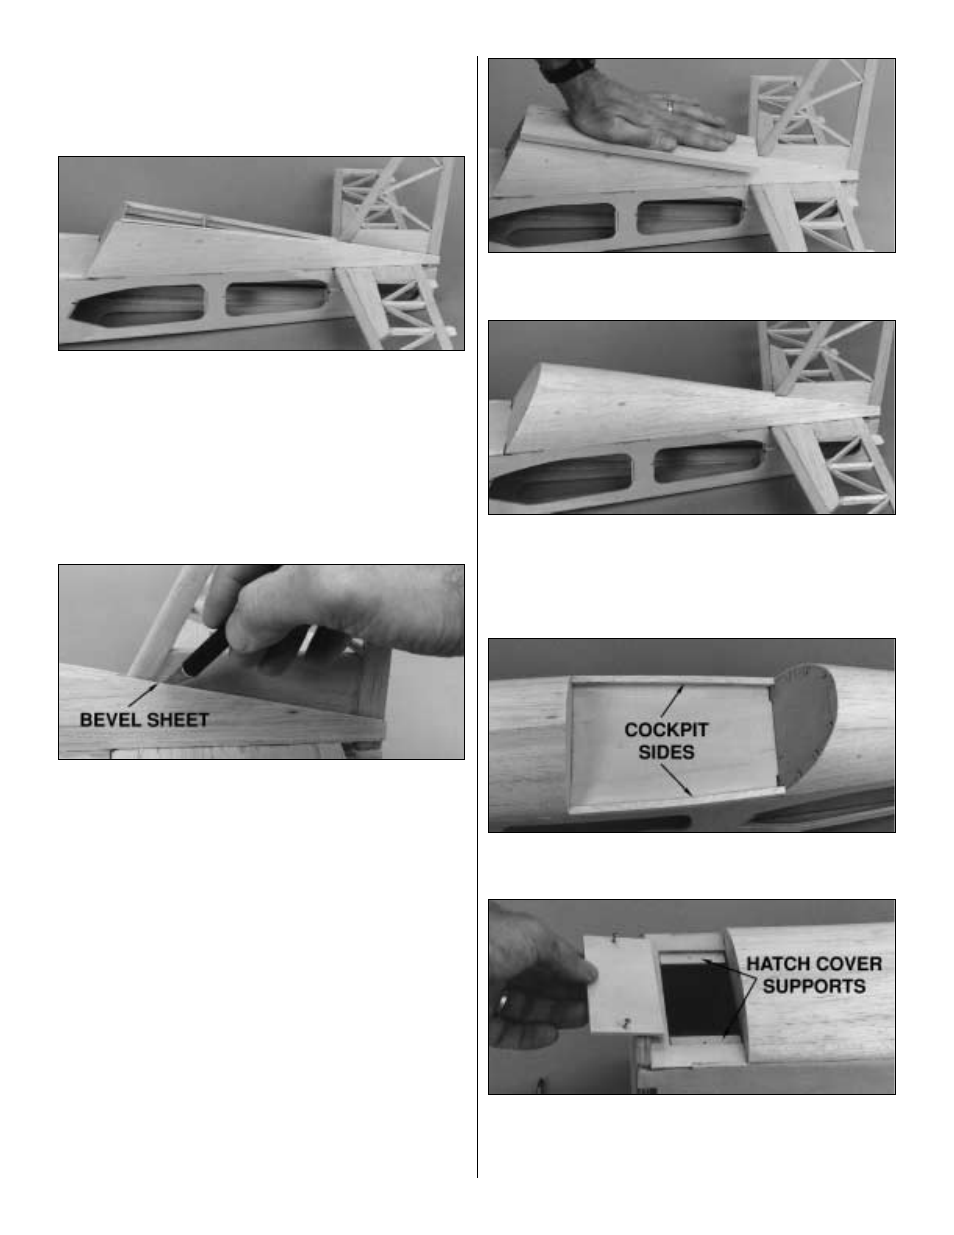
6. Once you can bend the sheet all the way around the
formers and to the top stringer, use a sharp #11 blade to
shave a bevel to the top edge of the sheet where it meets
the fin. Notice that the angle of the bevel becomes more
vertical toward the rear of the fin.
❏
7. When you have achieved a good fit between the top
of the sheet where it contacts the fin, use medium CA to
glue the sheet to the fin. Bend the sheet around the
stringers and formers, then use masking tape or clamps to
hold it in position. Use thin CA to glue the sheet to the
stringers and formers from the inside.
❏
8. Fit, bend and glue the right turtle deck sheet into
position the same way you did the left side. Since most of
the stringers won't be accessible from the inside you will
have to apply medium or thick CA to the stringers and
formers before you bend and clamp the sheet into position.
❏
9. Use your bar sander and 150-grit sandpaper to sand
the top of the turtle deck fuselage sheeting so it is flat and
even with the top stringers.
❏
10. Use medium or thick CA to glue the 3/8" x 2-3/4" x
10-3/4" turtle deck top sheet in position.
❏
11. Use your razor plane and your bar sander to shape
the turtle deck top sheet to match the contour of the turtle
deck and the shape shown on the plans. While carving and
sanding, be extremely careful as you reach the fin so you
do not accidentally nick it with your knife or sandpaper.
❏
12. Fit and glue the cockpit sides from the 1/4" x 1/4" x
24" balsa stick.
❏
13. Glue the die-cut 1/8" plywood hatch cover supports
to the underside of the forward fuse top as shown on the
plan. Test fit the hatch cover and make adjustments if
needed. With the hatch cover in position, drill a 1/16" hole
30