Mount the wing to the fuselage – Great Planes Extra 300S 40 Kit - GPMA0235 User Manual
Page 23
❏
23. After the epoxy from the two preceding steps has
fully cured, remove the tape and rubber bands. Glue the
forward fuselage top to the fuselage sides forward of F-2B.
❏
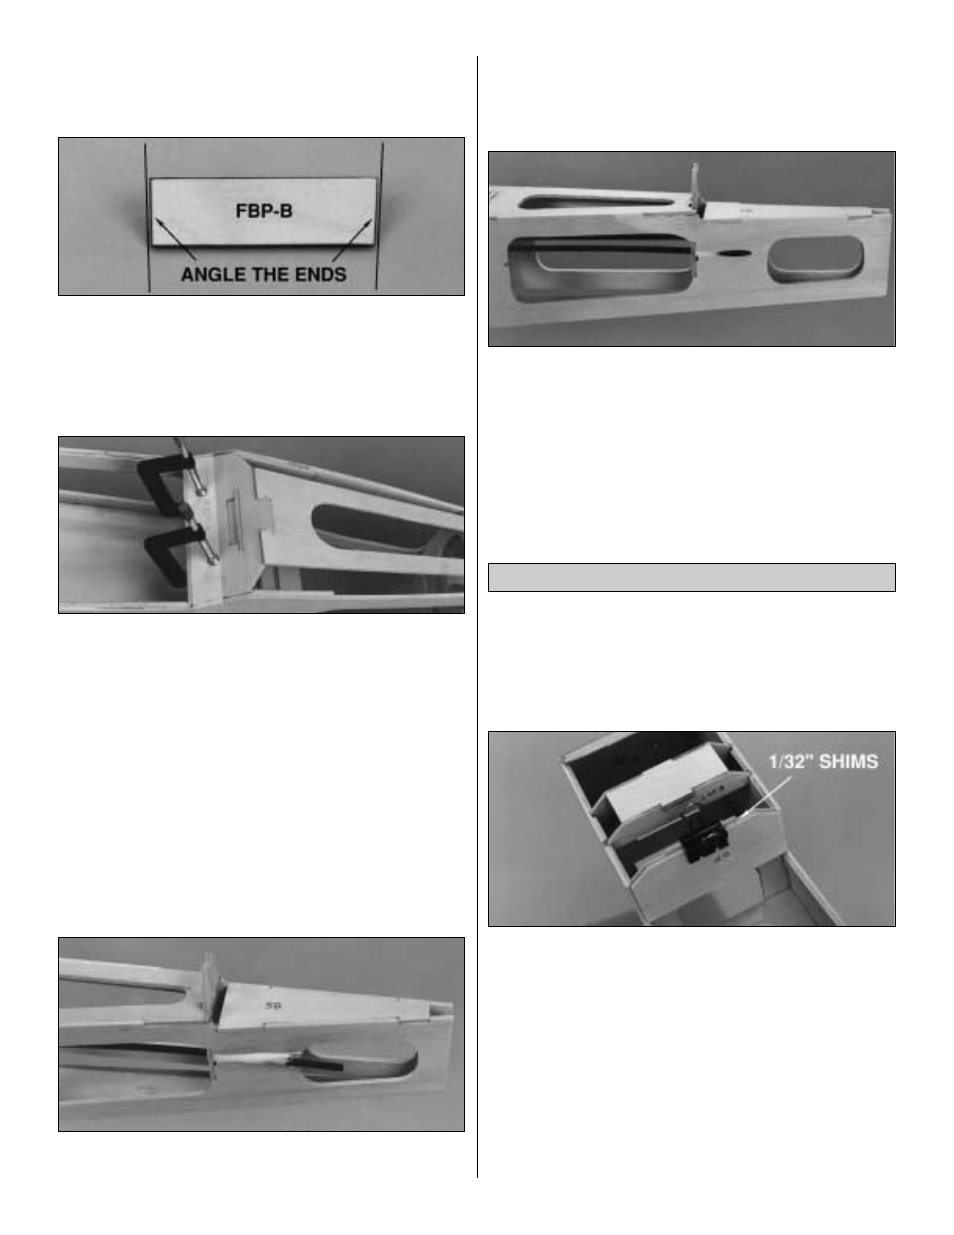
24. Remove the FBP-A from the aft end of the wing
saddle area. Test fit the shaped 1/4" x 1-3/8" x 4-1/2"
plywood fuselage bolt plate B (FBP-B) between the
fuselage sides where shown on the plan. Use your bar
sander to angle the ends of the bolt plate so it matches the
angle of the fuselage sides.
❏
25. Use 30-minute epoxy to simultaneously glue FBP-B
and FBP-A to each other and the fuselage. After the epoxy
cures, glue FBP-A to the aft fuselage bottom by adding a
fillet of medium CA to the notches. Use your bar sander to
bevel the forward edge of the fuse bottom so it is flush and
matches the angle of FBP-A.
❏
26. Cut both of the 36" outer pushrod guide tubes to a
length of 24". Carefully (so you don't snap them in two)
sand the outside of the tubes with coarse sandpaper so the
glue will stick.
❏
27. Use a round file or a #11 knife to bevel the holes in
F-3 so the guide tubes will slide through. Install the guide tubes
in the formers. Approximately 1" of the guide tubes should
protrude past the slots in the aft end of the fuselage sides.
❏
28. Glue the pushrod tubes to the slots at the end of the
fuselage with microballoons and epoxy. Completely fill the
slot with the microballoons and epoxy so it can be sanded
flush later. Glue the pushrod tubes to the formers with
medium CA.
Note: Talcum powder may be substituted for microballoons.
❏
29. After the epoxy has cured use your bar sander and
150-grit sandpaper to sand the pushrod tubes and epoxy
filler flush with the fuselage sides.
This is as much as we can do to the fuselage until we
mount the wing. From this point on it helps to have a cradle
or a box that you can place the fuselage onto upside down
while you mount the wing.
Refer to the fuselage plan often to make sure you
understand the location of the parts discussed in the
following steps. Unless otherwise noted, all the parts referred
to while mounting the wing to the fuselage are die-cut
1/8" plywood.
❏
1. With the punch marks facing forward, temporarily
clamp the dowel plate (DP) to F2-B so the edges align,
with an approximately 1/32" shim in between. You may use
playing cards, business cards or similar thin card stock for
the shim. Place the wing in the fuselage. The wing should
be nearly final sanded at this point.
❏
2. Cut the 3/16" x 1-3/4" x 10" balsa sheet into two 5"
long pieces for the wing root spacers. Position one of the
3/16" wing root spacers between the wing and the fuselage
so the aft edge of the spacer is fully contacting the forward
wing joiner. Use a ballpoint pen to mark the position of the
spacer on the fuselage.
Mount the Wing to the Fuselage
23