Assemble the fuselage sides build the fuselage – Great Planes Extra 300S 40 Kit - GPMA0235 User Manual
Page 20
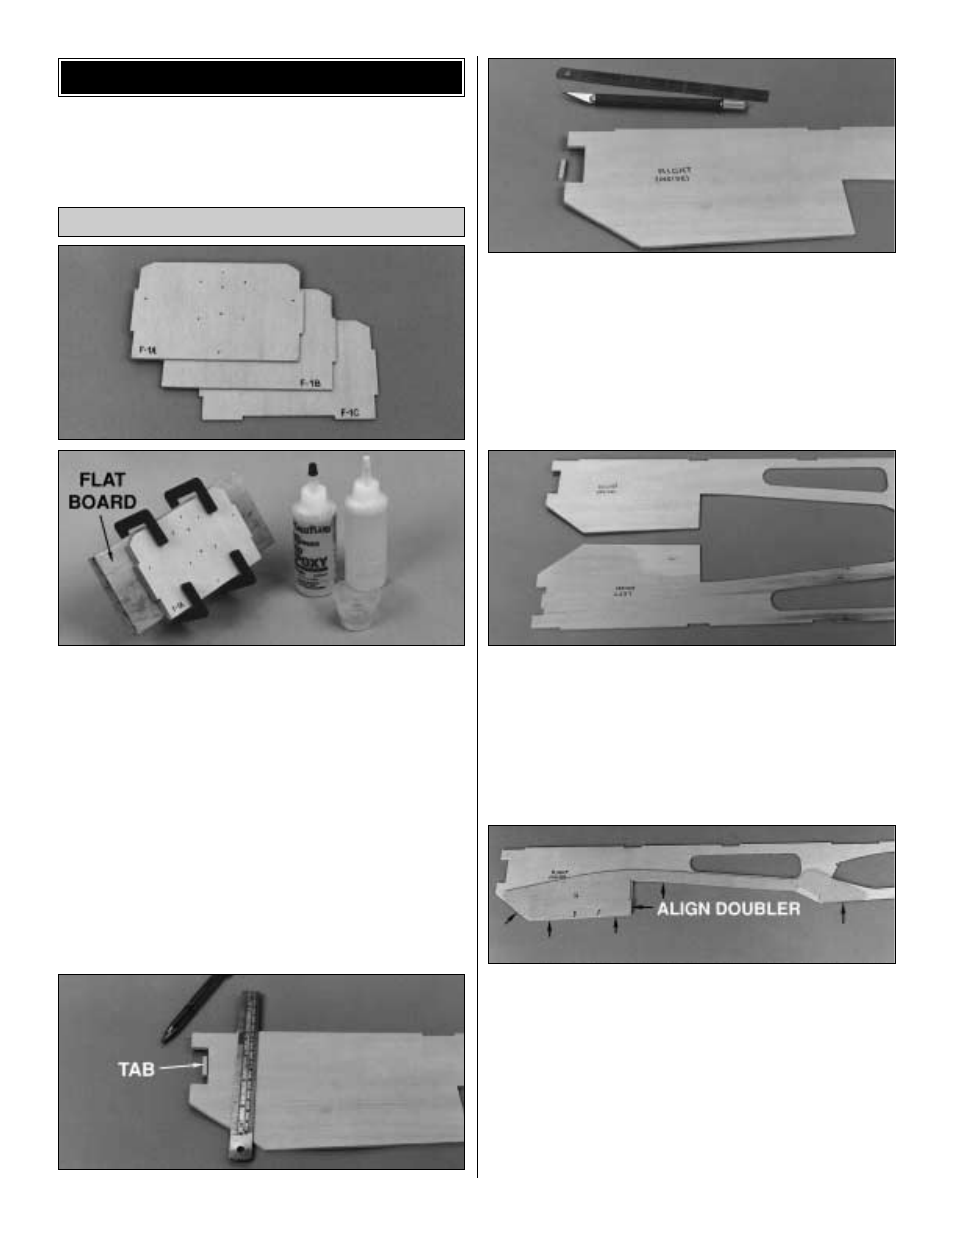
Note: All the fuselage parts from step 1 through step 25
are die-cut 1/8" plywood.
❏
1. Use 30-minute epoxy to glue the firewall formers
F-1A, F-1B and F-1C together. Make sure the embossed
label on each former is facing forward and the top edges
and notches of each former are aligned. Wipe away excess
epoxy before it cures. From now on this assembly will be
referred to as the firewall.
Note: If the formers are warped, simply clamping them
together may not “cancel out” the warps. It is best to clamp
the formers to a table or a flat board.
❏
2. Use a straightedge and a ballpoint pen to draw a line
across the
tab connecting the notches in the front of one of
the fuselage sides. Use the line as a guide to remove the
tab with a #11 knife blade. As shown in the photo, label this
as the RIGHT (inside) fuselage side.
❏
3. Lay the other fuselage side next to the right side in a
mirrored image and label it on the inside as the LEFT. It is
important that you lay the fuselage sides in a mirrored
image to insure that you build a right and a left.
❏
4. Use medium CA to accurately glue the RIGHT
fuselage doubler (labeled “R”) to the inside of the right
fuselage side. Make sure the doubler aligns with the fuselage
side at the points indicated by the arrows in the photo.
❏
5. Glue the left fuselage doubler to the left fuselage side
in the same manner.
Assemble the Fuselage Sides
BUILD THE FUSELAGE
20