Great Planes Extra 300S 40 Kit - GPMA0235 User Manual
Page 11
❏
2. Use the same procedure to bevel the leading edge of
the rudder.
❏
3. Cut a notch in the leading edge of the rudder for the
balance tab. The notch should be the same height as the
balance tab (1-3/8") and approximately 1/8" deep or, as
deep as the “V” on the leading edge. Make the balance tab
from the remaining piece of balsa left over from the
1/4" x 2" x 10" sheet. Glue the balance tab to the rudder
with medium CA, then glue the 1/8" balsa tip to the top of
the rudder.
Let's get back to the elevators.
❏
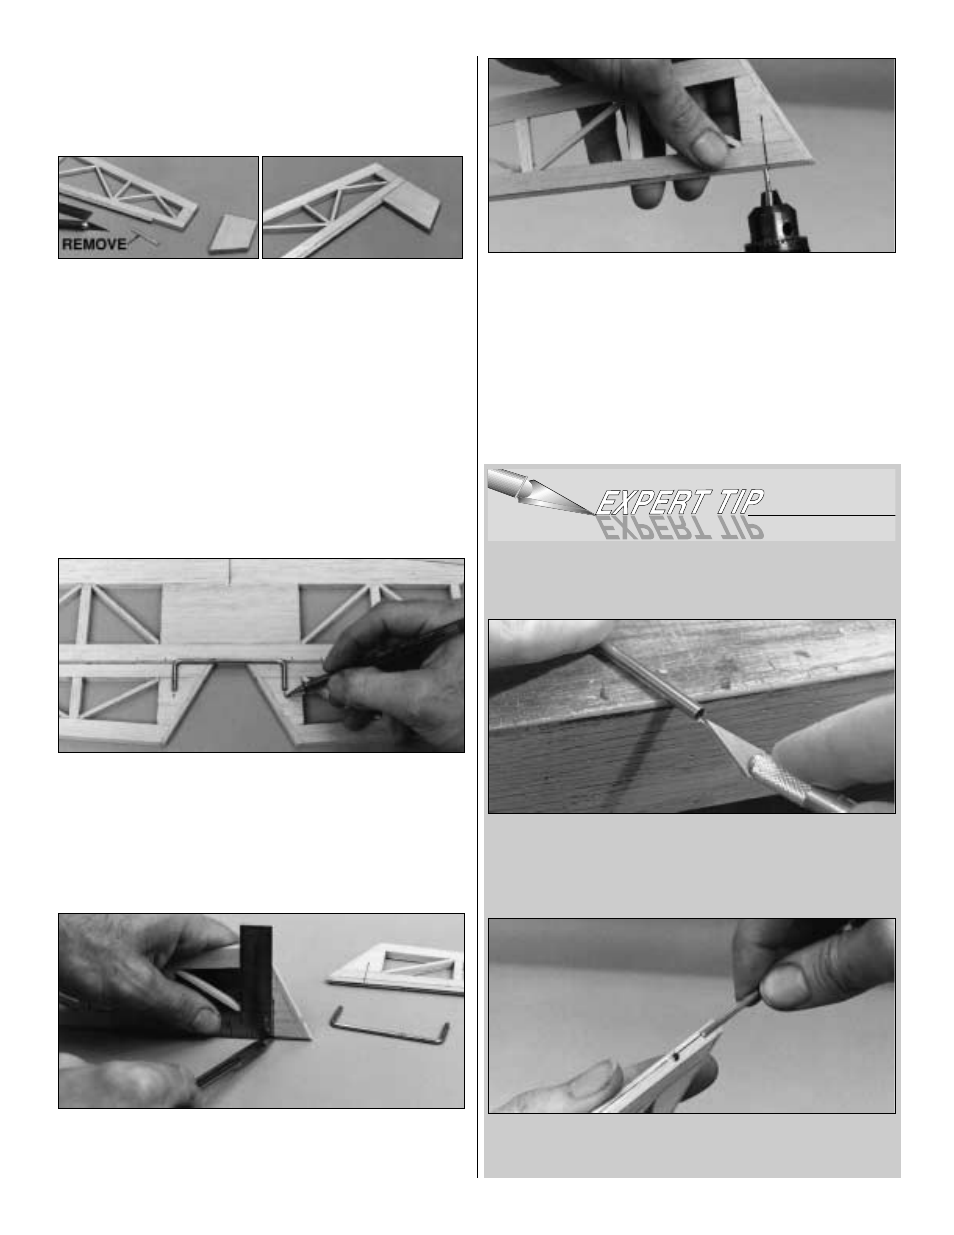
4. Make sure the tips of the elevators are even with the
tips of the stab, then lay the elevator joiner wire on top of
the elevators in the position shown on the plan. Use your
ballpoint pen to lightly mark the centerline of the ends of
the joiner wire on the stab.
❏
5. Remove the elevators from the stab and use a
draftsman's square to extend the line you marked on both
elevators to the leading edge.
❏
6. Drill a 3/32" pilot hole into the leading edge of the
elevators. As you drill each hole keep the drill aligned with
the top and bottom surface of the elevator and the
reference line you made in the previous step. Redrill the
holes with a 1/8" drill bit.
❏
7. Refer to the Expert Tip that follows, then cut a 1/8"
groove in the leading edge of both elevators to recess the
joiner wire.
HOW TO CUT A GROOVE FOR THE ELEVATOR
JOINER WIRE
A. Use a #11 knife blade to sharpen the end of a piece of
1/8" brass tube. Roll the tube as you
carve the end. If you
have a file or a cut-off wheel it helps to sharpen the outside
of the end of the tube as well.
B. Use the sharpened tube to
carefully gouge the leading
edge of the elevators. You'll have to make a few cuts to
make the recess deep enough for the joiner wire.
11