Great Planes Extra 300S 40 Kit - GPMA0235 User Manual
Page 25
❏
10. Remove the wing from the fuselage and securely
glue the DP in position. Using the punch marks in the DP
as a guide, drill a 1/4" hole through the DP and only the
front wing joiner. Do not drill through the aft wing joiner.
❏
11. Slightly round one end of both 1/4" x 1-1/8" wing
dowels, then use epoxy to securely glue them in position
so the rounded ends are facing forward.
❏
12. Drill a 1/4" hole through the punch marks in F-2A. After
the epoxy from the previous step has fully cured, test fit F-2A
on the wing dowels (it doesn't matter which way the notch
faces). Make adjustments to the holes in F-2A if needed.
Hint: Even if the holes align perfectly with the dowels, it
may be easier to install the wing for a days flying session if
you slightly enlarge the holes in F-2A. You want the wing to
easily slide into position, but with no free play.
❏
13. Replace the wing into the fuselage. Recheck
alignment. Use medium CA to glue F-2A to the front of F-2B.
Refrain from allowing CA to contact the wing dowels.
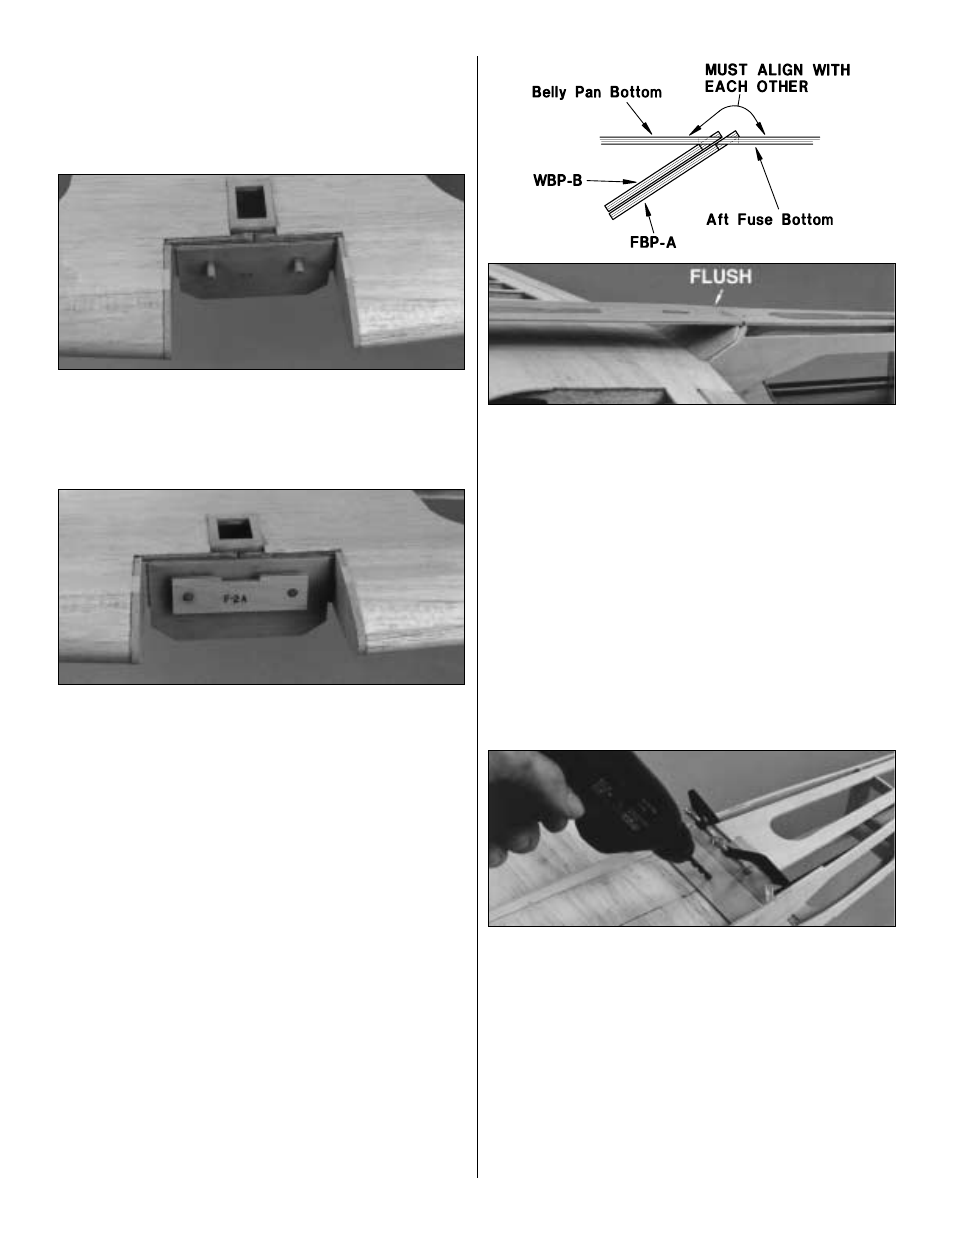
❏
14. Position the wing bolt plate B (WBP-B) on top of
FBP-A at the trailing edge of the wing with a 1/32" shim
between them.
❏
15. Sand a bevel on the aft edge of the belly pan
bottom to match the angle of FBP- A.
❏
16. Position the aft edge of the belly pan bottom on
WBP-B. Adjust the notch in the TE of the wing so that WBP-
B can be positioned to allow the belly pan bottom to
become flush with the aft fuse bottom.
❏
17. Remove the belly pan bottom. Recheck the alignment
of the wing, then carefully glue WBP-B to the wing only.
IMPORTANT: Hold the wing in alignment by clamping
WBP-B to FBP- A & B until you drill the wing bolt hole (see
photo below).
❏
18. Test fit, then glue the belly pan sides to the wing
sheeting and DP and WBP-B.
❏
19. Test fit, then glue WBP-A to WBP-B and the
belly pan sides.
❏
20. Drill a #10 or 13/64" hole through the wing bolt
plates (A & B) and the fuselage bolt plates (A & B).
❏
21. Remove the wing, then tap the threads into the fuse
bolt plates with a 1/4" x 20 tap. After tapping the fuselage
bolt plates, saturate the threads with thin CA. Allow the CA
to fully cure, then re-tap the threads.
❏
22. Drill a 17/64" clearance hole through the wing bolt
hole in the wing.
❏
23. Mount the wing to the fuselage with the 1/4-20 nylon
wing bolt.
25