Install the stabs & elevators – Great Planes Yak-55M 50-55cc Sport / 3D ARF - GPMA1230 User Manual
Page 9
9
❏
❏
10. Glue a 5/16" x 1" [7.9mm x 25mm] wood dowel into
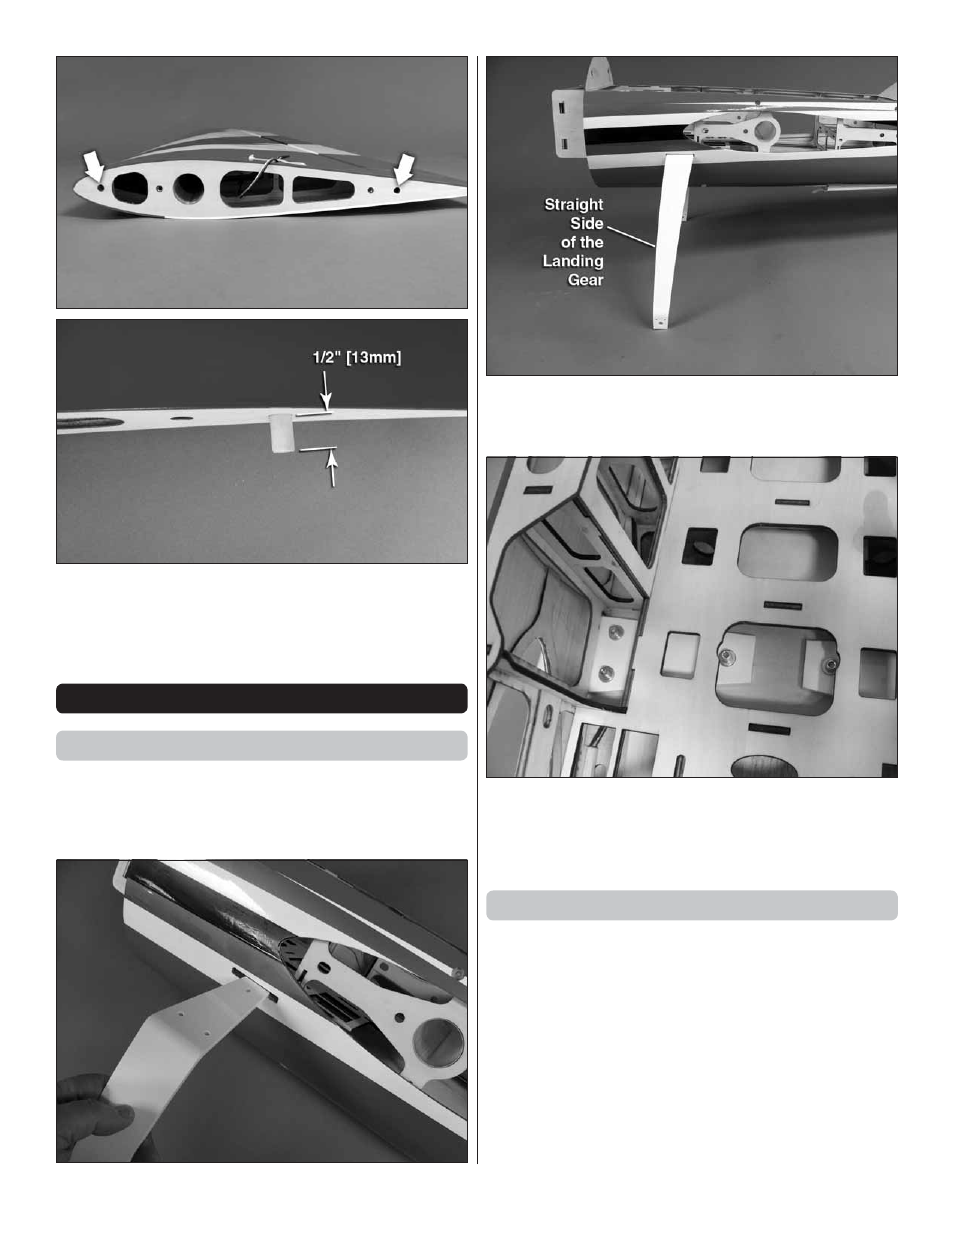
the two outermost holes in the wing root. The dowel should
extend out of the wing 1/2" [13mm].
❏
11. Repeat steps 1- 10 for the left wing panel.
ASSEMBLE THE FUSELAGE
Install the Main Landing Gear
The following steps explain mounting the main landing gear.
We will fi nish the tail wheel gear and installation of the wheels
later in the manual. You will fi nd the fuselage much easier to
work with when the landing gear is installed.
❏
1. Slide the landing gear into the fuselage on both the left
and right side of the fuselage. The straight side of the landing
gear should be towards the front of the fuselage.
❏
2. Secure the landing gear with 8-32 x 3/4" SHCS, #8 lock
washers and #8 fl at washers. Be sure to apply thread locker
to the screw threads.
Install the Stabs & Elevators
❏
1. Including the servo lead from the servo, you will need
58" [1475mm] of wire to reach from the elevator to the radio
compartment in the airplane. For a Futaba servo this means
you will need some combination of servo leads to equal 45"
[1145mm] or more. We used a 12" [305mm] and 36" [914mm]
lead plugged together. Be sure to secure all of the connections
with heat shrink tubing, tape or some other method to secure
all of the connections. If you have the ability make your own
leads you may choose to do this and eliminate one of the
connections. Make two of these extensions. Install the rubber
servo pads and metal grommets on the servos.