Install the canopy, pilot and instrument panel – Great Planes Yak-55M 50-55cc Sport / 3D ARF - GPMA1230 User Manual
Page 25
25
part on top of them as shown. Drill a 1/16" [1.6mm] hole through
the holes in each corner of the top piece and into each of the
blocks. Insert and then remove a #2 x 3/8" [9.5mm] screw into
each of the holes. Apply a couple of drops of thin CA glue
into the holes to harden the threads. After the glue has cured
secure the top of the tray with four #2 x 3/8" [9.5mm] screws
and #2 fl at washers.
❏
3. Cut the Velcro straps included with the kit to the proper
length to secure your battery and receiver. Install both the
battery and the receiver onto foam and secure them with the
Velcro. For our installation we installed the battery under the
tray and installed the receiver on top. However, you may install
the components in either location.
❏
4. Install the radio switch harness and charge jack into the
side of the fuselage. Be sure to leave at least 8" between the
radio switch and any of the components of the engine and
the ignition system, including the ignition switch.
5. Make all of the servo connections with the receiver. Secure
the battery connection to the switch lead with tape, heat shrink
tubing or some other method for securing the wires.
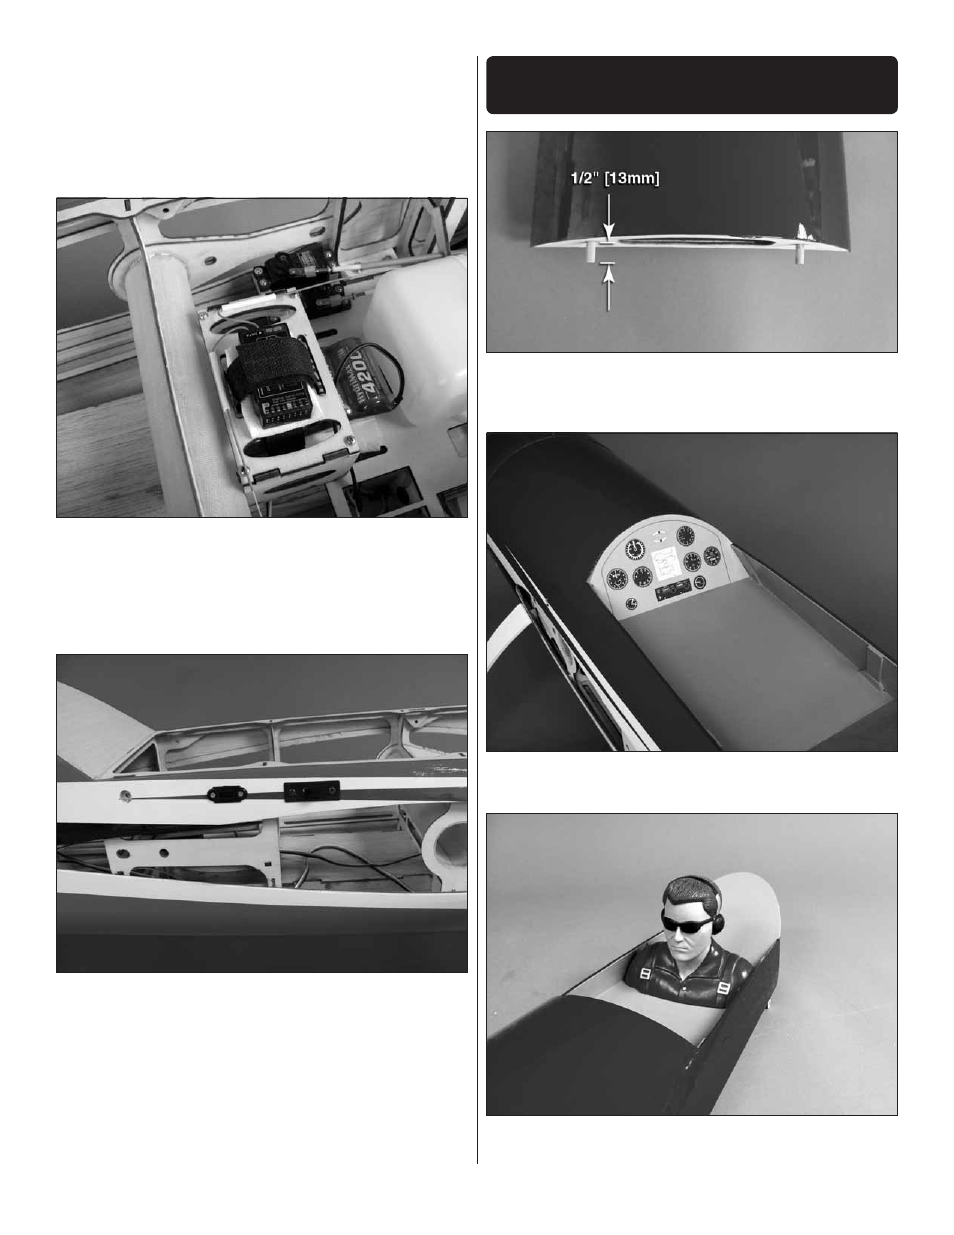
INSTALL THE CANOPY, PILOT
AND INSTRUMENT PANEL
❏
1. Glue the two 1/4"x 3/4" [6mm x 19mm] dowels into the
front of the fuselage hatch. The dowels should extend from
the front of the hatch 1/2" [13mm].
❏
2. Cut the instrument panel decal and then put it place in
the front of the cockpit.
❏
3. If you will be installing a pilot, install it securely in the
cockpit.