Great Planes Yak-55M 50-55cc Sport / 3D ARF - GPMA1230 User Manual
Page 22
22
❏
3. Install the cowl onto the fuselage. The cowl should over
lap the fi rewall approximately 1/8" [3.2mm]. Using the lines
you drew on the blocks, measure forward 1" from the mark
you made. Drill a 3/32" [2.4mm] hole through the cowl and the
block. Use the reference marks you made on the back of the
fi rewall to locate the blocks and drill a hole. Do this for all of
the cowl mounting blocks. Install and then remove a #4 x 1/2"
[13mm] screw into each of the holes you made. Apply a drop
of thin CA to harden the threads. Allow the glue to harden.
❏
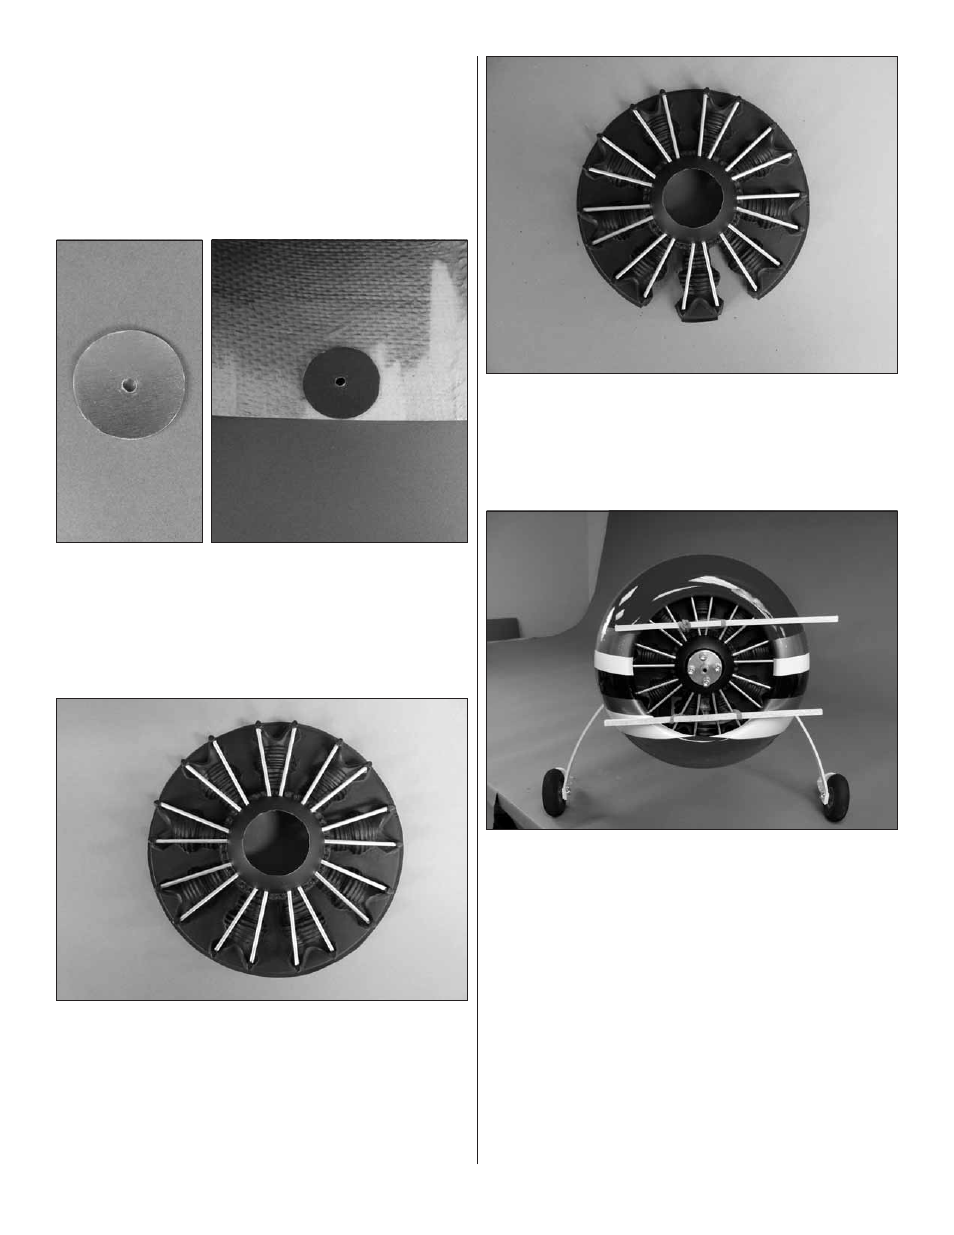
4. Locate the aluminum cowl mounting disks. Sand one
side of each disk with 220 grit sandpaper and then clean
them with alcohol. Lightly sand inside the cowl at each of the
mounting holes. Clean the area with alcohol. Using 5-minute
epoxy, glue a disk to the cowl at each of the mounting holes
you drilled. Be sure to align the hole in the disk with the hole
you drilled in the cowl.
❏
5. Drill 1/8" [3.2mm] holes in the dummy engine to accept
the 1/8" x 2-1/2" [3.2mm x 64mm] aluminum tubes. Insert
the tubes into the holes in the dummy engine. On the back
side of the dummy engine apply epoxy to the tubes to secure
them in place.
❏
6. To allow cooling air to fl ow over the engine cylinder
you need to cut the dummy engine as shown. This allowed
enough cooling air for our installation. Should you fl y in hotter
conditions or use the minimum amount of oil required for the
engine, you may also wish to cut away the dummy engine
cylinder to allow more airfl ow.
❏
7. Place the dummy engine into the cowl. Mount the cowl
to the fuselage with the cowl mounting screws. Thread a #64
rubber band through the aluminum tubes in the dummy engine
on the top and bottom half of the engine. Slide a balsa stick
through the rubber bands and place the sticks against the
cowl.
(If you chose not to install the tuned pipe you will have
a 1/4" x1/4" x24" balsa stick left over. Cut the stick in half. If
you have used the stick you will need to provide a stick to
complete the installation)
This will pull the dummy engine tight
to the inside of the cowl. Position the cowl where it needs to
be located. Once you have it properly positioned, carefully
remove the cowl.
❏
8. Using thick CA, tack glue the dummy engine to the cowl
in several spots. Re-install the cowl to verify the position of
the dummy engine. Make any additional adjustments / cutting
away of the dummy engine to achieve a good fi t. Once you are