Great Planes Yak-55M 50-55cc Sport / 3D ARF - GPMA1230 User Manual
Page 20
20
❏
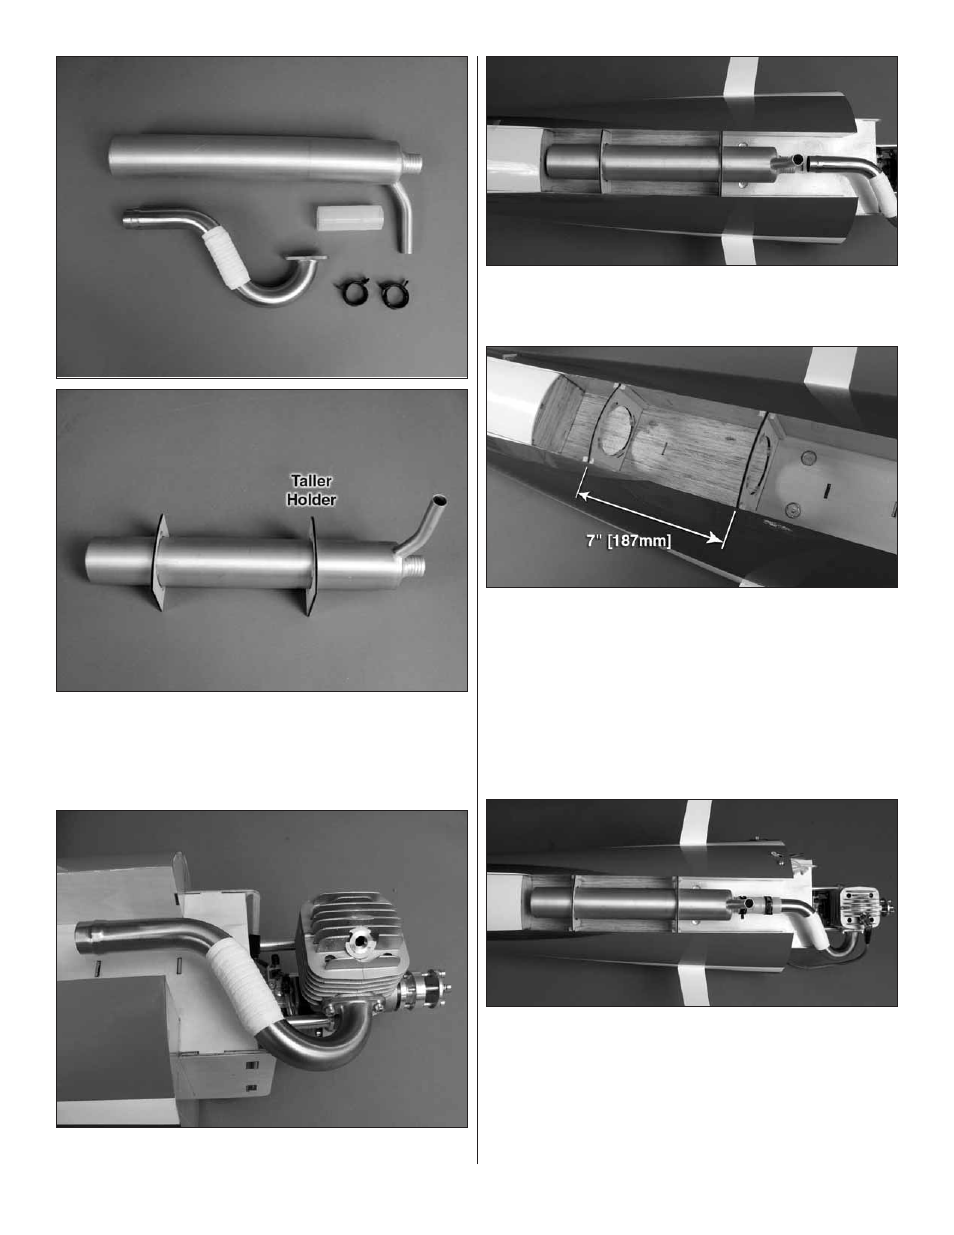
4. Gather all of the canister components together. Test fi t
the canister to the holders. The taller of the plywood holders
should be at the front of the canister and the shorter holder
towards the rear. The canister should fi t slightly loose between
the silicone holders.
❏
5. Temporarily mount the exhaust header to the engine.
❏
6. Test fi t the canister and holders into the opening in the
fuselage. When you are satisfi ed everything fi ts well, remove
the canister and remove the holders from the canister.
❏
7. Insert the taller of the two holders into the fuselage. Glue
it on the seam where the plywood meets balsa wood. Glue
the shorter holder in place 7" [187mm] back from the forward
holder. Make supports for the holders from the 1/4 x 1/4 x 24"
[6mm x 6mm x 610mm] balsa stick included in the kit. Cut
the sticks to length to fi t the holders. Glue the sticks to the
holders and the tunnel wall. The canister holders are already
fuel proofed but you should take a few minutes to fuel proof
the sticks. This can be done by brushing a small amount of
epoxy over the bare wood.
❏
8. Slide the canister into the holders. Slide the coupling
and the clamps onto the exhaust header and the secure the
header to the engine. Slide the coupler in place so that there
is approximately 1/4" [6mm] between the end of the canister
and the exhaust header. Be sure that the end of the canister
does not hit the back of the tunnel. You need to leave room
for the canister to expand when it gets hot. Be sure the lead
from the ignition module is not contacting the muffl er.