Install the fuel tank – Great Planes Yak-55M 50-55cc Sport / 3D ARF - GPMA1230 User Manual
Page 17
17
1" [25mm] on one end of each of the tubes with 200 grit
sandpaper. Insert the tubes into the hole you drilled in the
fi rewall. Be sure to insert the smooth end of the tube fi rst so
that the roughened end contacts the fi rewall. Apply glue to
the roughened end of the tubes and then make the end of
the tube fl ush with the fi rewall.
❏
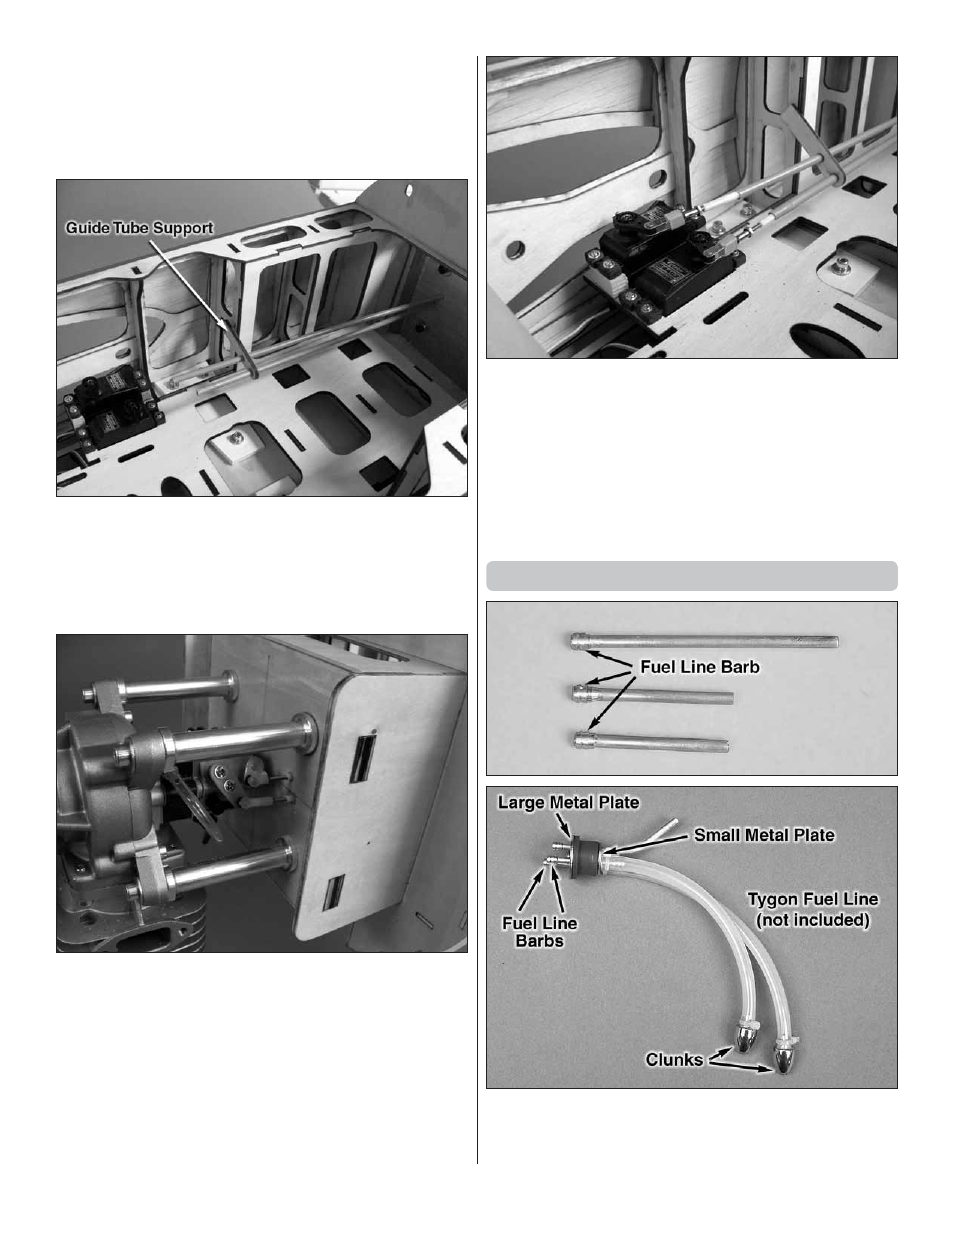
9. Slide the plywood guide tube support over both tubes.
(If you are not installing the choke servo then just slide the
tube over the single pushrod tube.) Slide it forward until it is
at the former as shown.
Do not glue the support in place!
Cut the tubes so that they end approximatey 2" [51mm] before
the servo arms.
❏
10. Thread a 2-56 x 1" [25mm] threaded rod into the end
of two white nylon inner pushrod tubes (You only need to do
one tube if you are not using the servo activated choke) and
then screw the nylon ball link connectors to the wires. Slide
the pushrods into the plastic tubes you glued to the fi rewall.
Snap the ball links onto the balls. Be sure that you use the
pushrod with the shortened ball link for the choke.
❏
11. Cut the inner white nylon pushrod to the proper length for
the position of the servos. Install a 2-56 x 1" [25mm] threaded
rod into the end of the pushrod tube followed by a 2-56 nut
and a 2-56 metal clevis and silicone clevis keeper. When you
are satisfi ed with the installation, glue the plywood guide tube
to the bulkhead. Position it so that the tubes make as straight
an exit through the fi rewall as possible.
Install the Fuel Tank
❏
1. Assemble the fuel tank stopper assembly with the fuel
tubes as shown. The easiest way is to fi rst solder a fuel line
barb (not included, Dubro Fuel Line Barb DUB0670) at the