Complete the radio installation – Great Planes Yak-55M 50-55cc Sport / 3D ARF - GPMA1230 User Manual
Page 24
24
❏
❏
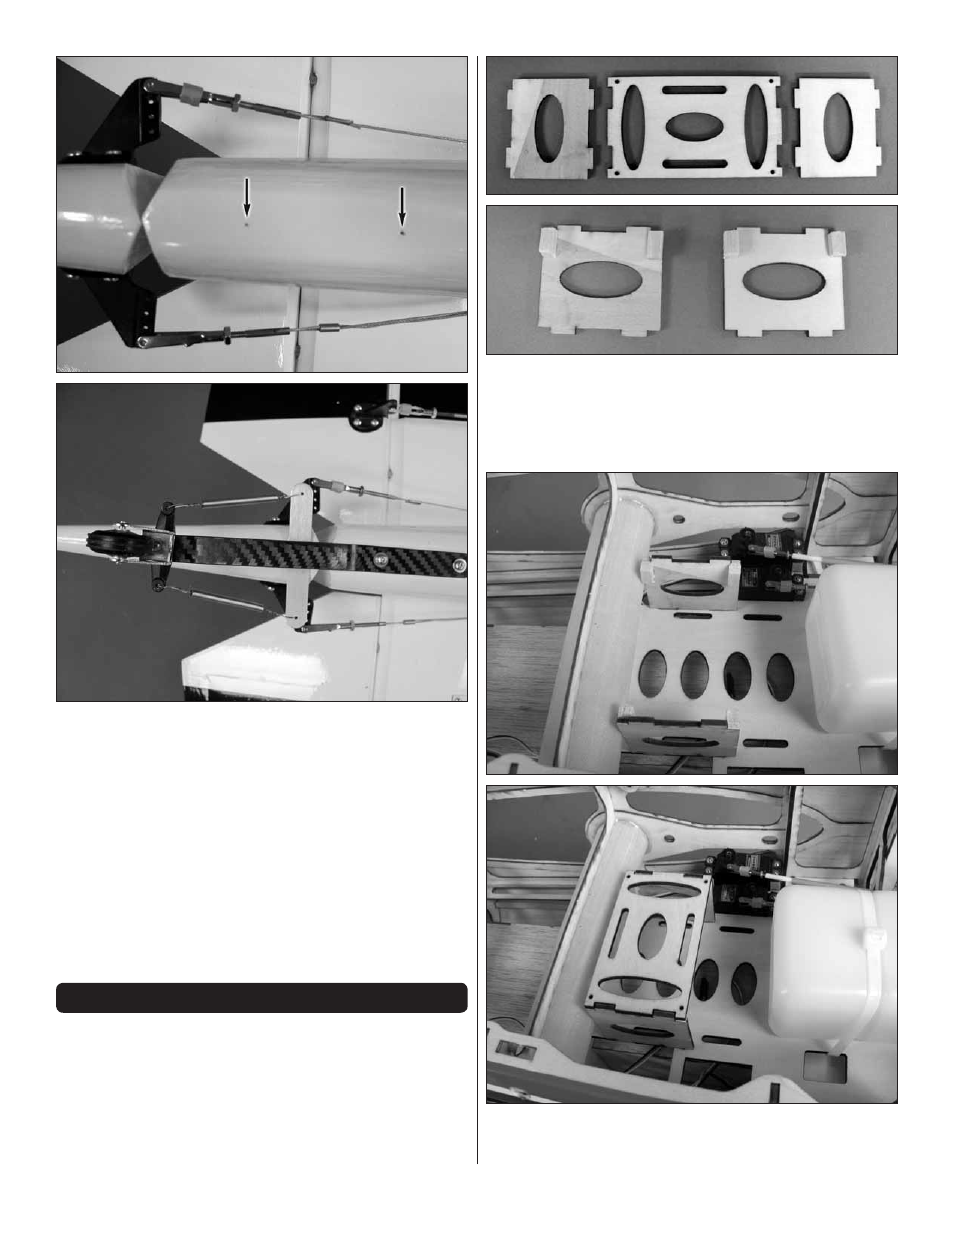
6. At the rear of the fuselage you will fi nd two small
pilot holes. Drill a 3/32" [2.4mm] hole through the two holes.
Insert and then remove a #4 x 1/2 [13m] screw into each of
the holes. Apply a couple of drops of thin CA glue into the
holes to harden the threads. Mount the tail wheel bracket to
the fuselage with the screws and a #4 fl at washer and lock
washer. Center the rudder servo and the rudder. Attach a
spring to each side of the control horn.
COMPLETE THE RADIO INSTALLATION
The following instructions explain installation of a tray for
mounting the battery and receiver. We found that for 3D fl ying
we added a small amount of tail weight to achieve the best
balance for this type of fl ying. If that is your intention for this
airplane, you may wish to try to mount the battery/receiver
further back into the fuselage rather than adding any weight
to the tail.
❏
1. Locate the three plywood parts shown. These will become
the servo / battery tray. Glue two 1/4" x 1/4" x 5/8" [6mm x
6mm x 15mm] hardwood blocks to both of the plywood parts
as shown. The blocks should be installed even with the corners
of the part.
❏
2. Glue the two side pieces into the slots in the tray inside of
the fuselage. Once the glue has hardened, place the remaining