Install the main & tail wheels – Great Planes Yak-55M 50-55cc Sport / 3D ARF - GPMA1230 User Manual
Page 23
23
satisfi ed, permanently glue the dummy engine to the cowl. The
dummy engine needs to be glued to the cowl with a mixture of
5-minute epoxy and micro balloons. The addition of the micro
balloons will prevent the glue from running.
❏
9. In order to provide suffi cient cooling to the engine you
must provide openings for the air to exhaust out of the cowl. If
you installed either the canister or tuned pipe there is suffi cient
exhaust provided by the tunnel. If you are using the Pitts style
muffl er you will need to provide an opening in the bottom of
the cowl approximately 3-1/2" x 3-1/2" [89mm x 89mm].
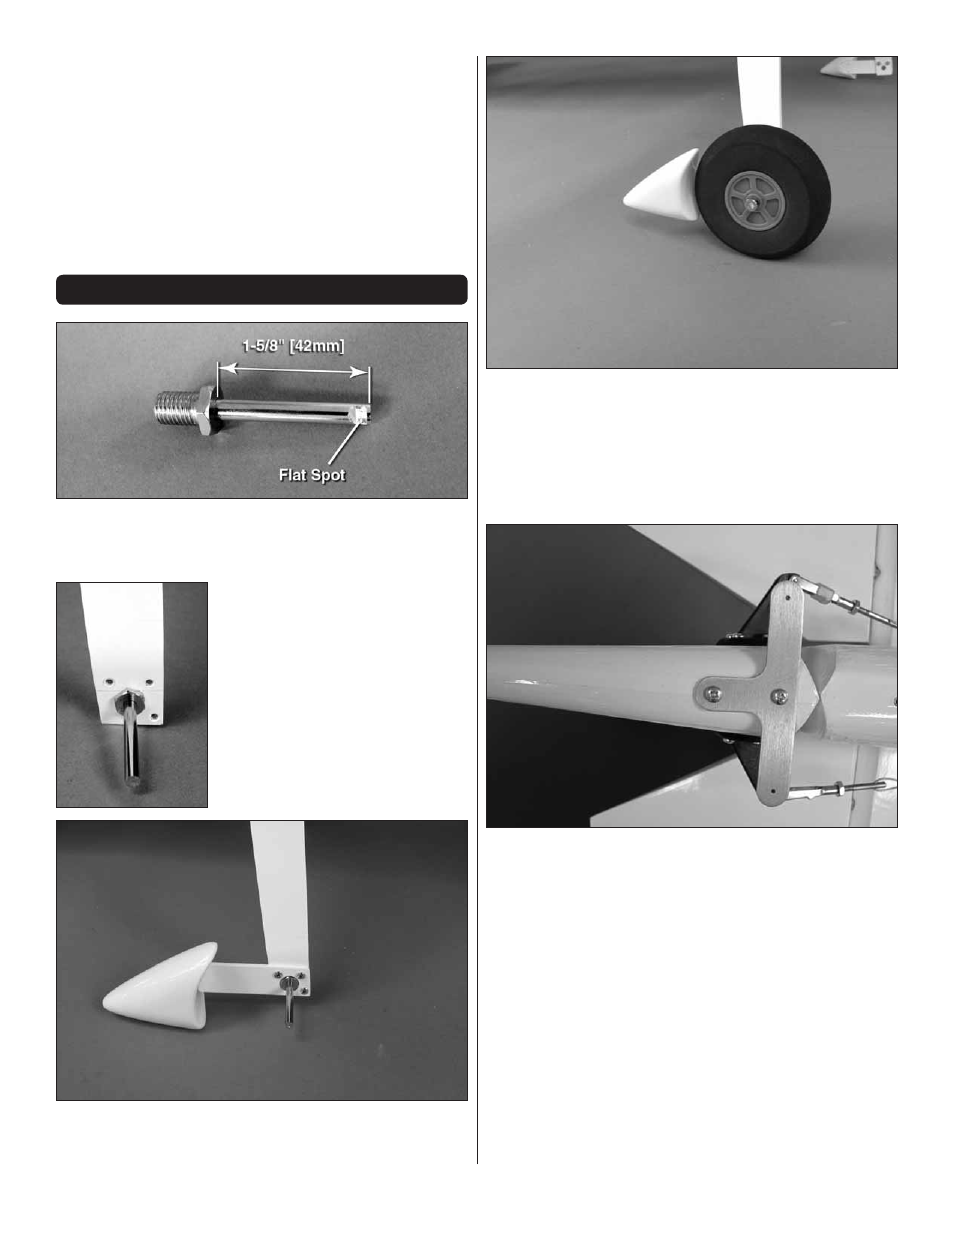
INSTALL THE MAIN & TAIL WHEELS
❏
❏
1. Cut each of the 2" [52 mm] long axles to a length of
1-5/8" [42mm]. Make a fl at spot in the end of the axle. This can
be done with a small fi le or high speed motor tool.
❏
❏
2 Install the axles to the landing
gear with the large axle nuts.
❏
❏
3. Secure the wheel spats to the landing gear with three
4-40 x 1/2" [13mm] screws and 4-40 lock nuts. Do this for
both landing gear.
❏
❏
4. Install a 6-32 set screw into each of two 3/16" [5mm]
wheel collars. Be sure to apply a drop of thread locker to each
of the set screws. Slide one wheel collar onto the axle followed
by the wheel and another wheel collar. Tighten the set screw
on the inner wheel collar against the axle and the set screw
in the outer wheel collar against the fl at spot you made in the
axle. Do this for both the left and right landing gear.
❏
❏
5. Place the aluminum “T” bracket onto the bottom of the
rudder as shown. Drill a 3/32" [2.4mm] hole through the two
center mounting holes, into the rudder. Remove the bracket
from the rudder. Insert and then remove a #4 x 1/2 [13mm]
screw into each of the holes. Apply a couple of drops of thin
CA glue into the holes to harden the threads. After the glue
has cured secure the bracket to the rudder with the screws.