Apply the decals – Great Planes Yak-55M 50-55cc Sport / 3D ARF - GPMA1230 User Manual
Page 26
26
❏
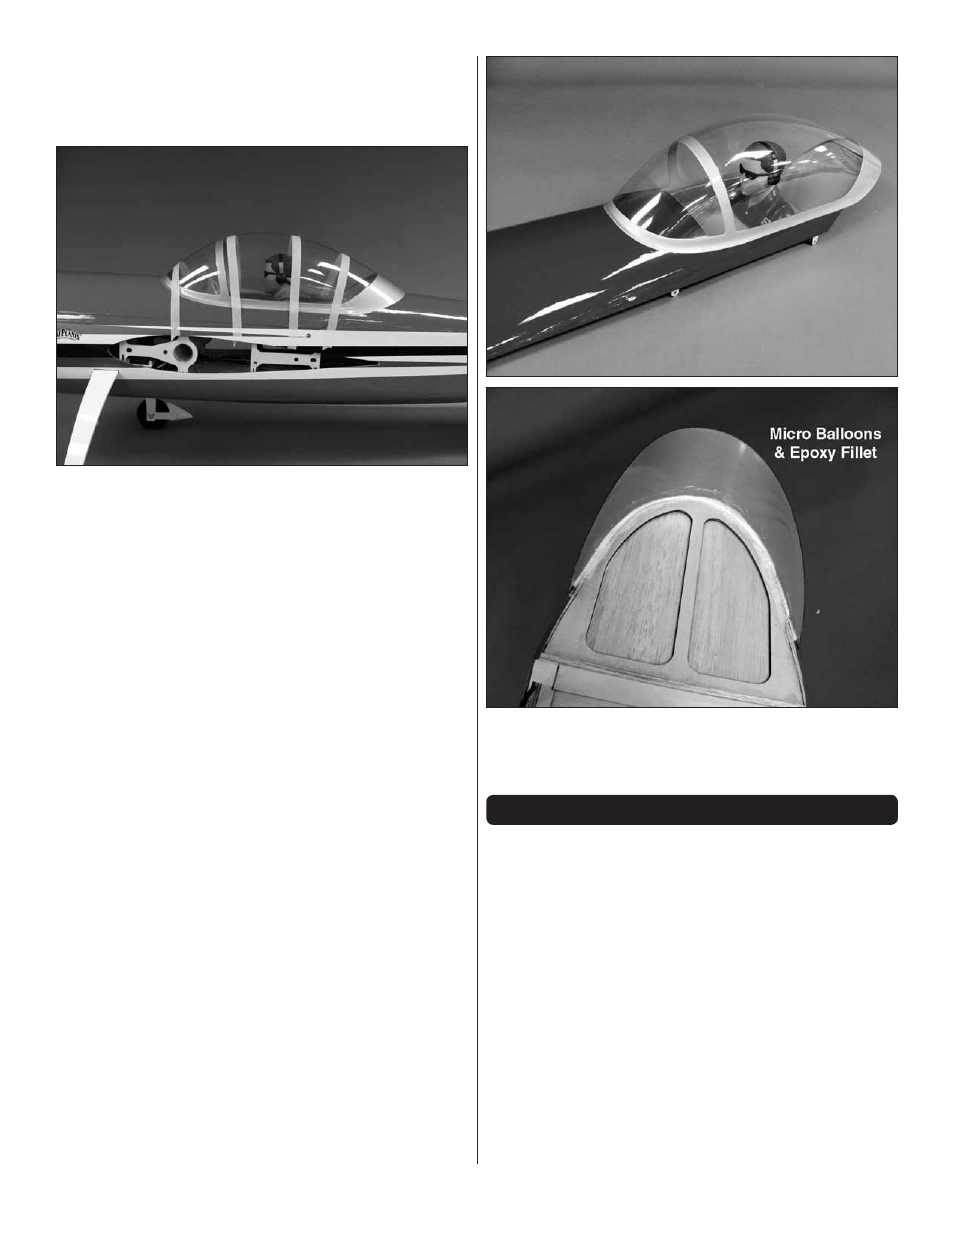
4. Attach the canopy hatch to the top of the fuselage with
four 4-40 x 3/4" [19mm] screws, #4 lock washers and #4
fl at washers. Test fi t the canopy to the top of the fuselage to
determine the mounting position.
❏
5. Determine the position of the canopy and make a couple
of reference marks on the fuselage so that you can easily
locate the canopy position. Remove the canopy and apply a
bead of RC 56 glue to the inside of the canopy. Note that the
canopy rests on both the canopy hatch and the fuselage.
You
only want the glue to be applied to the canopy where it
will be in contact with the canopy hatch.
Tape the canopy
to the canopy hatch. Be sure the tape is only applied to the
hatch and not the fuselage below the hatch.
❏
6. Remove the screws holding the canopy hatch in place
and remove the hatch from the fuselage being careful not to
disturb the canopy.
❏
7. Clean any excess glue that may have gotten on the
fuselage or the back portion of the canopy with a damp cloth.
When you have removed the excess glue, reinstall the canopy
onto the fuselage.
IMPORTANT!
Be sure that you reinstall all
four of the screws that secure the canopy hatch. The hatch
must be tight to the fuselage while the glue dries.
If needed,
add additional tape to secure the canopy. Allow the glue to
dry at least 12 hours.
❏
8. Remove the canopy hatch from the fuselage. Mix a small
amount of epoxy and micro balloons and make a small fi llet
of the glue on the back, underside of the canopy.
APPLY THE DECALS
❏
1. Use scissors or a sharp hobby knife to cut the decals
from the sheet.
❏
2. Be certain the model is clean and free from oily fi ngerprints
and dust. Prepare a dishpan or small bucket with a mixture
of liquid dish soap and warm water—about one teaspoon of
soap per gallon of water. Submerse the decal in the soap and
water and peel off the paper backing.
Note:
Even though the
decals have a “sticky-back” and are not the water transfer type,
submersing them in soap & water allows accurate positioning
and reduces air bubbles underneath.
❏
3. Position decal on the model where desired. Holding the
decal down, use a paper towel to wipe most of the water away.
❏
4. Use a piece of soft balsa or something similar to squeegee
remaining water from under the decal. Apply the rest of the
decals the same way.