GME GP450XB User Manual
Page 22
PAGE 22
INSTRUCTION MANUAL
GP450X
5 . If maN is selected, an additional field is displayed and
highlighted to allow manual entry of the magnetic variation .
Press the ENt key .
6 . Use the Cursor keypad to select the required magnetic
variation . Press the or keys to change the first character
to E (East) or W (West) then press the key to move the
cursor to the right . Use the or keys to change the value
(in degrees) of the magnetic variation . Press the ENt key
when done .
7 . Press the mENu key twice to return to the navigation screen .
WPt Name
This defines how Waypoints are displayed on the plotter screen .
1 . From the main menu select PlottEr and press the ENt key .
2 . Select the WPt NamE field and press the ENt key .
3 . Choose from dsP Goto, dsP rtE or dsP all and press
the ENt key .
4 . Press the mENu key twice to return to the navigation screen .
dsP Goto: Displays only the Goto Waypoint name .
dsP rtE: Displays all Waypoint names in the currently
active route .
dsP all: Displays all Waypoint names .
ttG/Eta sPd
Select this option to define how the GP450X will calculate Time
to Go (ttG) and Estimated Time of Arrival (Eta) .
1 . From the main menu select PlottEr and press the ENt key .
2 . Select the ttG/Eta sPd field and press the ENt key .
3 . Choose auto or maN and press the ENt key .
auto: The unit will calculate ttG and Eta based on your
vessels average speed .
maN: The unit will calculate ttG and Eta using a speed
you enter .
4 . If maN was selected a Speed field appears, press the
ENt key .
5 . Use the cursor keys to select the required speed for use in
ttG and Eta calculations, then press the ENt key .
6 . Press the mENu key twice to return to the navigation screen .
user display setup
There are two user displays that can appear when cycling the
dIsP key . They can be set to show a Speedometer and/or a set
of digital numeric fields in a combination that you choose .
to setup the user displays:
1 . From the main menu, select usEr dIsP and press the ENt
key . Two user display screen selections are provided .
2 . Select 1 or 2 and press the ENt key .
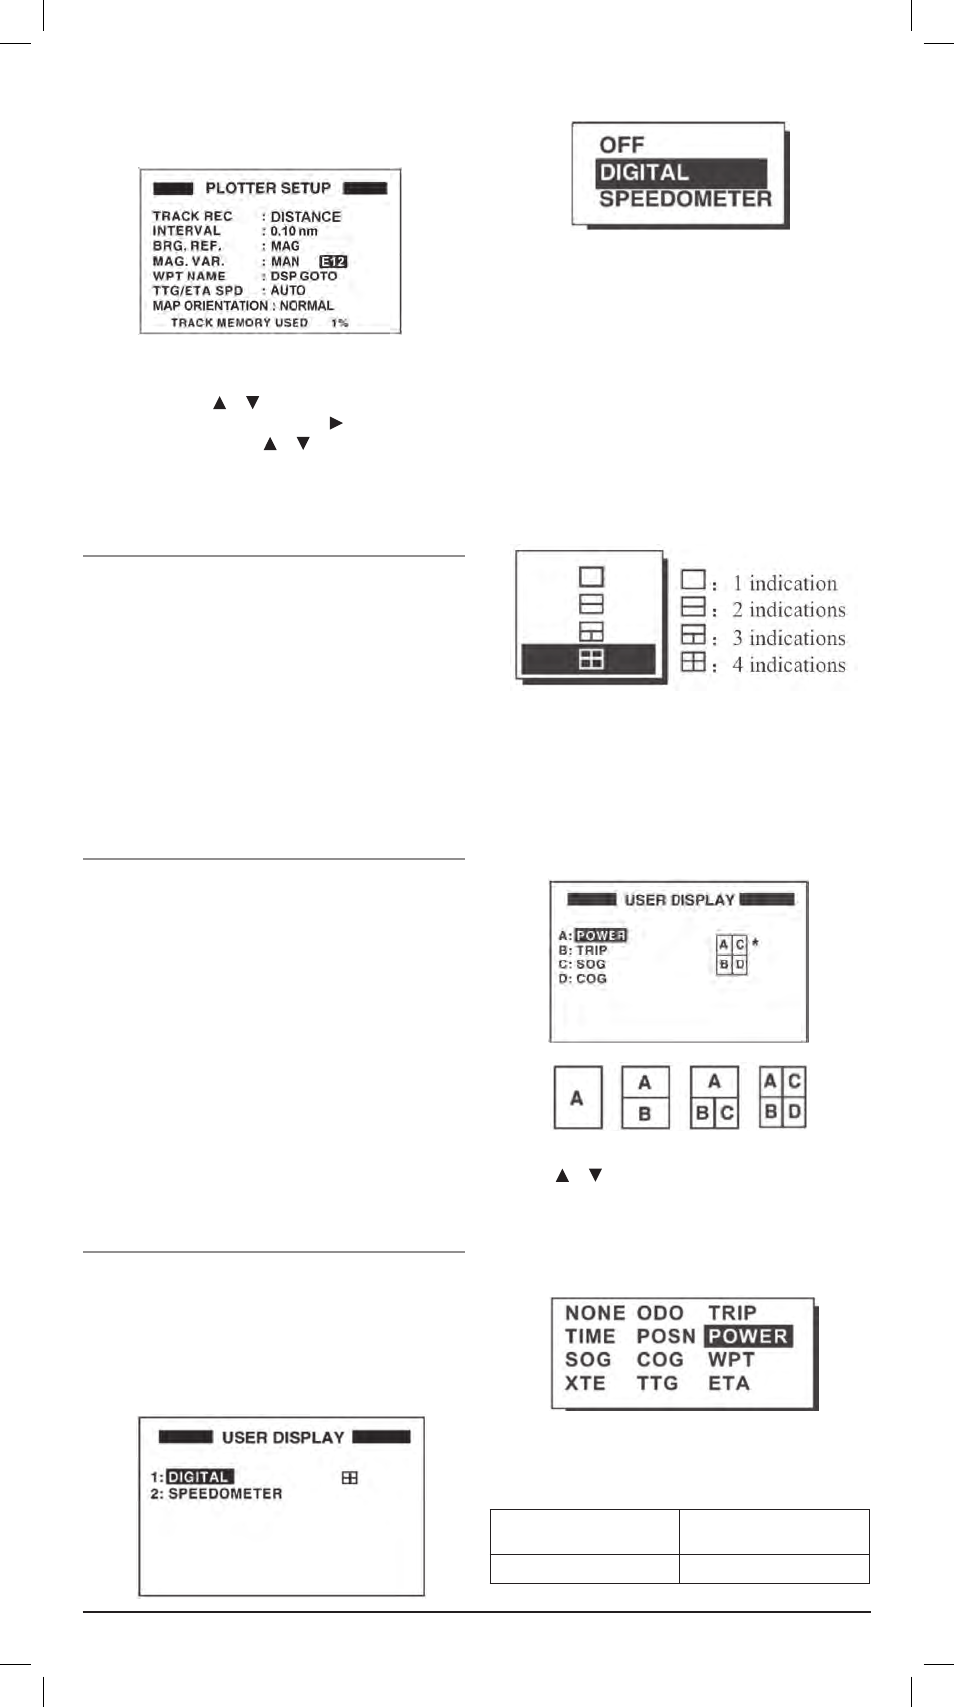
3 . Choose from off, dIGItal or sPEEdomEtEr and press
the ENt key . Instructions for each option are shown below
off
Select off to turn the selected user display off . When off is
selected, nothing will be displayed for the selected user display
when the dIsP key is cycled .
dIGItal
Select dIGItal to format the display with digital fields . The field
layout will be highlighted .
1 . Press ENt to select the require layout of 1 to 4 data fields .
4 . Once the required layout is selected, the field data option
screen is displayed along with the current settings for each
field . The fields are labelled a, B, c & d to match the field
position legend to the right of the display (see image below) .
The field position legend will match the number of fields you
have selected .
5 . Use the or keys to select the required field (a, B, c or
d) and press the ENt key .
6 . Use the cursor keys to select the require data to be displayed
at the selected field . Press the ENt key to accept it .
The data field options are;
NoNE: No Display
soG: Speed over ground
odo: Odometer distance
coG: Course over ground
data field options