GME GP450XB User Manual
Page 20
PAGE 20
INSTRUCTION MANUAL
GP450X
sys sEtuP
language
Your GP450X supports the following languages;
• English
• French
• Spanish
• Italian
• Chinese
To change the language setting;
1 . From the main menu, select sys sEtuP and then press the
ENt key .
2 . Select the laNGuaGE field and press the ENt key .
3 . Use the or keys to select the required language then
press the ENt key .
4 . Press the mENu key twice to return to the
navigation screen .
units of measurement
Distance and Speed can be displayed in Nautical Miles/Knots,
kilometres/kilometres per hour or statute miles/miles per hour .
to change the settings
1 . From the main menu select sys sEtuP and press the
ENt key .
2 . Select the uNIts field and press the ENt key .
3 . Choose the distance/speed combination required and press
the ENt key .
4 . Press the mENu key twice to return to the
navigation screen .
time difference (local time), time format
The GPS system uses the international time standard UTC
based at Greenwich in England . To display local time you need
to apply a time offset to the GPS time . Your GP450X can also
display time in 12 or 24 hour format .
to set local time
1 . From the main menu select sys sEtuP and press the
ENt key
2 . Select the tImE dIff field and press the ENt key .
3 . Press the or keys to change the first character to + or – .
4 . Press the key to move the cursor to the right . Use the
or keys to change the value of the time offset to suit your
local area .
e.g. for sydney the offset would be set to + 10:00.
NotE: During Daylight Savings time add 1 hour to the normal
time offset .
5 . When finished press the ENt key .
6 . The tImE dIsP is highlighted . Press the ENt key .
7 . Choose 12 hour or 24 hour and press the ENt key .
8 . Press the mENu key twice to return to the navigation screen
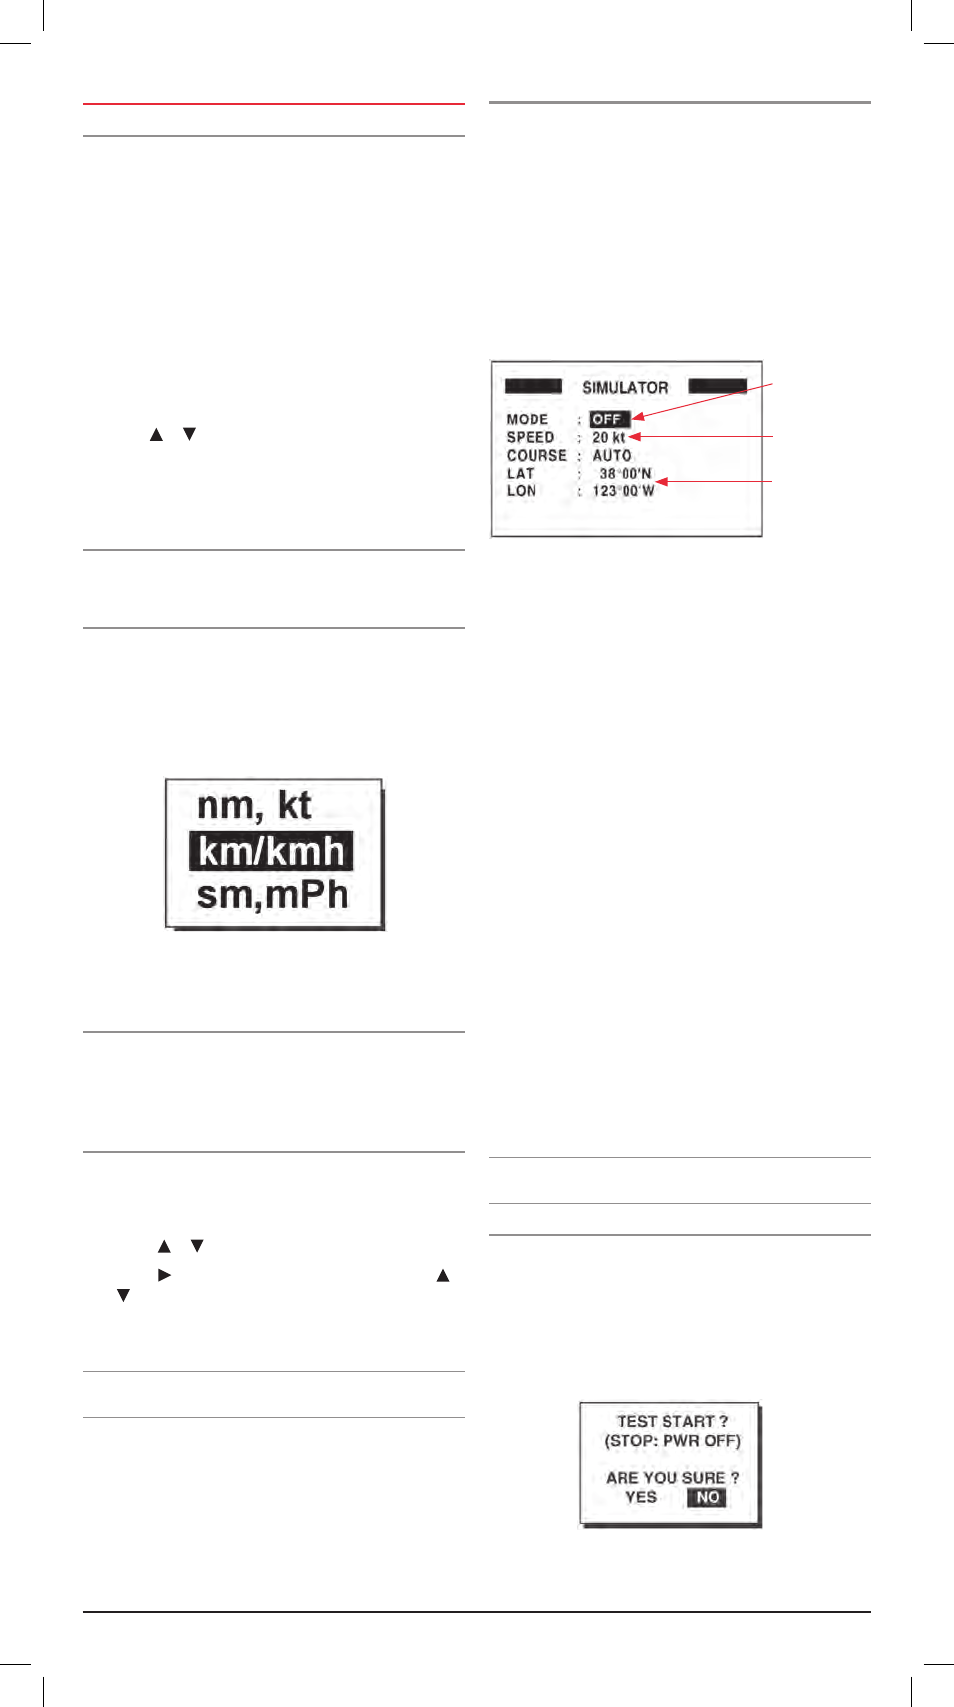
simulator
To practice with your GP450X you can select the Simulator
mode . This mode provides a simulated operation allowing the
unit to function as if it were calculating positions and moving
around . All controls will operate normally and you can create
Waypoints and follow routes to their destinations .
1 . From the main menu select sys sEtuP and press the
ENt key
2 . Select sImulator and press the ENt key .
3 . Select the modE field and press the ENt key .
4 . Choose oN and press the ENt key . The simulation mode is
now active .
5 . Select the sPEEd field and press the ENt key
6 . Use the cursor keys to enter a speed that you would like the
unit to simulate while following routes . Press the ENt key
when done .
7 . Select the coursE field and press the ENt key .
8 . Choose auto or maN and press the ENt key .
To automatically simulate routes to chosen destinations you
should select auto .
9 . Select lat and press the ENt key .
10 . Use the cursor keys to enter the latitude of your simulation
starting position and press the ENt key .
11 . Select loN and press the ENt key .
12 . Use the cursor keys to enter the longitude of your simulation
starting position and press the ENt key .
13 . Press the mENu key twice to return to the
navigation screen .
Press the dIsP key repeatedly until the Plotter screen is
displayed . sIm appears in the upper left of the display when the
simulator is active .
To turn off the simulator, set the simulator modE in step 3
to off .
Note the simulator mode will be also be turned off
automatically when the unit is switched off .
diagnostics
The diagnostic test checks rom, ram, data port, beacon
receiver, battery, rtc, keyboard and lcd for proper operation .
1 . From the main menu select sys sEtuP and press the
ENt key .
2 . Choose tEst and press the ENt key . You will be asked if you
are ready to start the test .
3 . Select yEs and press the ENt key to start the test .
Turns Simulator
ON or OFF .
Sets Simulation
Speed .
Sets Simulation
Starting Position .