GME GP450XB User Manual
Page 11
GP450X
INSTRUCTION MANUAL
PAGE 11
5 . Repeat the steps above to log additional Waypoints to the
Route Log memory .
6 . Once you have entered and logged all the required Waypoints
for that route, press the mENu key twice to access the main
menu . Select routEs and press the ENt key .
7 . The routE menu will show the assembled route under the
LOG heading . The route will be automatically labelled using
the first and last Waypoints in the route .
8 . To save the route, highlight the loG route (001 -> 003
in the example above) and press the ENt key . The Route
processing options are displayed .
9 . Select movE and press the ENt key . The route will be
moved from the Route Log memory to the first available
sequential route number and the Route Log will listed
as empty .
If you wish to edit the route later on, follow the steps described
under EdItING routEs later in this section .
crEatING a routE from thE routE mENu
The following process describes how to create a route using two
Waypoints already stored in the Waypoint list . In this example
the Waypoints are called ramP and fIsh1 .
1 . From the main menu select routEs and press the ENt key .
The Route list is displayed .
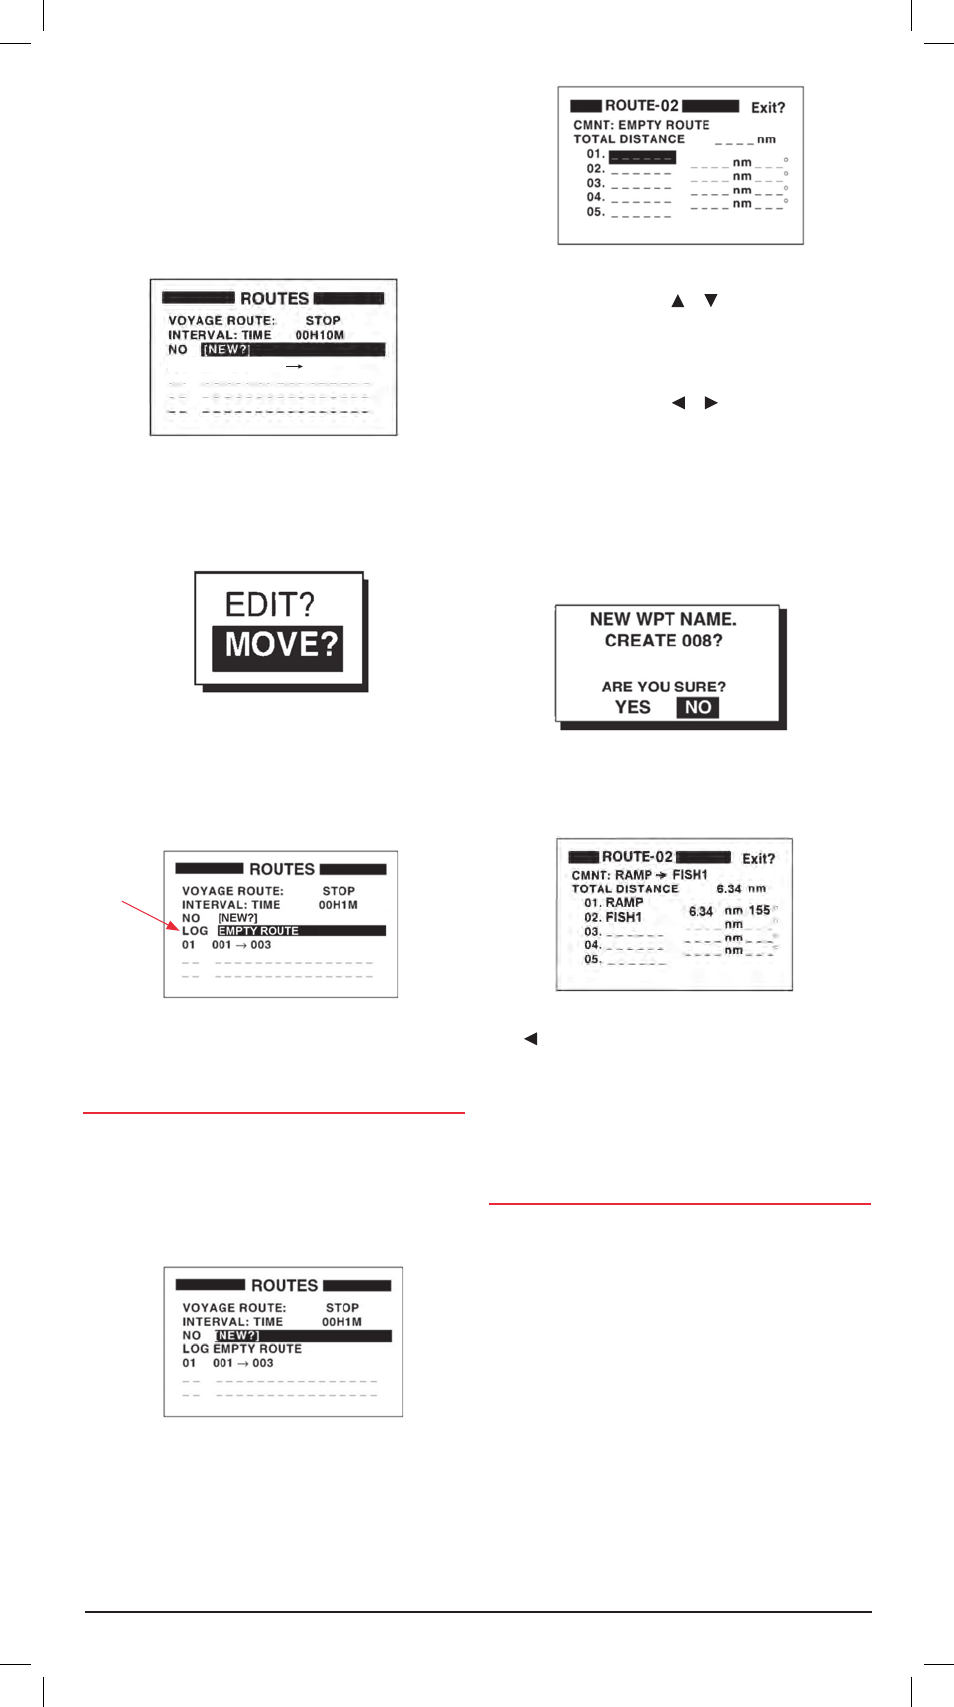
2 . Select NEW and press the ENt key . The Route Entry screen
appears (next column) .
The route automatically uses the first available route number
(Route 02 in the following example) . The first Waypoint
position 01 is highlighted by default .
3 . Press the ENt key . Use the or keys to scroll through the
characters at the first cursor position . As you scroll through
the characters your GP450X looks for stored Waypoints
matching the characters you select and displays them . If
more than one Waypoint exists with the same first letter (e .g .
RAMP and RAMP2) use the or keys to move the cursor
position left or right to select other letters that spell the name
of the Waypoint you require .
4 . When the required Waypoint name is displayed (RAMP in
this example), press ENt . The next Waypoint position 02
is highlighted . Repeat the steps above to select the next
Waypoint (fIsh1 in this example) . Press ENt when done . You
should now have two Waypoints stored in the route .
5 . If you enter a Waypoint name that is not in the Waypoint list
your GP450X screen will show the following message:
Press to choose yEs then press the ENt to create a new
Waypoint (or choose No to return to the Route entry screen) .
6 . The Waypoint attribute edit window is displayed . Edit the
latitude, longitude Icon (Mark) and comments as necessary
then select EXIt and press ENt to return to the Route/
entry screen .
crEatING routEs from thE WayPoINt lIst
This method is very similar to the method described for creating
routes from the cursor .
1 . From the main menu select WayPoINts and press the
ENt key .
2 . Choose lIst or NEarEst and press the ENt key .
The Waypoint list is displayed .
3 . Choose a Waypoint from the list and press the ENt key .
The Waypoint attribute page is displayed .
4 . Choose loG rtE and press the ENt key .
5 . Repeats steps 3 and 4 to build the route .
6 . When the route is completed press the mENu key once to
return to the main menu then select routEs . The route you
have assembled is stored under the loG heading .
7 . Highlight the loG route and press the ENt key .
LOGGED ROUTE 001 003
route menu
route Processing options
route list
route Entry Window
Route Log