How то adjust the tv picture, Tips if something isn't working, How то – Philips COLOR TV User Manual
Page 25: V“ © (d
Attention! The text in this document has been recognized automatically. To view the original document, you can use the "Original mode".
How то
A
djust
the
TV
P
icture
r
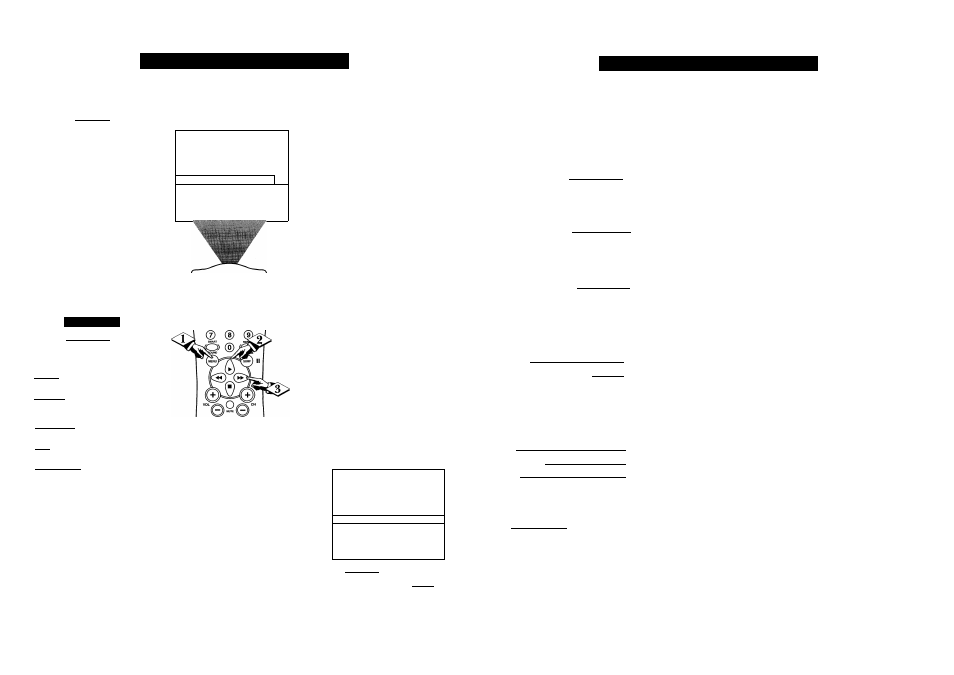
'o adjust your TV picture con
trols, select a channel and follow
the steps shown below:
CBEGif?)
Press the
MENU
button
on the
remote to display the onscreen menu.
Press the CURSOR UP ^ or
<|> DOWN« buttons
until the word
BRIGHTNESS
is highlighted. (Or,
COLOR, PICTURE, SHARPNESS,
TINT, COL. TEMP, depending on
the adjustment you want to make.)
^^Press the CURSOR RIGHT
or the CURSOR LEFT ^<4
buttons
to increase or decrease the
brightness of the picture.
S
mart
H
elp
BRIGHTNESS Press the
or buttons until darkest
parts of the picture are as bright as you
prefer.
COLOR Press the ►► or buttons
to add or eliminate color.
PICTURE Press the ►► or but
tons until lightest parts of the picture show
good detail.
SHARPNESS Press the
or ^
buttons to improve detail in the picture.
TINT
Press the or
buttons to
obtain natural skin tones.
COLOR TEMP Press the ^ or ^
buttons to select NORMAL, COOL, or
WARM picture preferences. (NORMAL
will keep the whites, white; COOL will
make the whites, bluish; and WARM will
make the whites, reddish.)
The onscreen menu will time out and
disappear from the screen when you
finish, or you can press the
STATUS/EXrr button to clear the
menu from the screen.
SETUP
SmartLock REVIEW
►
-
►
BRIGHUMESS
■■■■ 30
COLOR
-■ 30
PICTURE
....30
SmartLock REVIEW
►
BRIGHTNESS ■■........... 30
ODL
j
OR
PICTURE
SHARPNESS
30
30
SLEEP
О
и
А/СН STATUS/ЕХГГ
CC CLOCK
О О О
RECORD
TV/VCR
V“ © (D @
L
acc
® ® ®
BRIGHTNESS
COLOR
30
30
PICTURE
SHARPNESS
TINT
30
0
SWAP SOURCE POSITION FREEZE
О О О О
PIP ON/OFF
О
COLOR
PICTURE
SHARPNESS
30
30
TINT
COL. TEMP
-f...... 0
NORMAL
PICTURE
SHARPNESS
30
30
TINT
■f
0
COL.
TEMP.
NORMAL
CONTRSATPLUS OFF
SHARPNESS
-
TINT ..................... E-
- 30
... □
ICOL. TEMP NORMAL
CONTRAST PLUS
OFF
NOISE REDUCTION
OFF
I
col
,
шар
.
WARM
COL. TEMP
"rnOLl
T
ips
I
f
S
omething
I
sn
'
t
W
orking
■
T^lease make these simple
IT
checks before calling for ser
vice. These tips can save you time
and money since charges for TV
installation and adjustment of
customer controls are not covered
under your warranty.
No Power
No Picture
No Sound
Remote Does Not
Work
TV Displays Wron^
Channel or No
Channels Above 13
CAUTION: A video source (such as a video game. Compact Disc Interactive - CDI, or
TV information channel) which shows a constant non-moving pattern on the TV screen,
can cause picture tube damage. When your TV is continuously used with such a source
the pattern of the non-moving portion of the game (CDI, etc.) could leave an image
permanently on the picture tube. When not in use, turn the video source OFF.
Regularly alternate the use of such video sources with normal TV viewing.
Check antenna connections. Are they properly secured to the TV's 750 plug?
Check the TUNER control for CABLE or ANTENNA setting.
Check AudioWideo Input jack connections if using a VCR or other external device.
Check the VOLUME buttons.
Check the MUTE button on the remote control.
Check AudioWideo Input jack connections if using a VCR or other external device.
• Check the TV power cord. Unplug the TV, wait 10 seconds, then reinsert plug into
outlet and push POWER button again.
• Check that outlet is not on a wall switch. Be sure fuse is not blown on AC Power strip.
Check batteries. Replace with A A Heavy Duty (Zinc Chloride) or Alkaline batteries
if necessary.
Clean the remote and the remote sensor window on the TV.
Check the TV power cord. Unplug the TV, wait 10 seconds, then reinsert plug into
outlet and push POWER button again. Be sure fuse is not blown on AC Power strip if
one is being used.
Check to be sure TV outlet is not on a wall switch.
Repeat channel selection.
Add desired channel numbers (CHANNEL control) into TV memory.
Check to be sure the TUNER control is set to the CABLE option.
Cleaning and Care
• To avoid possible shock hazard be sure the TV is unplugged from the electrical outlet before cleaning.
• When cleaning the TV screen take care not to scratch or damage the screen surface (avoid wearing jewelry or using
anything abrasive). Wipe the front screen with a clean cloth dampened with water. Use even, easy, vertical strokes when
cleaning.
• Gently wipe the cabinet surfaces with a clean cloth or sponge dampened in a solution of cool clear water. Use a clean
dry cloth to dry the wiped surfaces.
• Never use thinners, insecticide sprays, or other chemicals on or near the cabinet, as they might cause permanent marring
of the cabinet finish.
43