Comtrol API (6508) for the MS-DOS User Manual
Page 5
5
Installating RocketPort/ISA Systems
This section contains a product overview and discusses installing the
API
for
your system. The
DOS
API
and Interrupt 14 device driver are delivered on one
diskette.
Note: See the Int 14 Reference Card for Interrupt 14 information.
1.1. Product Introduction
The RocketPort multiport serial controller series fits into a 16-bit
ISA
slot of a
personal computer. The RocketPort series uses a 36
MH
z processor specifically
designed to process asynchronous serial communications, thereby maximizing
performance and eliminating bottlenecks.
RocketPort series uses Application Specific Integrated Circuits (
ASIC
s)
technology to replace most hardware components, including:
•
The processor
•
Serial controller
•
Bus interface logic and other miscellaneous logic
The RocketPort series is
I/O
mapped eliminating memory mapping conflicts.
The RocketPort series supports
RS-232
or
RS-422
mode and connects easily to
the interface box or your peripherals, depending on the type of RocketPort
controller you purchased.
The device driver supports up to four RocketPort controllers (128 ports) in one
PC
. You can install any combination of the series, which includes the following:
The RocketPort series is easy to install using Subsection 1.2.
1.2. Software and Hardware Installation Procedures
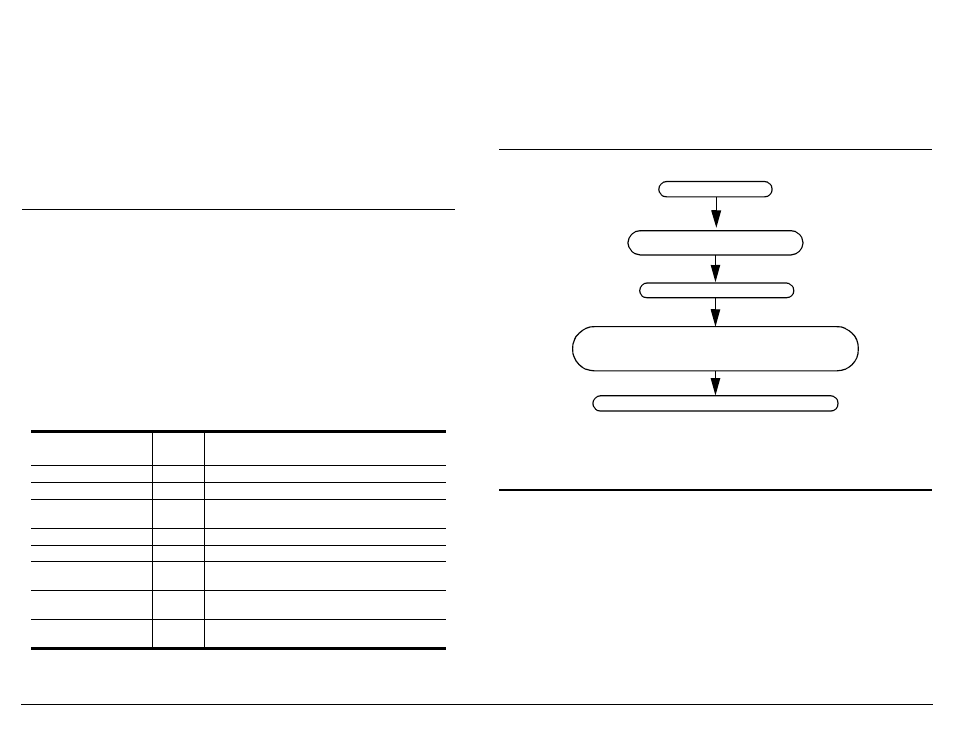
Use Flowchart 1-1 for an overview of installing a RocketPort series system.
Flowchart 1-1. Hardware and Software Installation Overview
Note: If you have an installation or operations problem, see Chapter 3.
1.3. Installing the Software
You may want to install the
API
in a directory named
\ROCKET
so that the
examples illustrated in this guide match your environment.
The following shows a sample installation onto your hard disk (assuming the
hard disk is drive C):
1.
Insert the Comtrol
API
and Device Driver for
MS-DOS
diskette into the
appropriate drive.
2.
Change to the drive that you installed the diskette on.
3.
Enter the following:
install
4.
Select the API button by pressing <Enter> or <Click>. <Click> means that
you should move the cursor over the item and press the mouse button.
Name
Number
of Ports
Interface Type
RocketPort 4*
4
Requires interface box
RocketPort 4J
4
RJ45 cables not included
RocketPort Quadcable*
4
Includes a fanout cable with standard
DB25
or
DB9
connectors
RocketPort 8
8
Requires interface box
RocketPort 8J
8
RJ11 cables not included
RocketPort Octacable
8
Includes a fanout cable with standard
DB25
or
DB9
connectors
RocketPort 16
16
Requires 16-port interface box (Standard
DB25
or Rack Mount
RJ45
available)
RocketPort 32
32
Requires two 16-port interface boxes (Standard
DB25
or Rack Mount
RJ45
available)
Connect the interface box to the controller
your peripherals to the interface box (if you have not already
Install the
API
(see 1.3).
(if applicable) and
done so). For specific cabling information, see the appropriate
Hardware Reference Card.
Set the switches on the controller and
install the controller (see 1.4).
Update the
AUTOEXEC.BAT
file.
Develop applications using Section 2 and Appendix A.
Section 1. Installating RocketPort/ISA Systems