2) install the tray panel, 3) remove and set up the head board assy – Pioneer PDR-04 User Manual
Page 95
Attention! The text in this document has been recognized automatically. To view the original document, you can use the "Original mode".
PDR-04
7.2 DIAGNOSIS
7.2.1 DISASSEMBLY
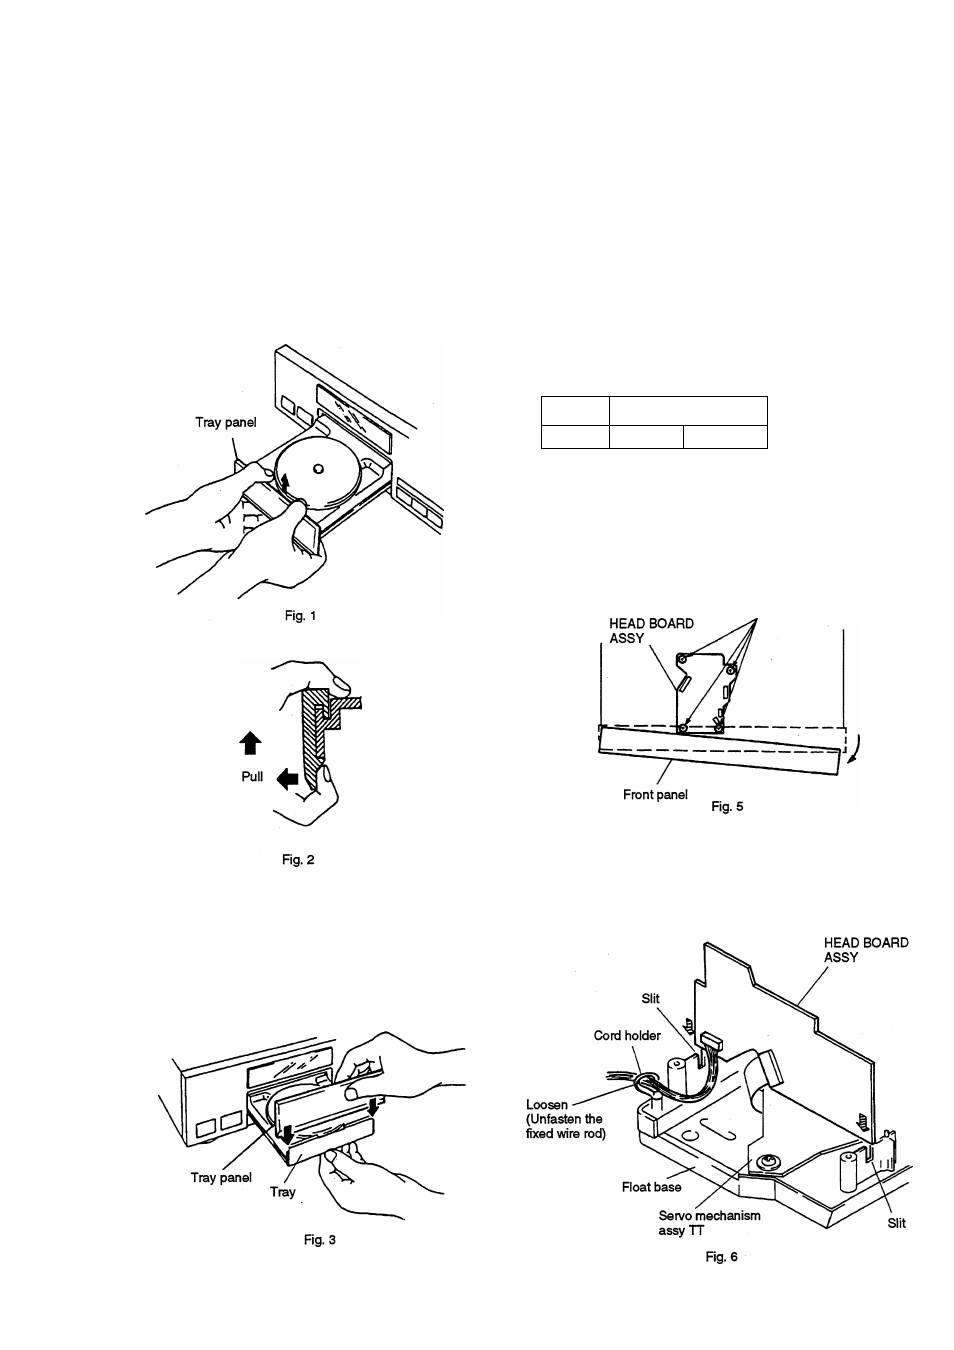
(1) REMOVE THE TRAY PANEL
Hold the tray panel with your hands as shown in Fig. 1, and
grasp the tray with your thumbs and then lift the tray panel
up while pulling it toward you with the othCT fingers. (Fig. 2)
(2) INSTALL THE TRAY PANEL
Align the tray panel with the grooves located at both edges of
the tray. And then press it down till it stops. (Fig. 3)
(3) REMOVE AND SET UP THE HEAD BOARD ASSY
® Remove the bonnet.
(D
Remove the tray panel (Refer to section 1).
d) Remove the five screws of the flront panel.
Front panel
(Right side)
11 OO °o°
0133 o
Screw
Screw
Fig. 4
0 Pull out the right side of the front panel to the firont and
remove the four screws of the board.
Screw
0 Remove the fixtures of the wires connected to the board
(cord holder, PCB binder).
®
Place the HEAD BOARD ASSY upright against the slit
of the float base.
95