Haricjie instailation cincl ieiriijvai – Kenmore 106.511800 User Manual
Page 11
Attention! The text in this document has been recognized automatically. To view the original document, you can use the "Original mode".
HaricJie Instailation cincl ieiriijvai
PARTS INCLUDED: Door handles (2), W hex key, spare
setscrews
To Install the Handles:
NOTE: The handle mounting setscrews are preinstalled in the
handle.
1.
Remove the handles, which are packed inside the
refrigerator.
NOTE: To avoid scratching the finish, place the handles on a
towel or other soft surface.
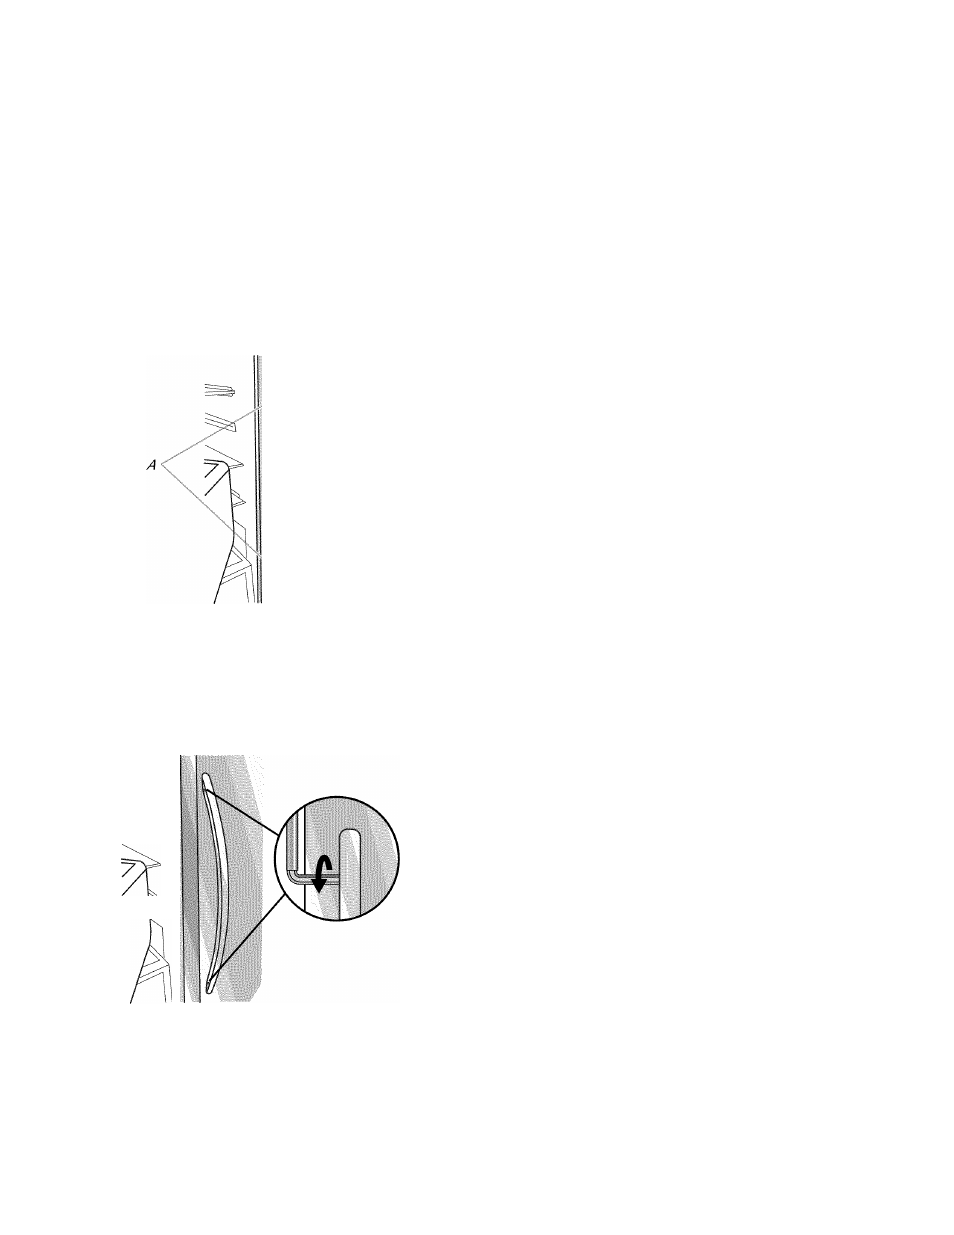
2.
Open the freezer door. On the refrigerator door, place the
handle on the shoulder screws with the setscrews facing the
freezer.
A. Shoulder screws
B. Setscrews inside the handle
3.
Firmly push the handle toward the door until the handle
base is flush against the door.
4.
While holding the handle, insert the short end of the hex key
into the upper hole and slightly rotate the hex key until it is
engaged in the setscrew.
5.
Using a clockwise motion, tighten the setscrew until it begins
to contact the shoulder screw.
6.
Repeat steps 4 and 5 to begin fastening the lower setscrew.
Z Once both setscrews have been partially tightened as
outlined in the previous steps, fully tighten both the upper
and lower setscrews.
IMPORTANT: When the screws feel tight, tighten them an
additional quarter-turn. The handle is not properly installed
without this extra tightening.
8.
Open the refrigerator door and close the freezer door.
Repeat steps 2 through 7 to install the other handle onto the
freezer door with the setscrews facing the refrigerator.
9.
Save the hex key and all instructions.
To Remove the Handles:
1.
While holding the handle, insert the short end of the hex key
into the lower setscrew hole and slightly rotate the hex key
until it is engaged in the setscrew.
2.
Using a counterclockwise motion, loosen the setscrew a
quarter-turn at a time.
3.
Repeat steps 1 and 2 for the upper setscrew. Gently pull the
handle away from the door.
4.
If necessary, use a Phillips screwdriver to remove the
shoulder screws from the door.
Read all directions before you begin.
IMPORTANT:
■
Plumbing shall be installed in accordance with the
International Plumbing Code and any local codes and
ordinances.
■
Use copper tubing or PEX (cross-linked polyethylene) plastic
tubing, and check for leaks.
■
Install tubing only in areas where temperatures will remain
above freezing.
TOOLS NEEDED:
Gather the required tools and parts before starting installation.
■
Flat-blade screwdriver
■
Vn" and V
2
open-end wrenches or two adjustable wrenches
■
V
a
' nut driver
Connect to Water Line
IMPORTANT: If you turn the refrigerator on before the water
line is connected, turn the ice maker OFF.
1.
Unplug refrigerator or disconnect power.
2.
Turn OFF main water supply. Turn ON nearest faucet long
enough to clear line of water.
3.
Use a quarter-turn shutoff valve or the equivalent, served by
a
1
/
2
" copper household supply line.
11