56 first flights – Carl Goldberg GPMA0955 EAGLE 2 User Manual
Page 57
56
FIRST FLIGHTS
INTRODUCTION
There is no way to fully explain the principals of flight and the tech-
niques of flying in only a few pages. Entire books have been written
about apparently simple subjects as the shape of the wing. And
even if you read several books about flying techniques, there is no
substitute for an experienced R/C flyer helping you learn to actual-
ly fly, The following information is not intended to replace your flight
instructor but we hope it will help you understand basic flight con-
cepts and techniques.
One of the most important yet sometimes neglected pre-flight
checks is to always make sure the wing is securely banded to the
fuse! Use at least seven #64 rubber bands on each side of the wing.
The first flight instructions below show the essential flight elements.
If you have a helper, acquaint him with these steps, and have him
call each of them off to you at the appropriate time.
Turn on the Tx and Rx and make sure all control surfaces are
responding correctly. See that the Tx trim tabs are centered with
the surfaces centered and make sure you have a reliable idle and
correct High Speed Needle Valve setting and that the Tx meter
registers in the "safe" zone.
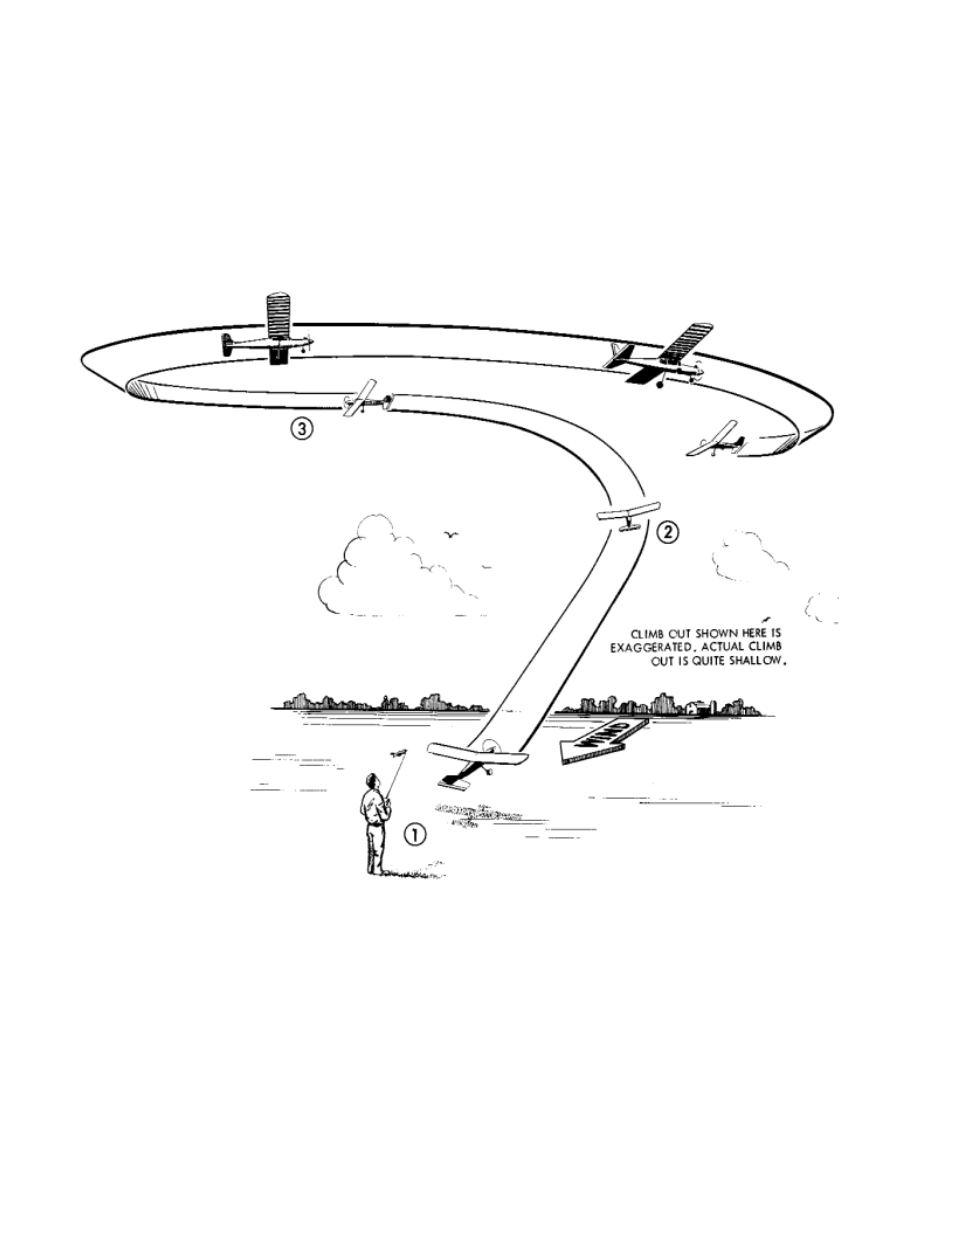
It is important to have a total flight plan in mind. Look at the fly-
ing sketches here to get an idea of the take-off direction and
space you will need when flying from your field.
1. Start your engine. Point the model directly into the wind.
Advance the throttle smoothly, steering on the ground with rud-
der the plane will gain speed rapidly. After it rolls about 100 feet,
add slight back stick (up elevator) pressure so the model rises
smoothly from the ground. With ailerons keep the wings level.
Hold only as much back stick as necessary to keep the plane in
a 5' to 10' gentle climb (if you climb too steeply the model may
slow down and then "stall" and fall to the ground).
NOW THAT YOU'RE READY...
2. Be patient, let the model climb slowly to about 150-200 feet of
altitude, add just a touch of left (or right aileron) stick pressure
until the model begins a very shallow turn in the direction you
want to go.
3. Try to maintain this shallow turn. Do not let the turn get too
steep (see previous page). The wind will tend to blow your plane
further downwind-try to keep it flying upwind at all times prior to
your landing approach. It is more difficult to fly a model when it is
downwind, and if a mistake is made the model will end up further
downwind, making it more difficult to fly back to the field,
To compensate for wind, you should continue making your
upwind turns shallow, but make your turns flying with the wind
(downwind), a little steeper.