Windshield – Carl Goldberg GPMA0955 EAGLE 2 User Manual
Page 41
40
WINDSHIELD
Apply covering first to the bottom and then to the sides
of the fuse. Cover the top of the fuse last.
Finish by applying the trim color.
HINT:
It is a good idea to apply a triple coat of covering to the
tail end. To minimize abrasion damage, we highly rec-
ommend you apply a strip of CGM Scuff Guard.
WINDSHIELD
Clean model surfaces thoroughly before applying decals. Cut
decal sheets apart in sections, as needed. Fold decal in half,
front to rear. Open at fold and lay decal out straight. The pro-
tective backing will bubble away from the decal at the fold.
Using a scissors, cut the backing along the bubble, removing
a strip of backing about 1" wide. Carefully position the decal on
the model and stick in place. Then, working from the center,
rub the decal down while peeling off the backing.
CAUTION: FOLLOW
INSTRUCTIONS CAREFULLY
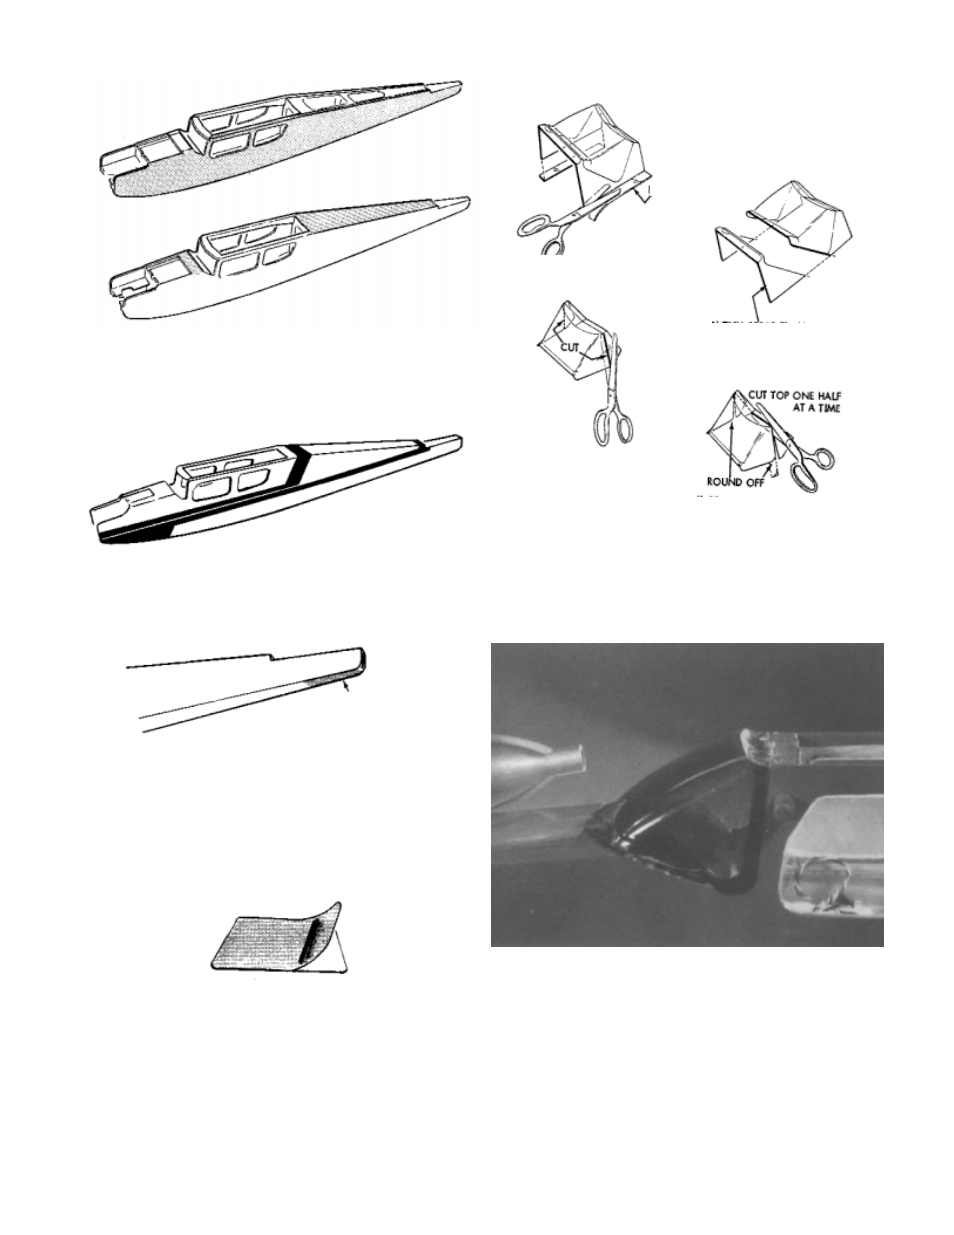
FLASHING
1) CAREFULLY REMOVE FLASHING AT
BOTTOM OF WINDSHIELD SIDES.
2) TRIM SCRAP FROM FRONT OF
WINDSHIELD BY CUTTING ON
MARKED LINE.
3) MAKE TWO VERTICAL CUTS
AT MARKED LINES.
4) OPEN SACK SLIGHTLY, INSERT SCISSOR
BLADE HALF WAY AND CUT ON LINE.
REMOVE SCISSORS AND FINISH CUT
FROM OTHER SIDE. ROUND OFF BOTTOM
CORNER OF WIND SHIELD AT MASKED
LINES.
Remove windshield from vac-formed sheet by cutting on
lines as shown in sketches
Temporarily set windshield in place on fuse and note
where its outline contacts fuse. For better gluing, lightly
sand covering in this outline area, just dulling covering
surface. Also, for added gluing strength, make a series
of pin hole punctures through the covering, so glue can
grab the wood underneath.